Here are the Jack-O-Lanterns I created for the Minnesota Zoo in my fifth year on the show. The theme for the 2025 show was “What Goes Bump In The Night”, a general nighttime theme that spanned many genres.
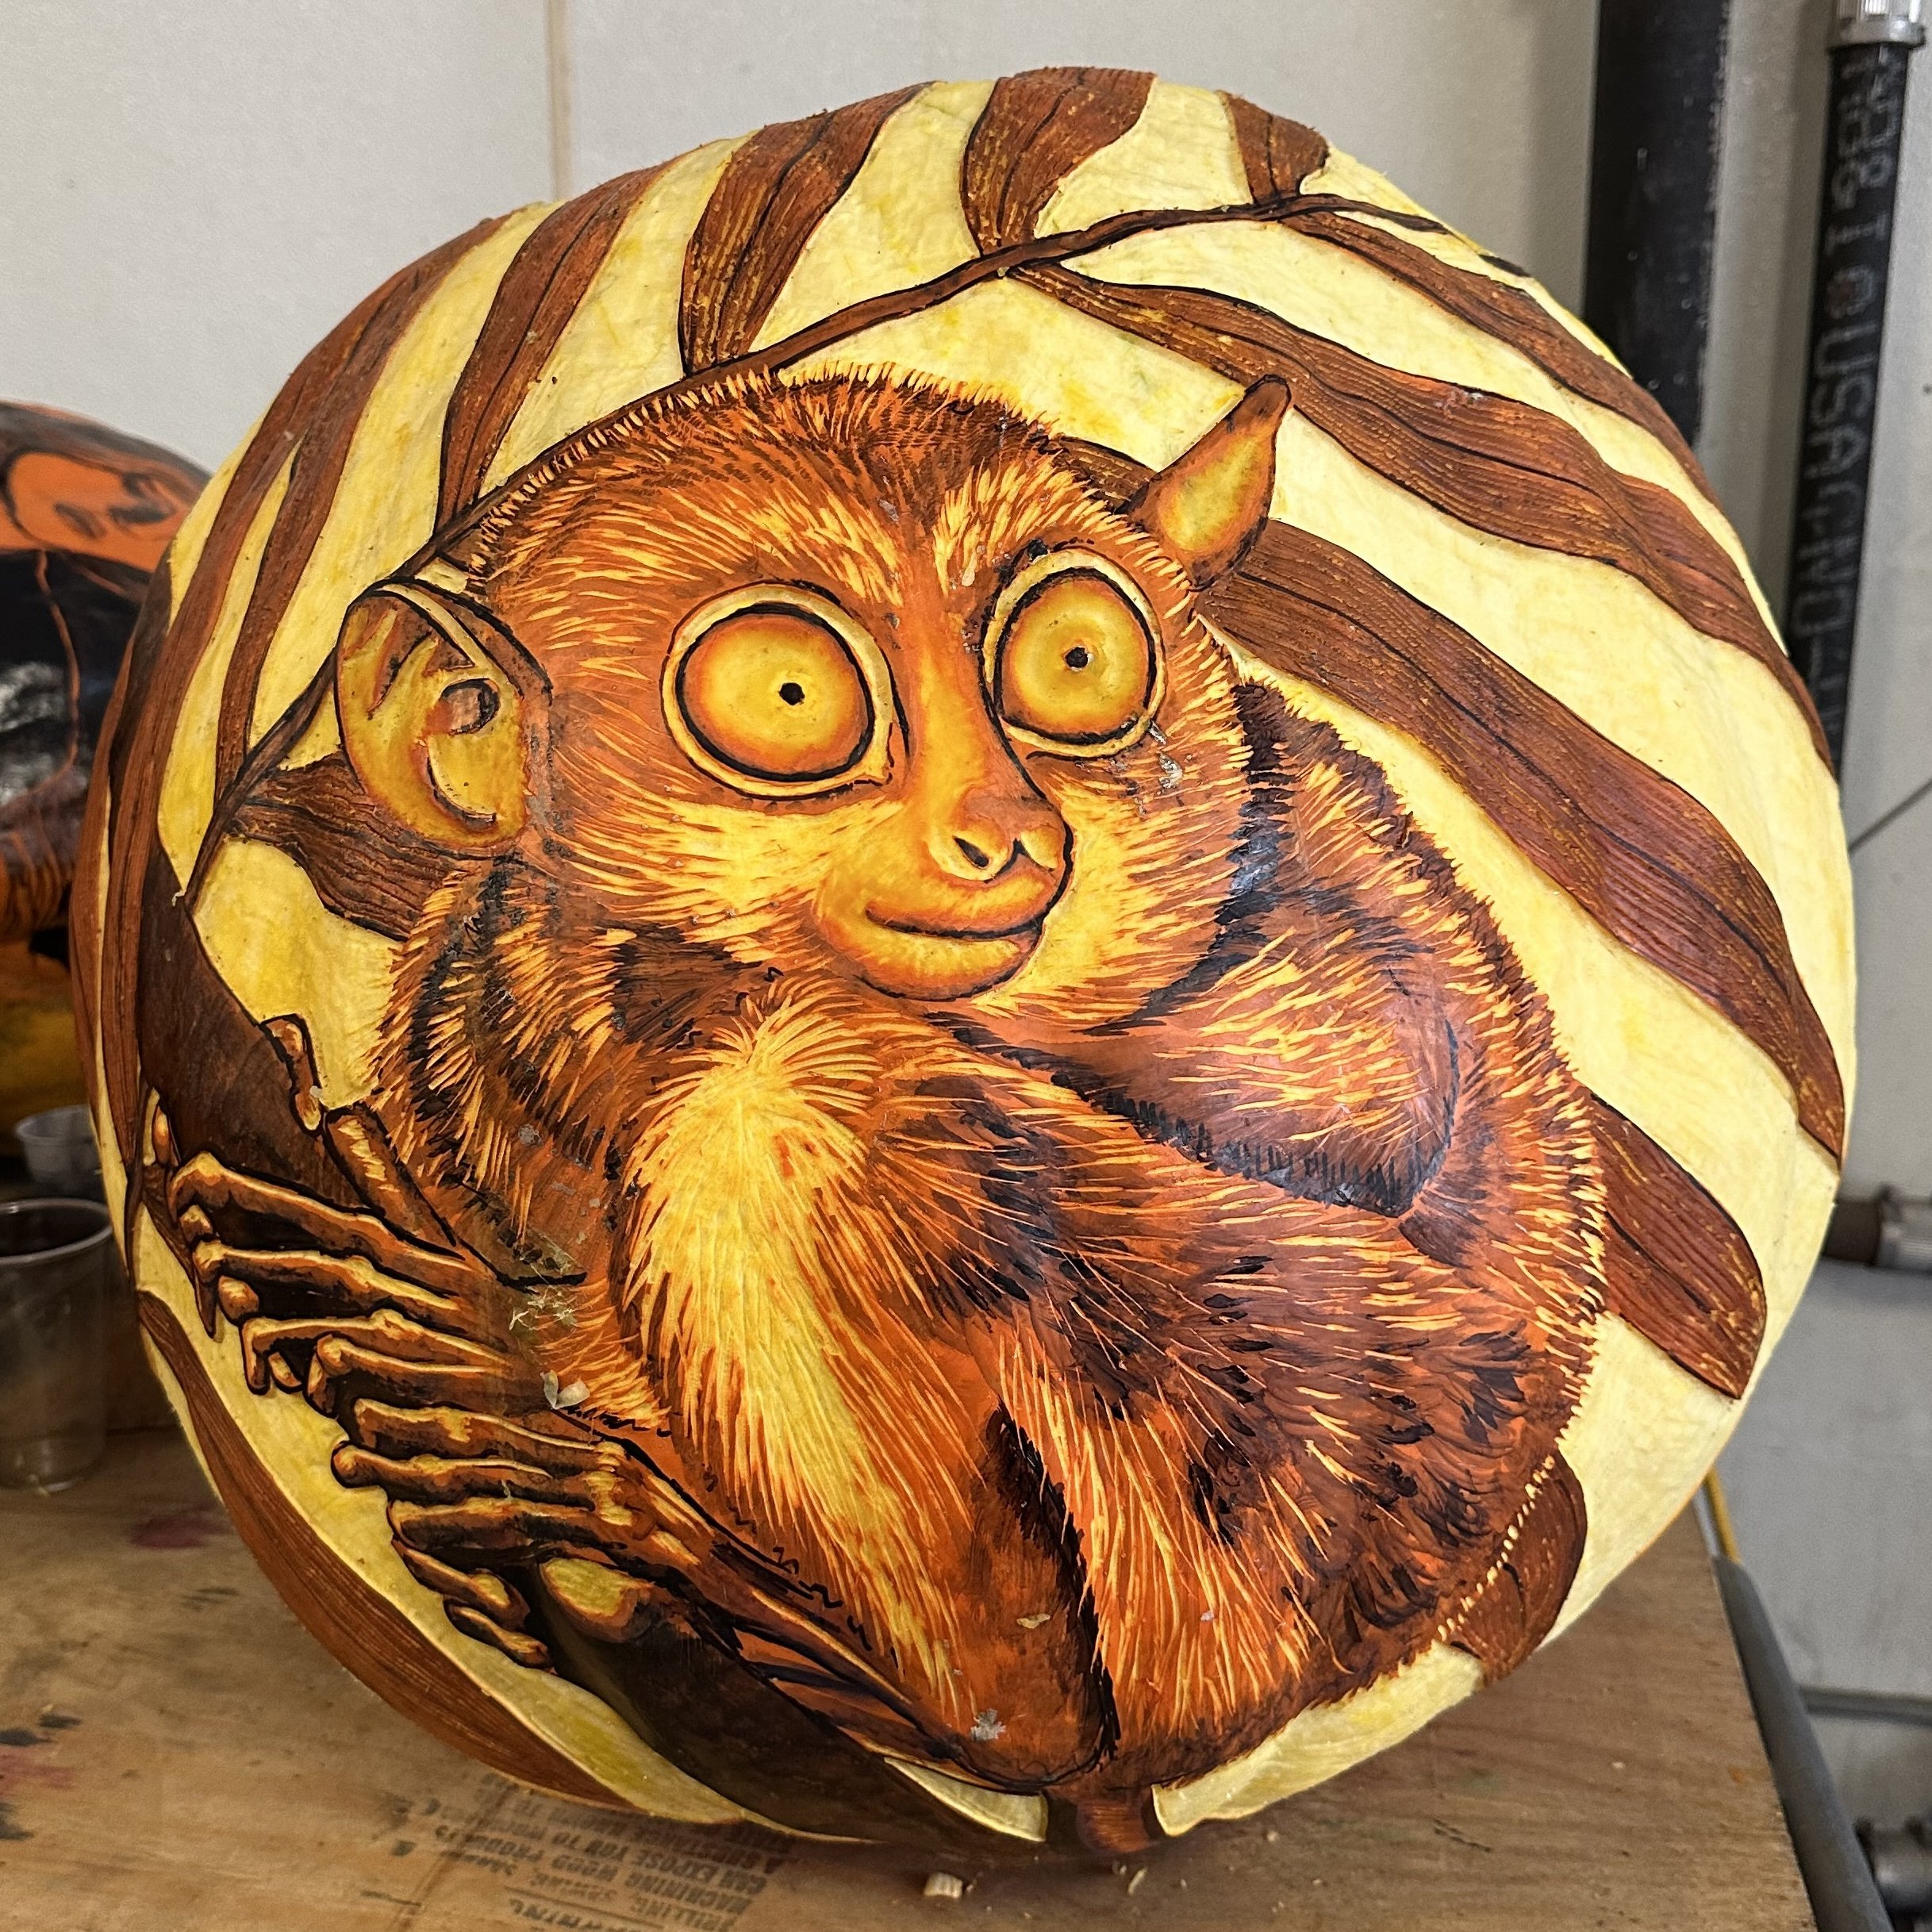
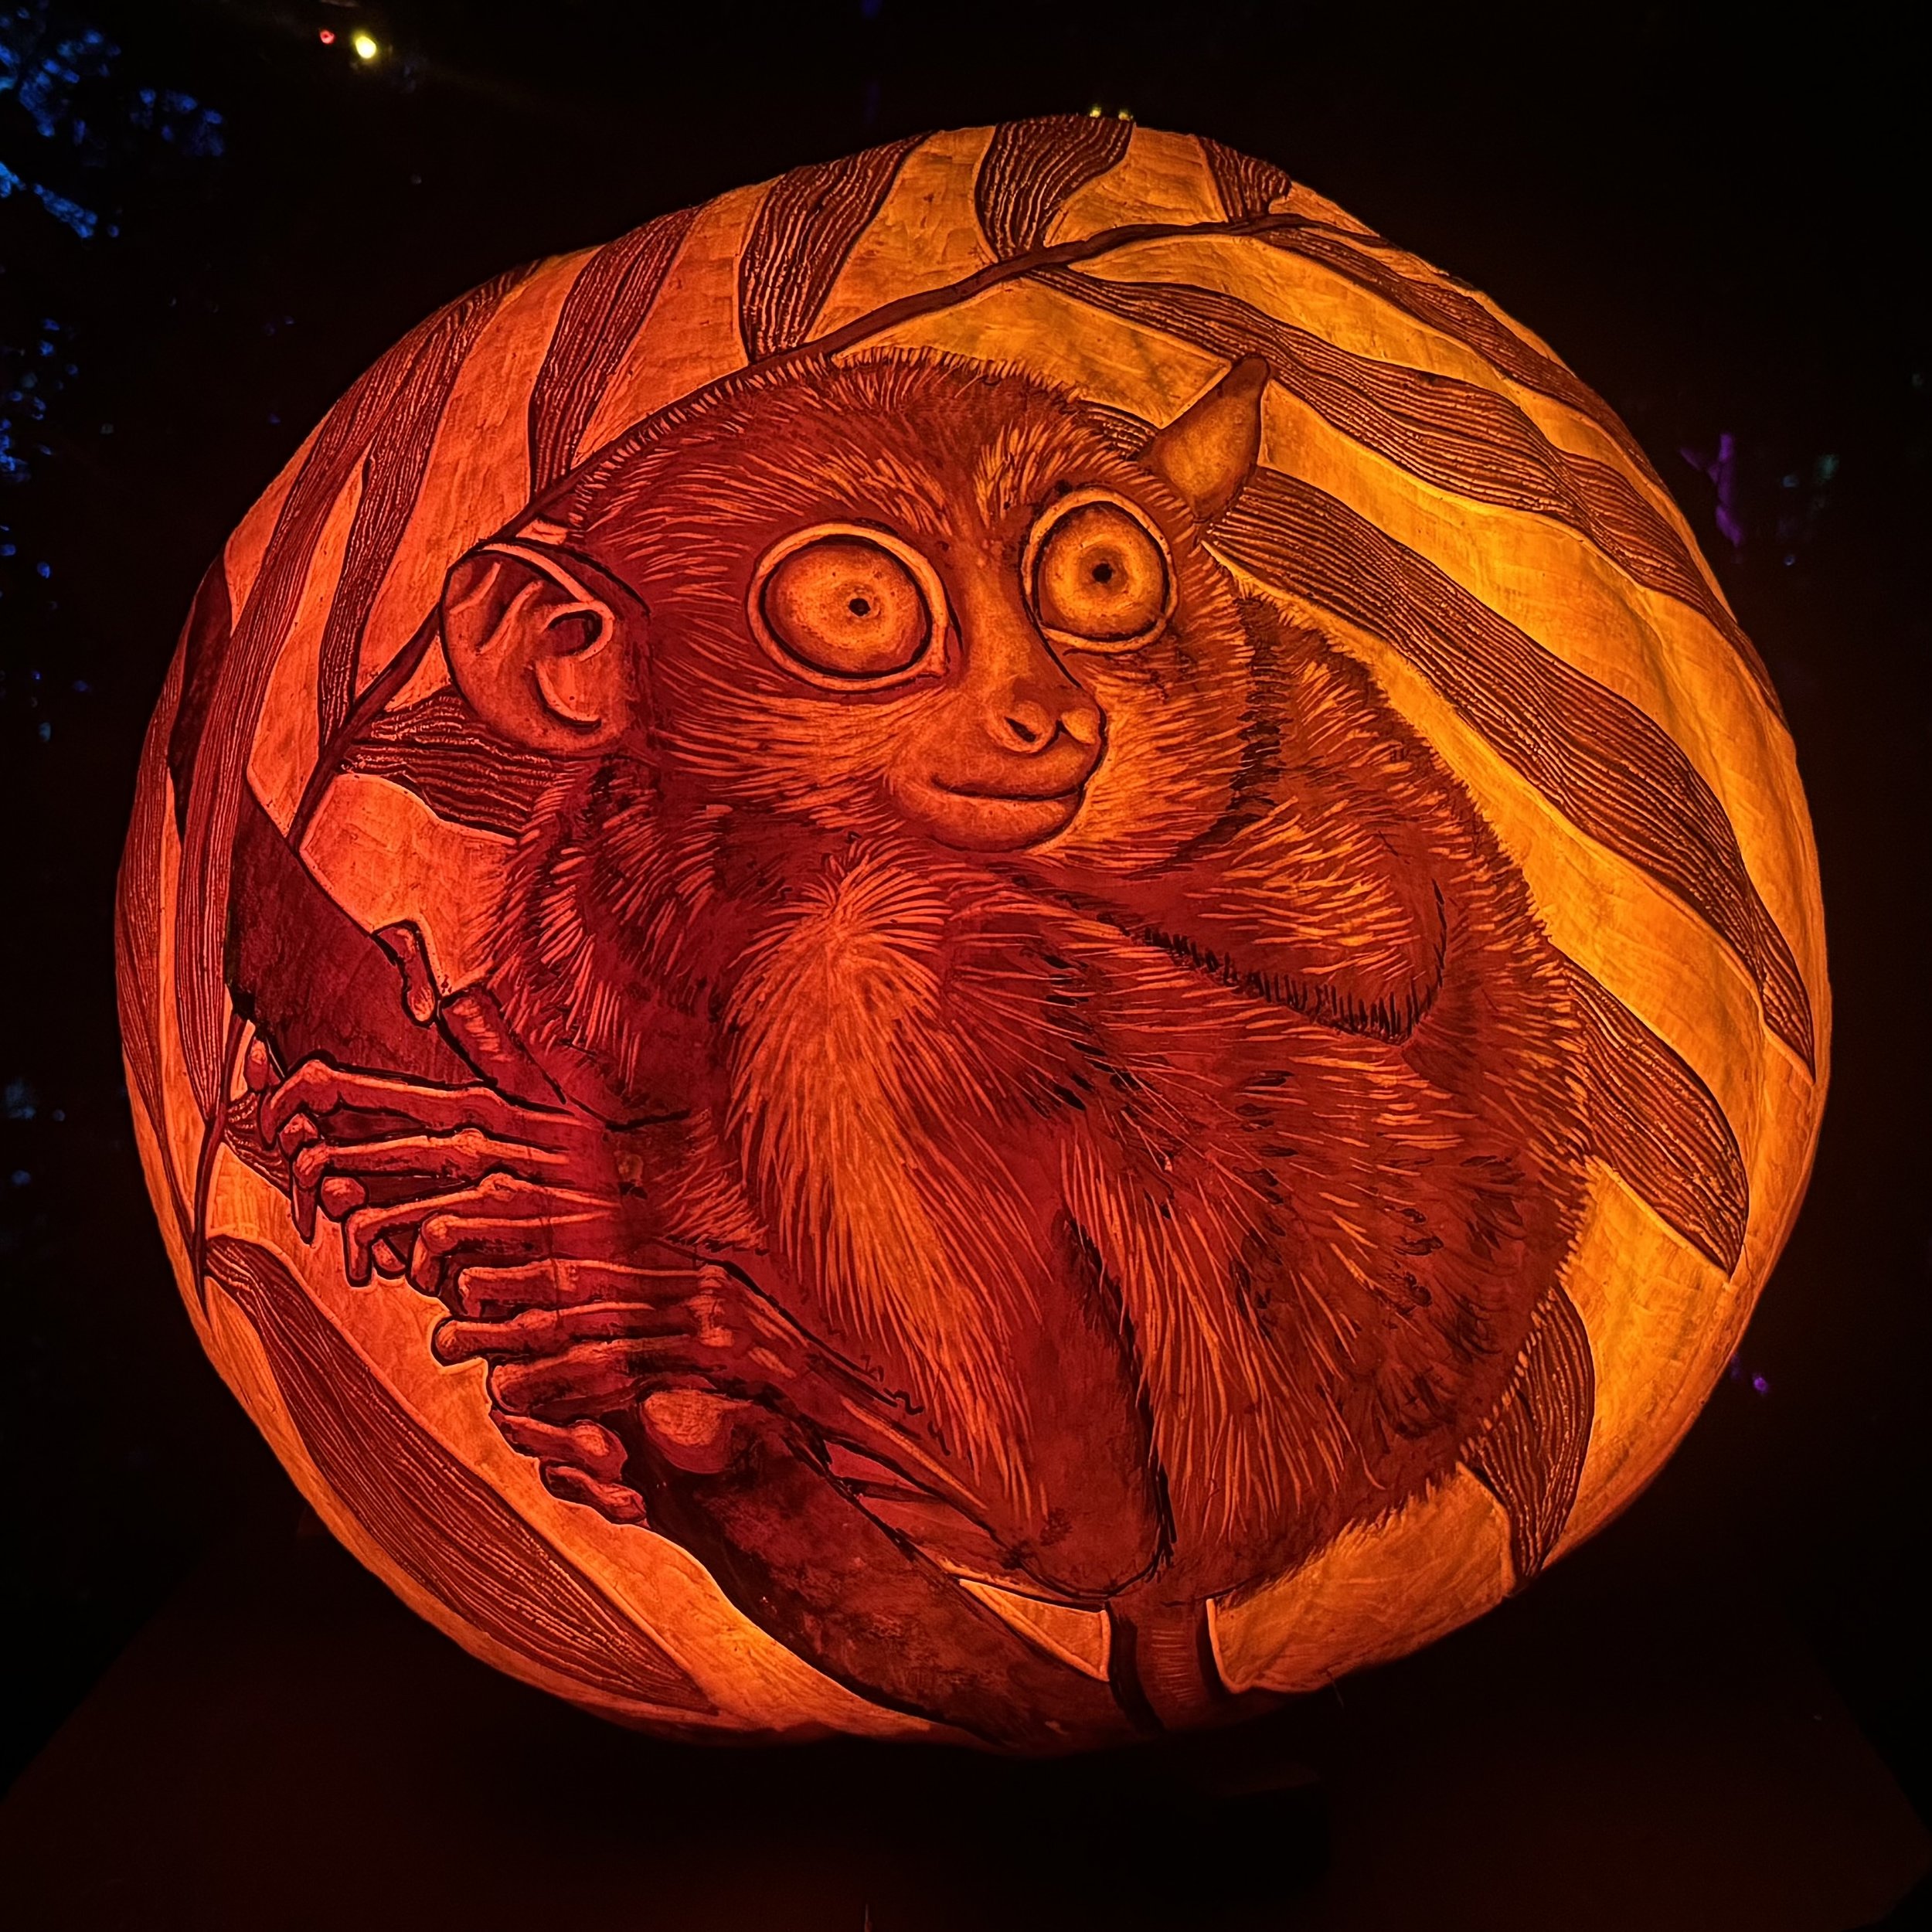
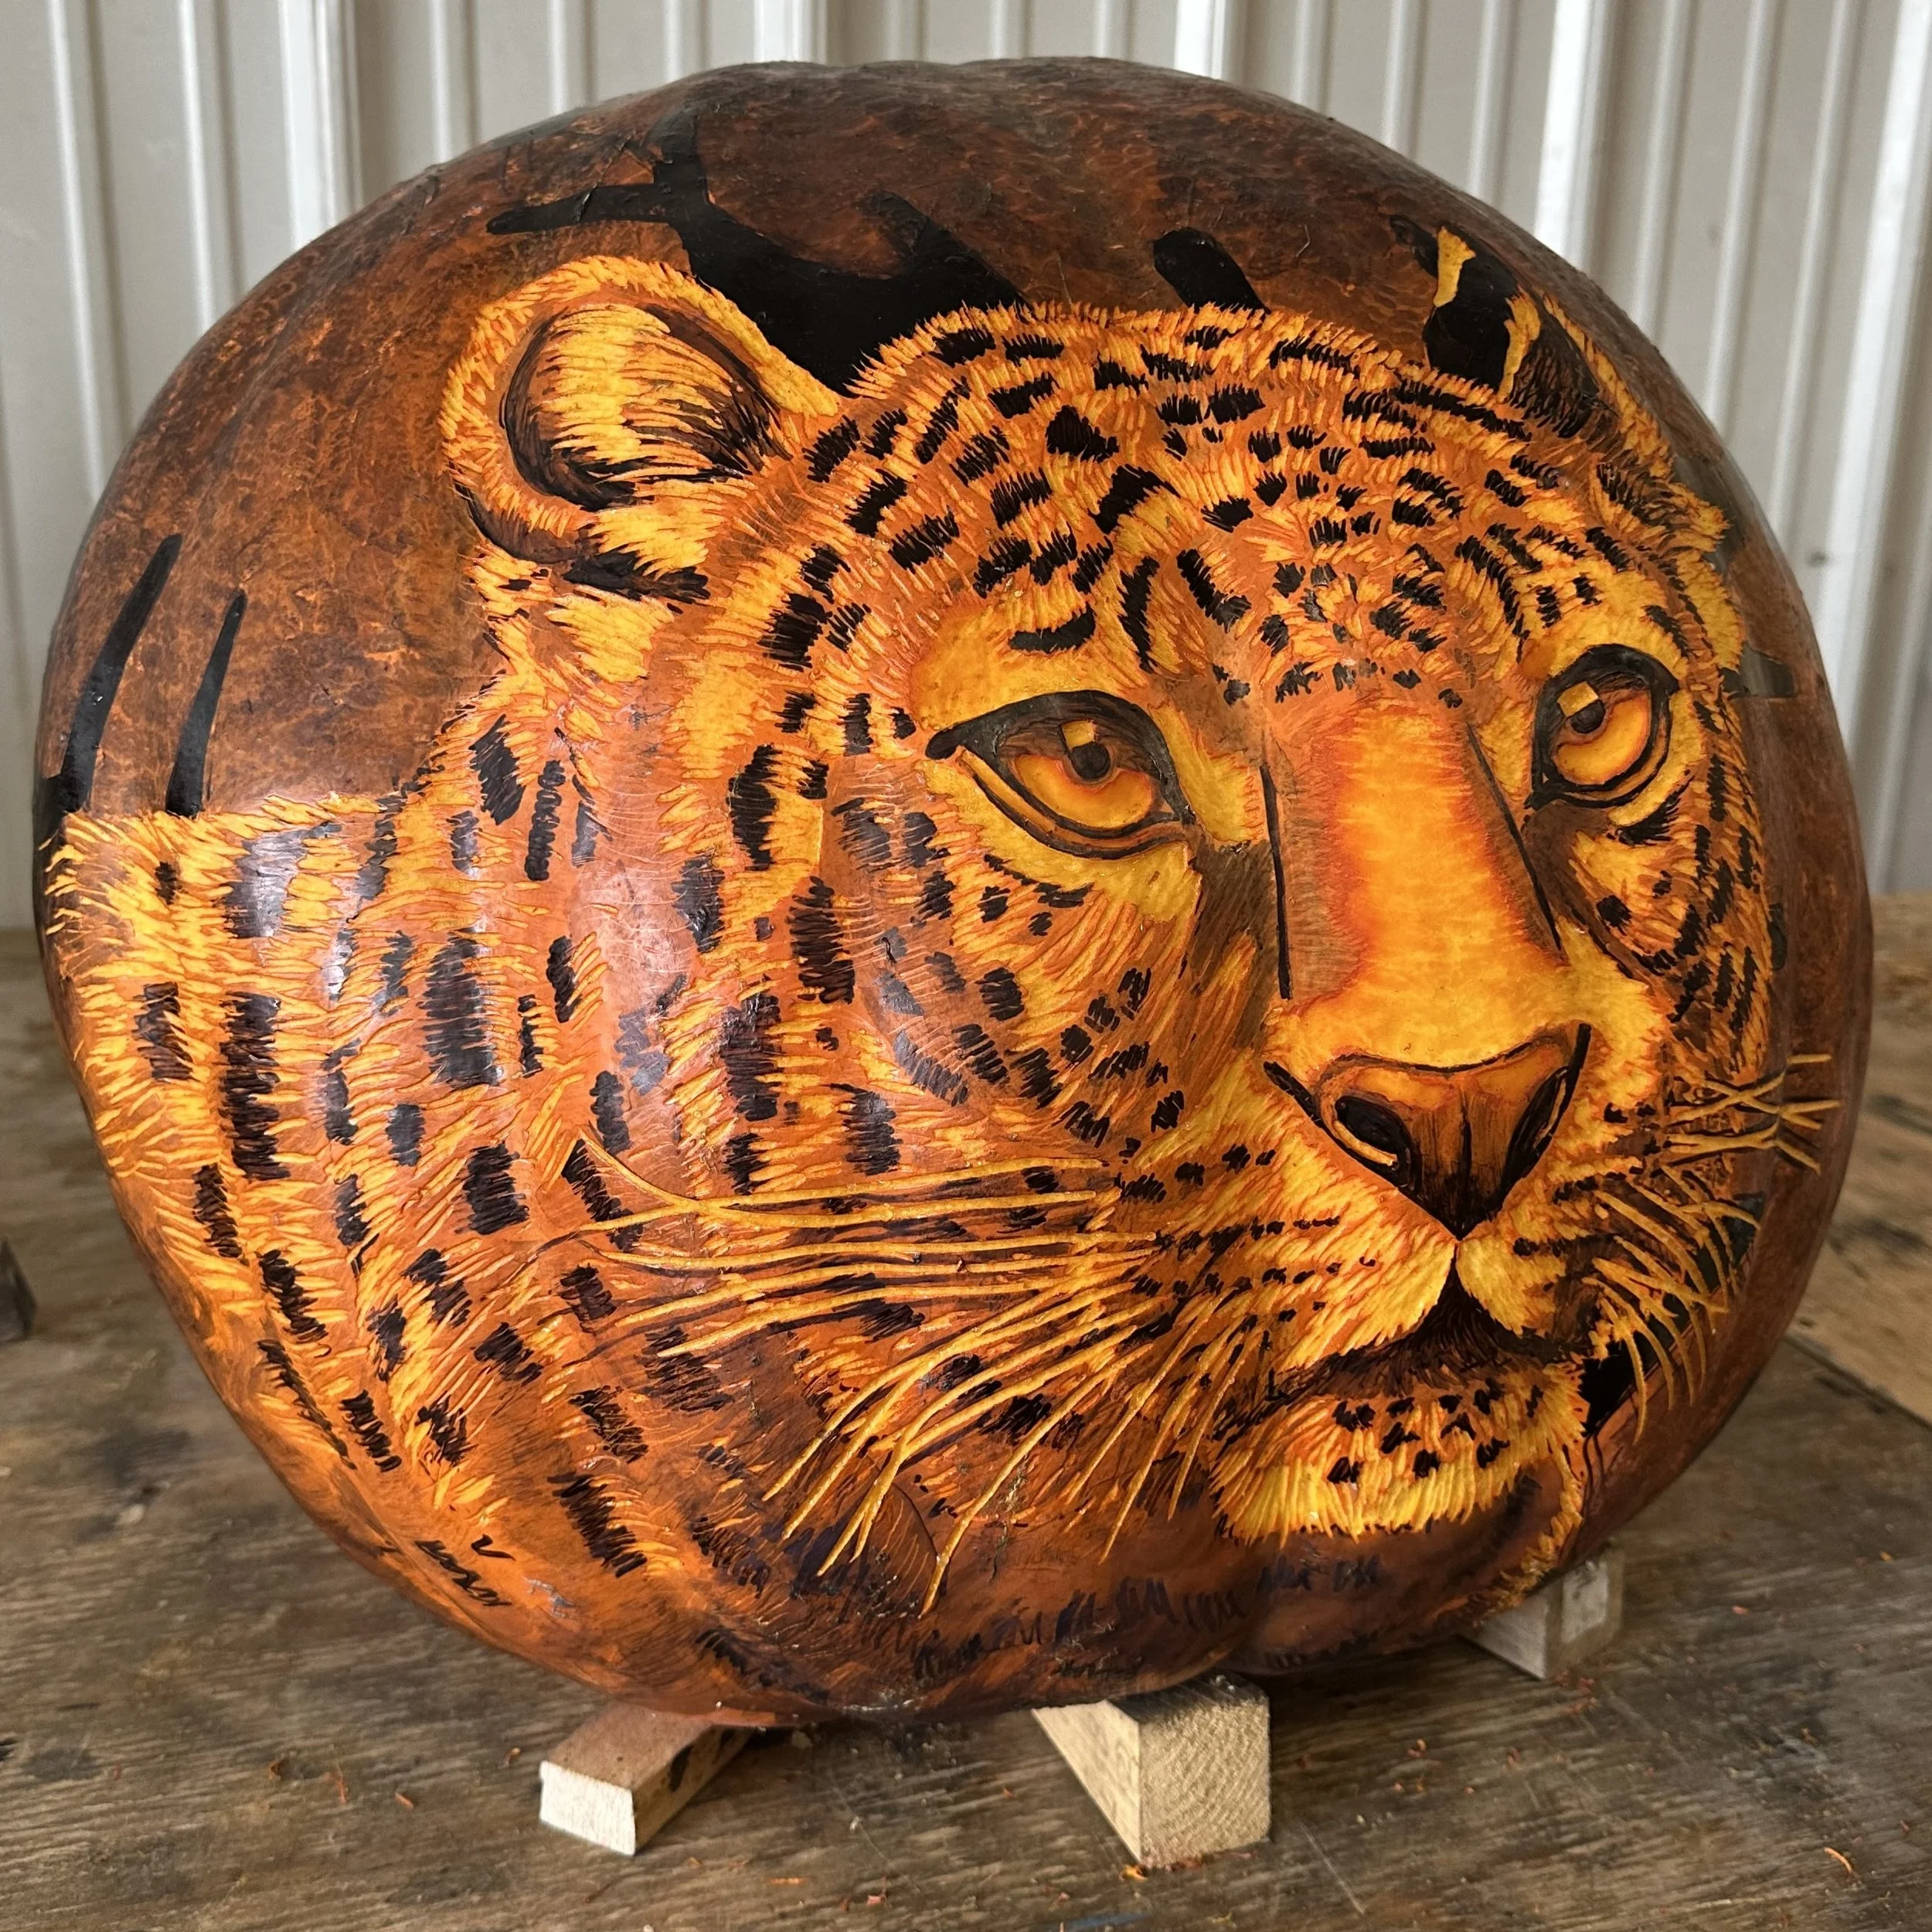
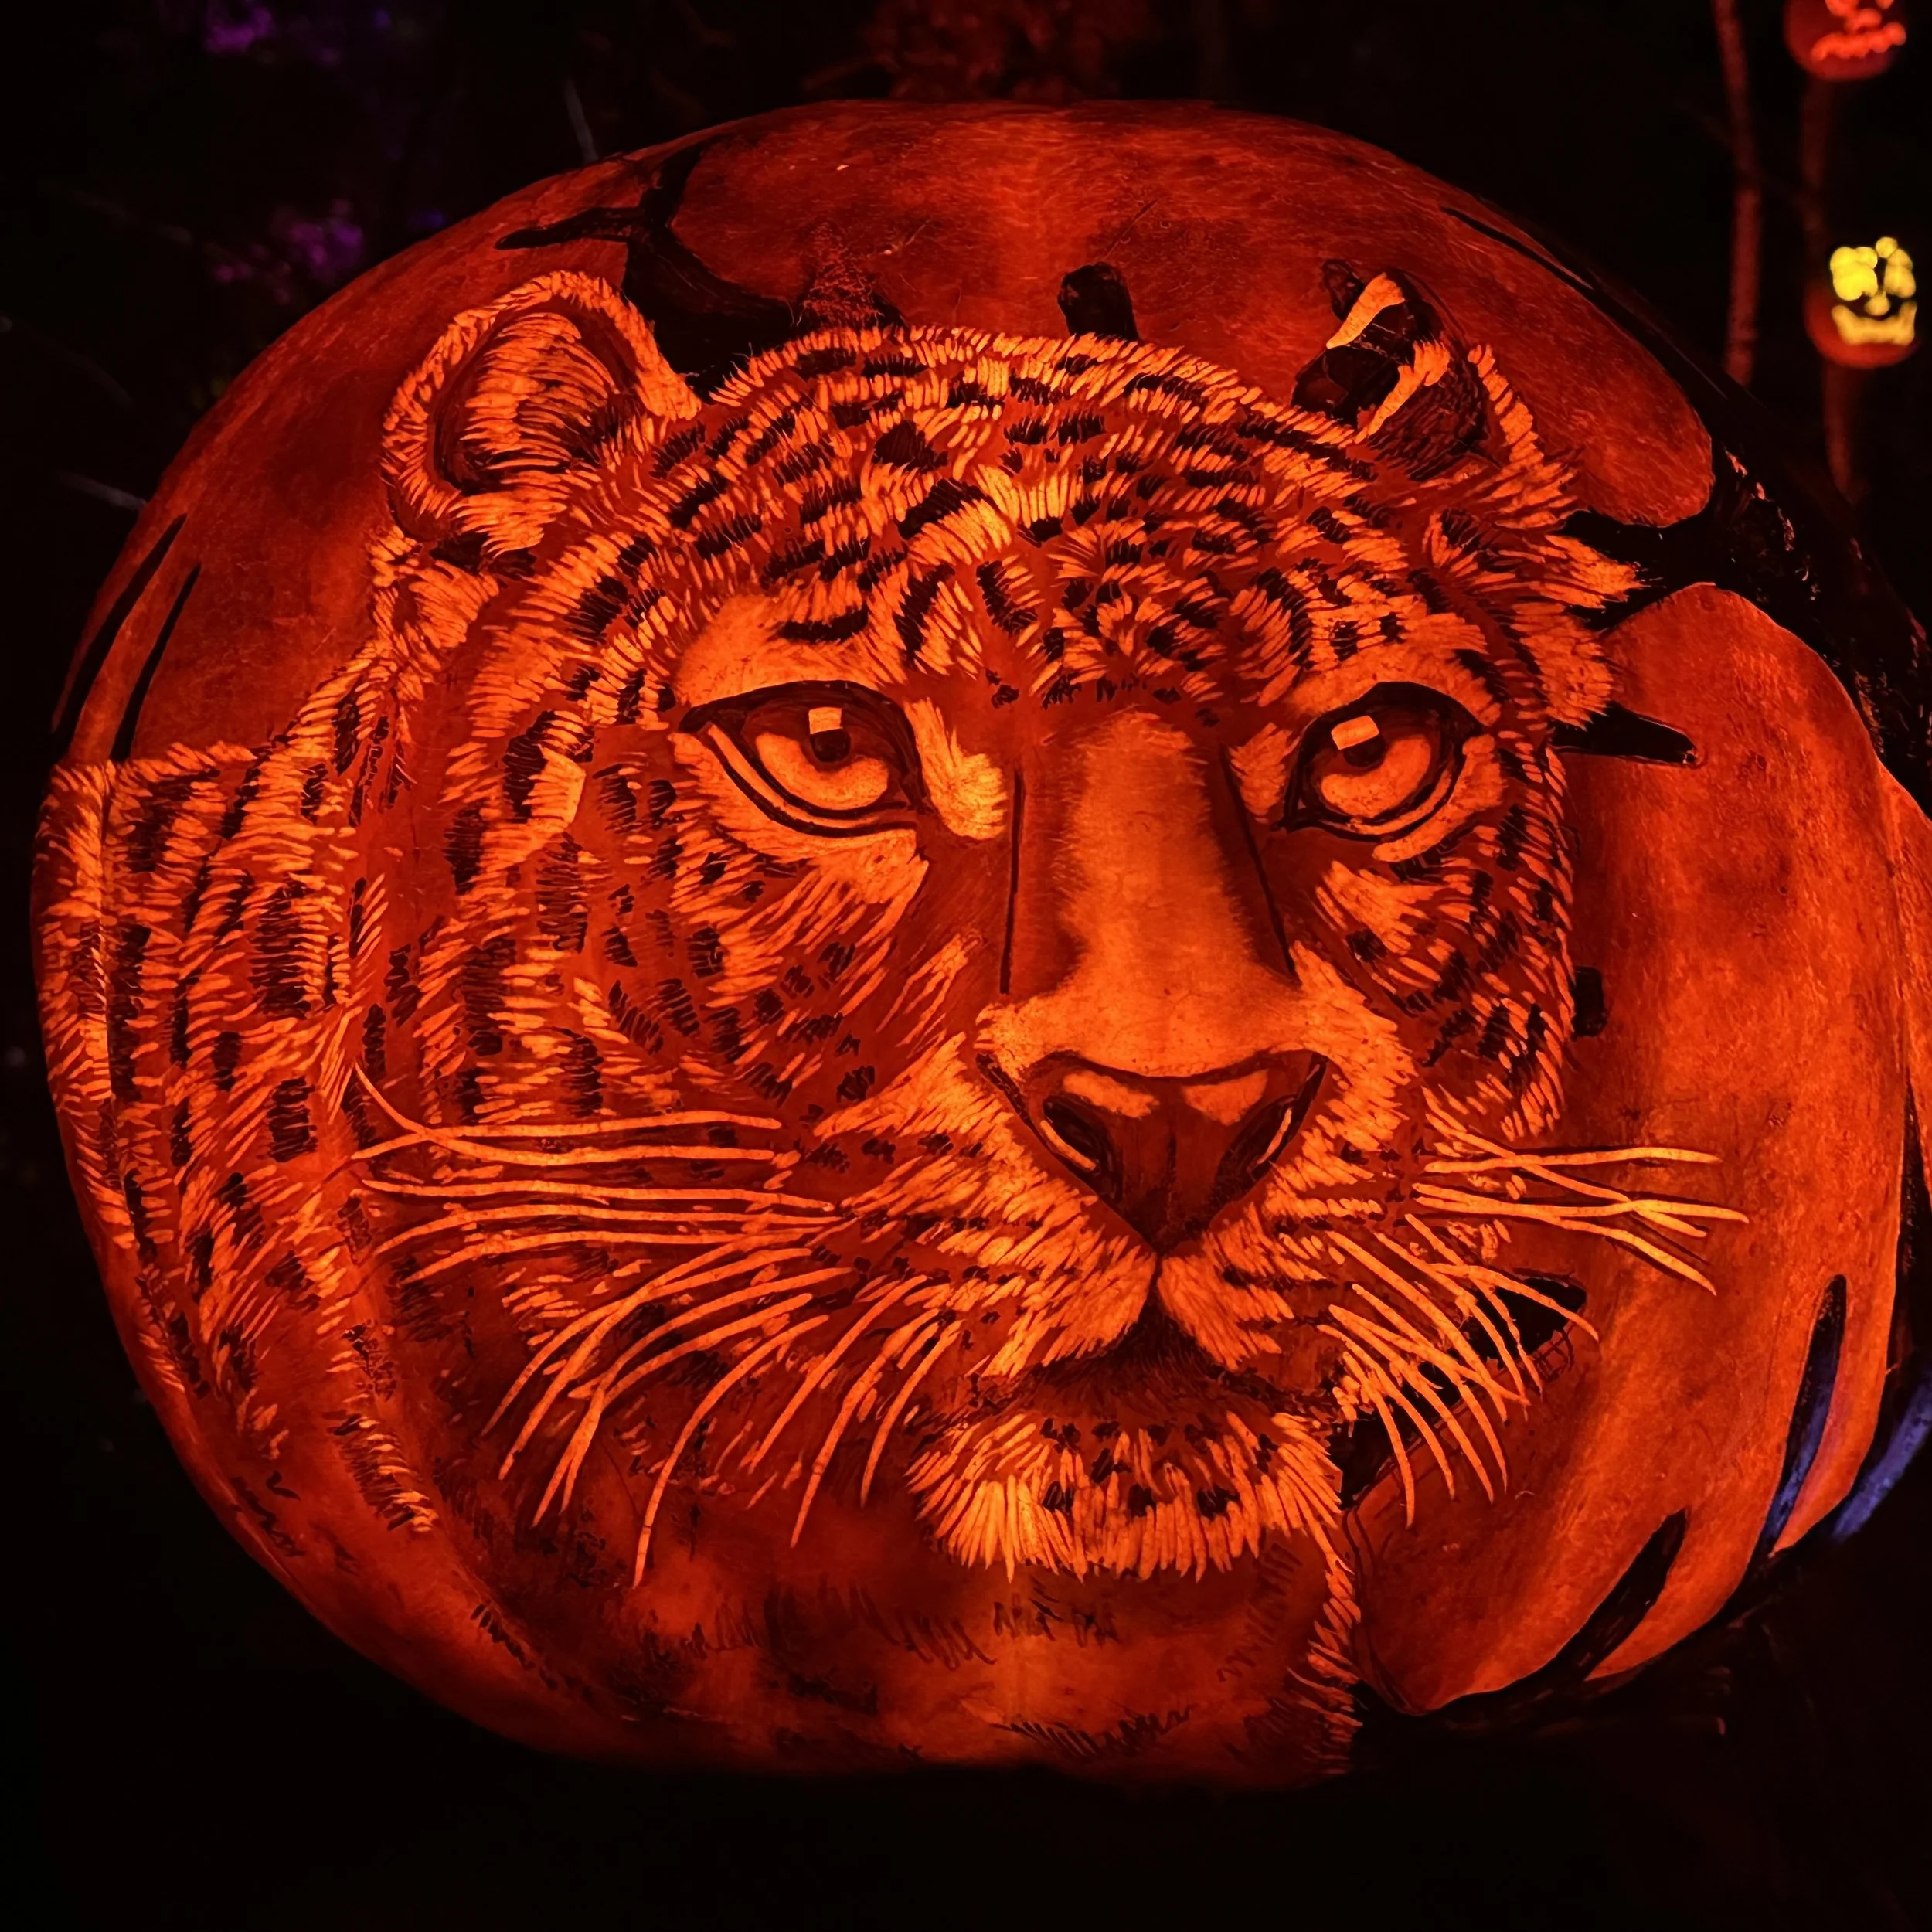
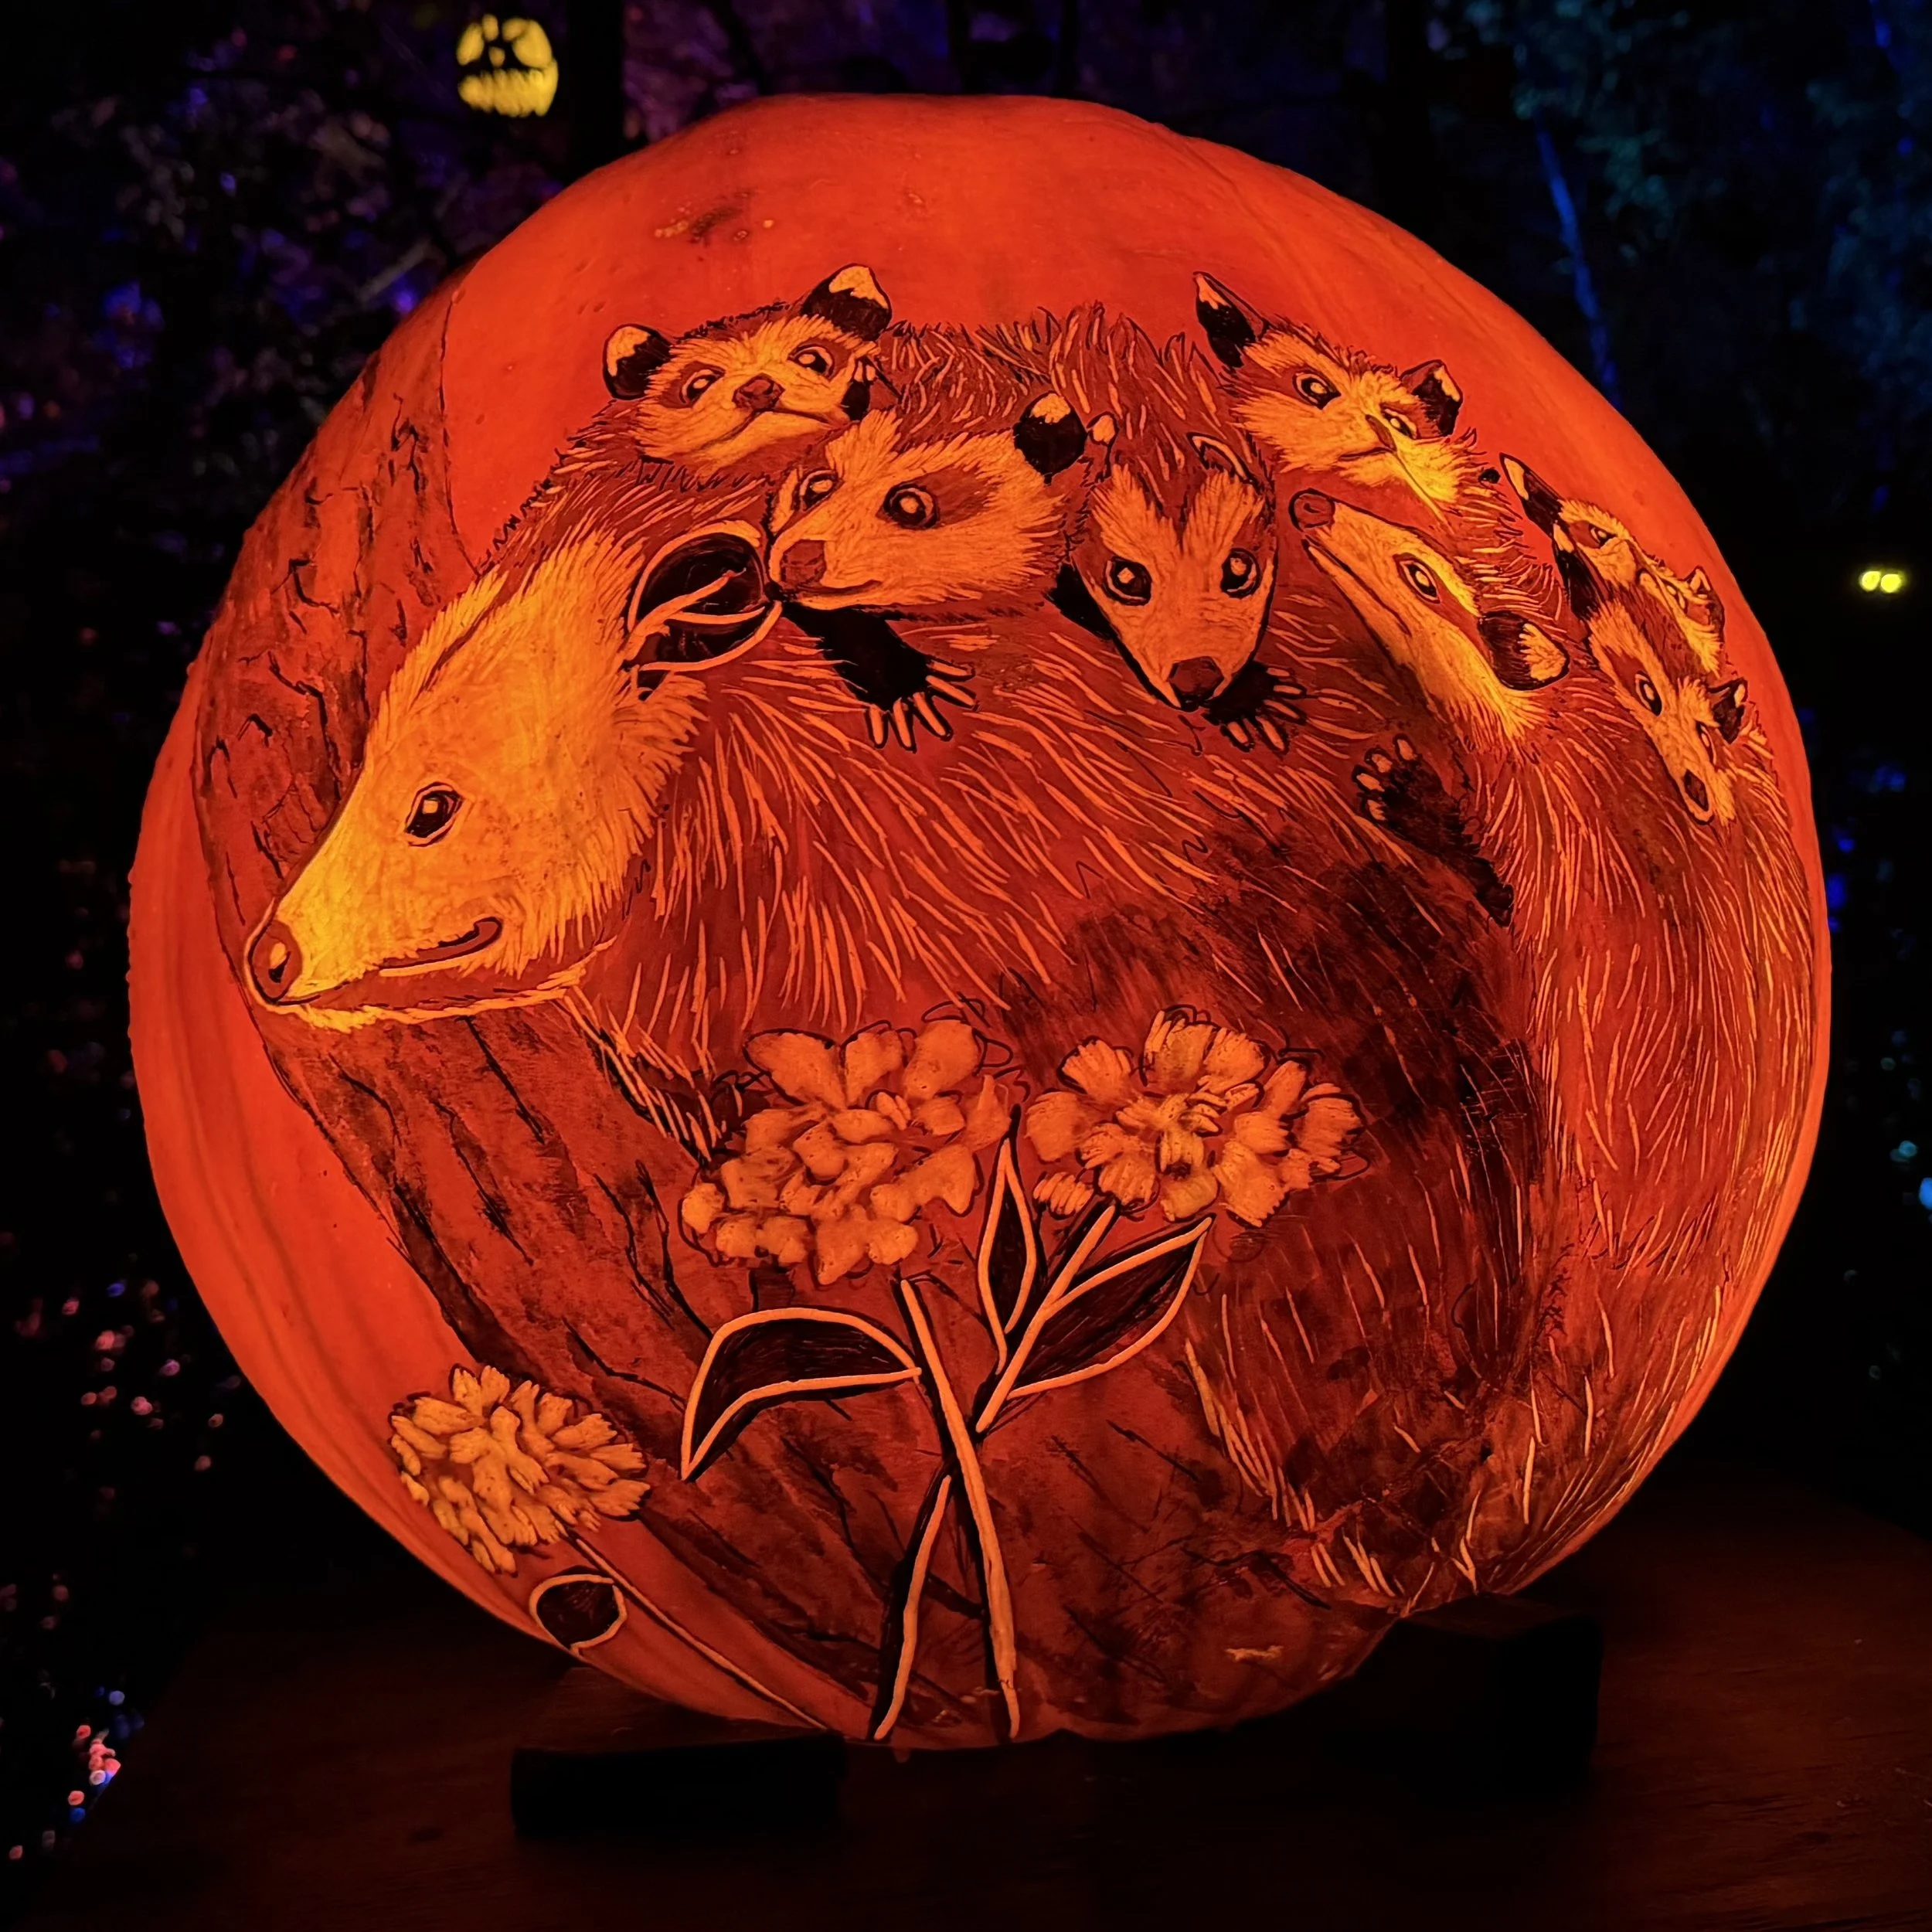
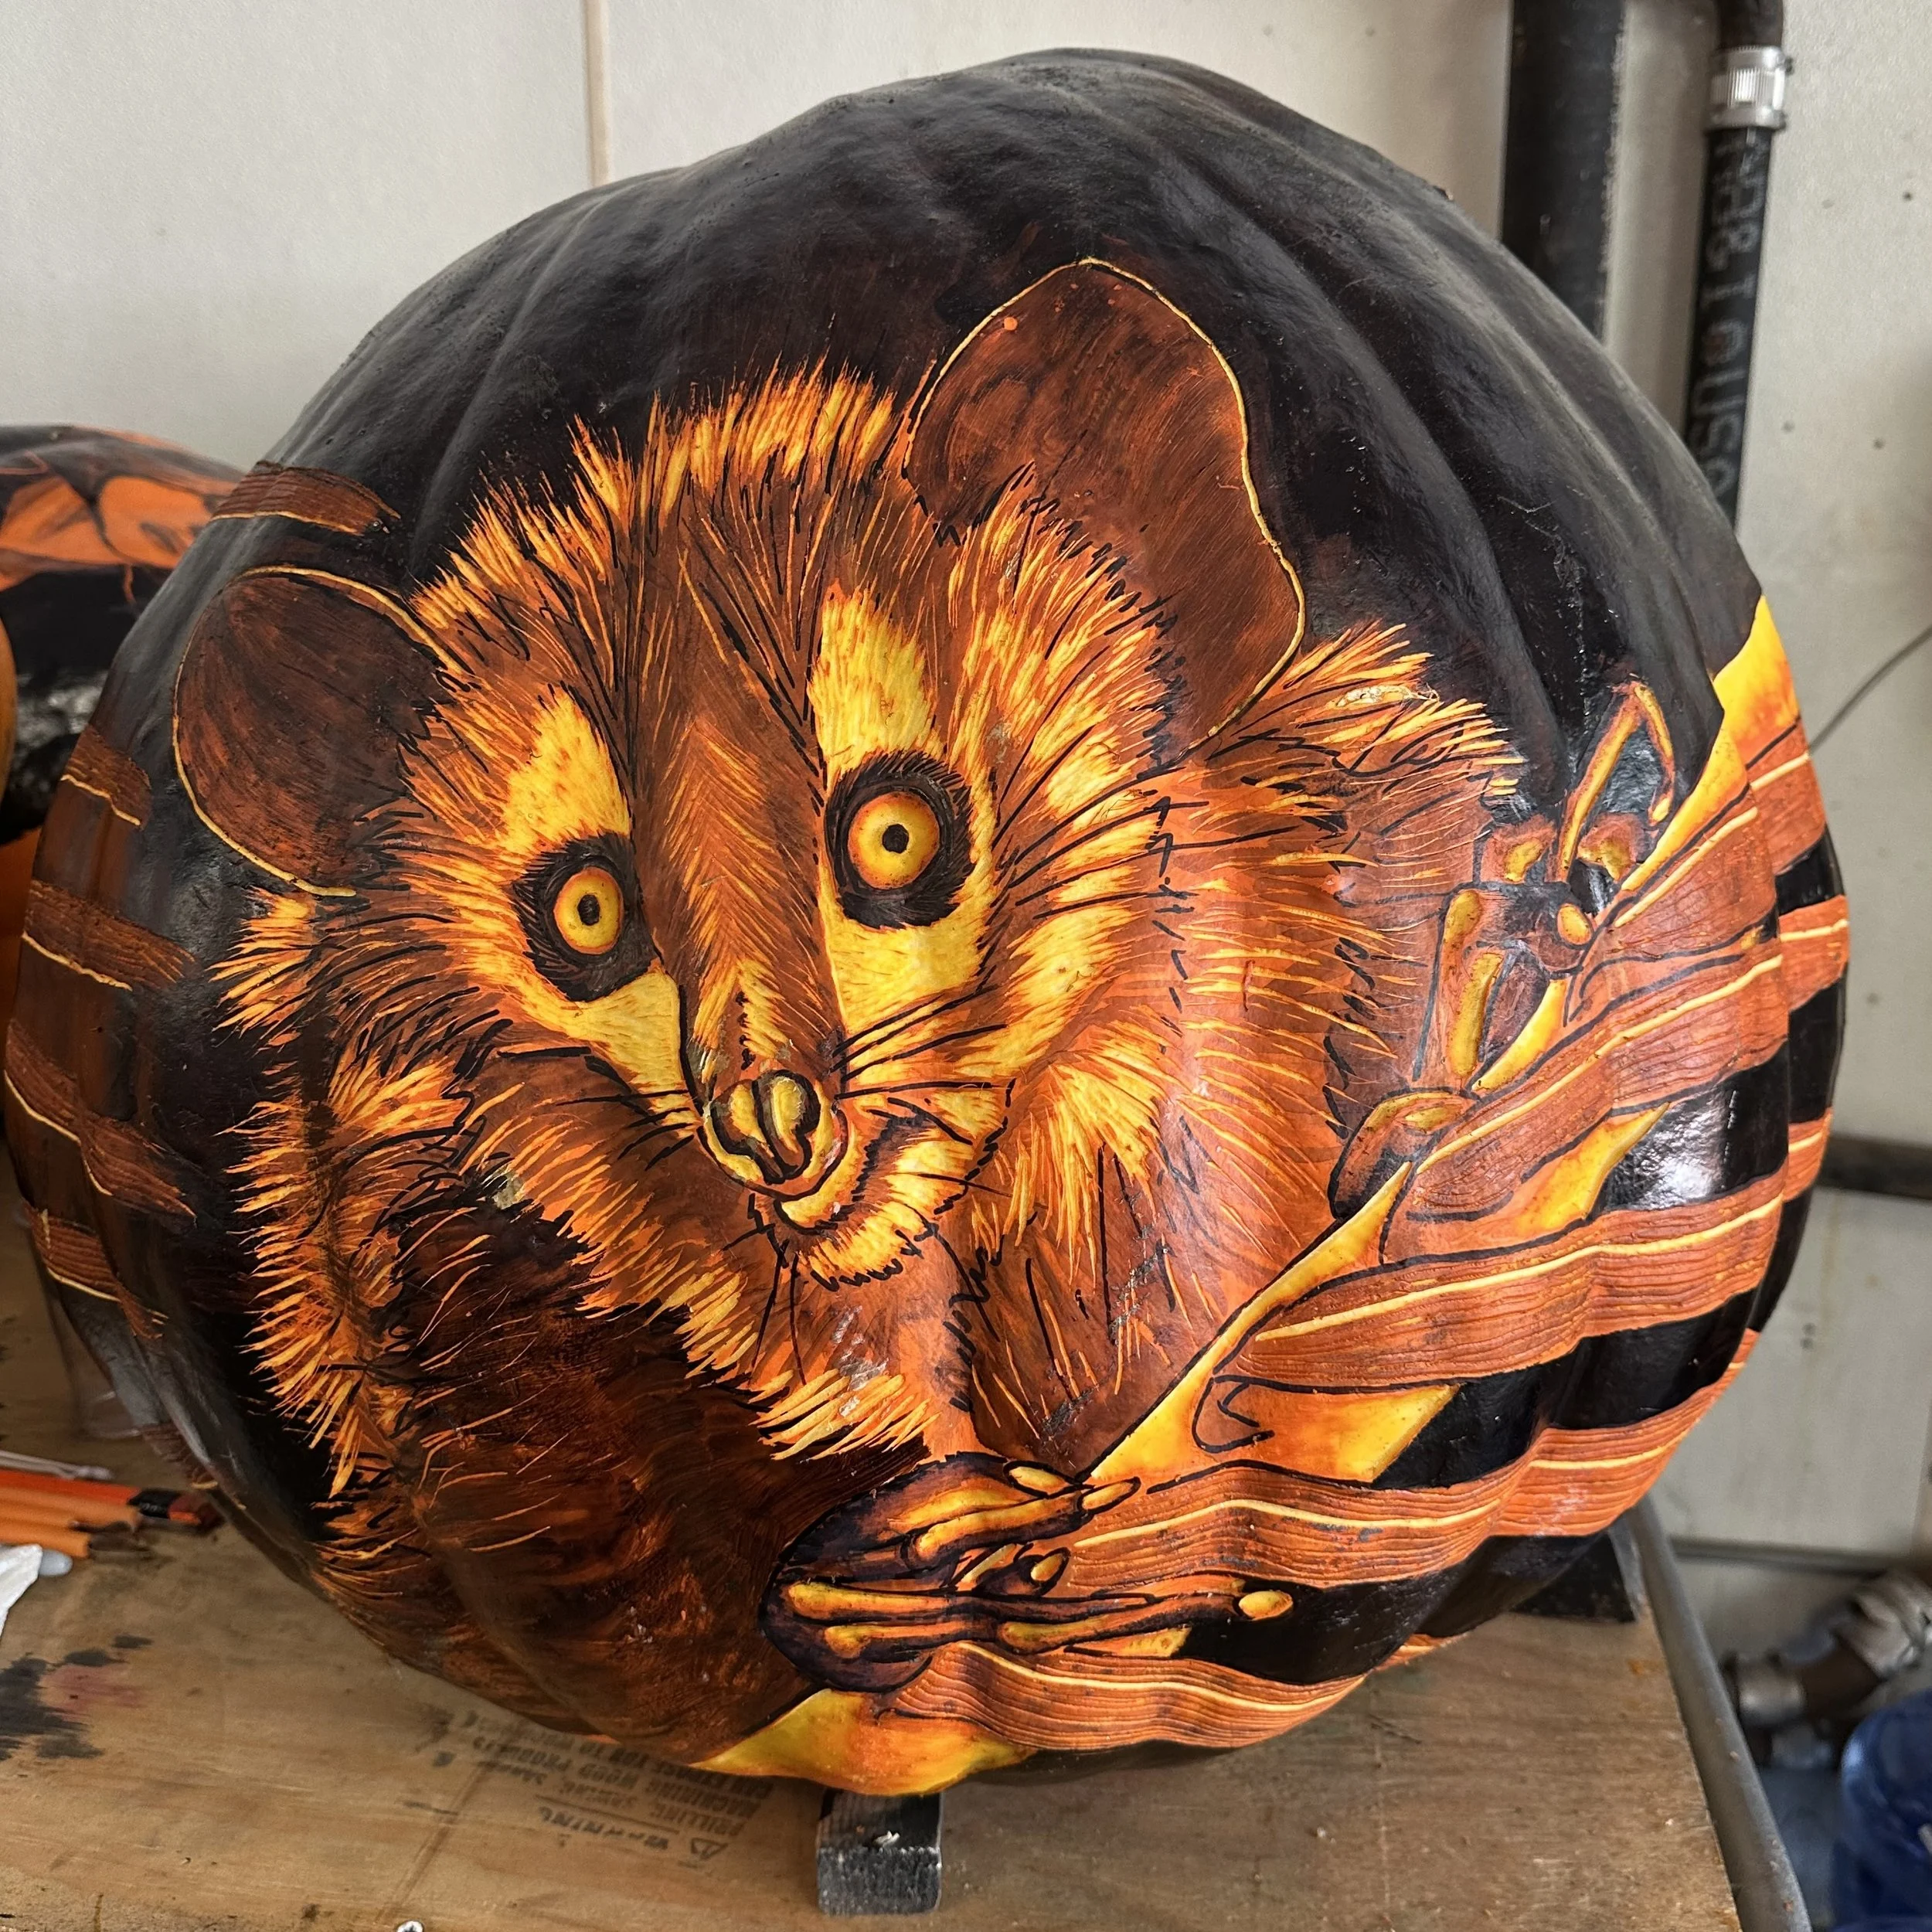
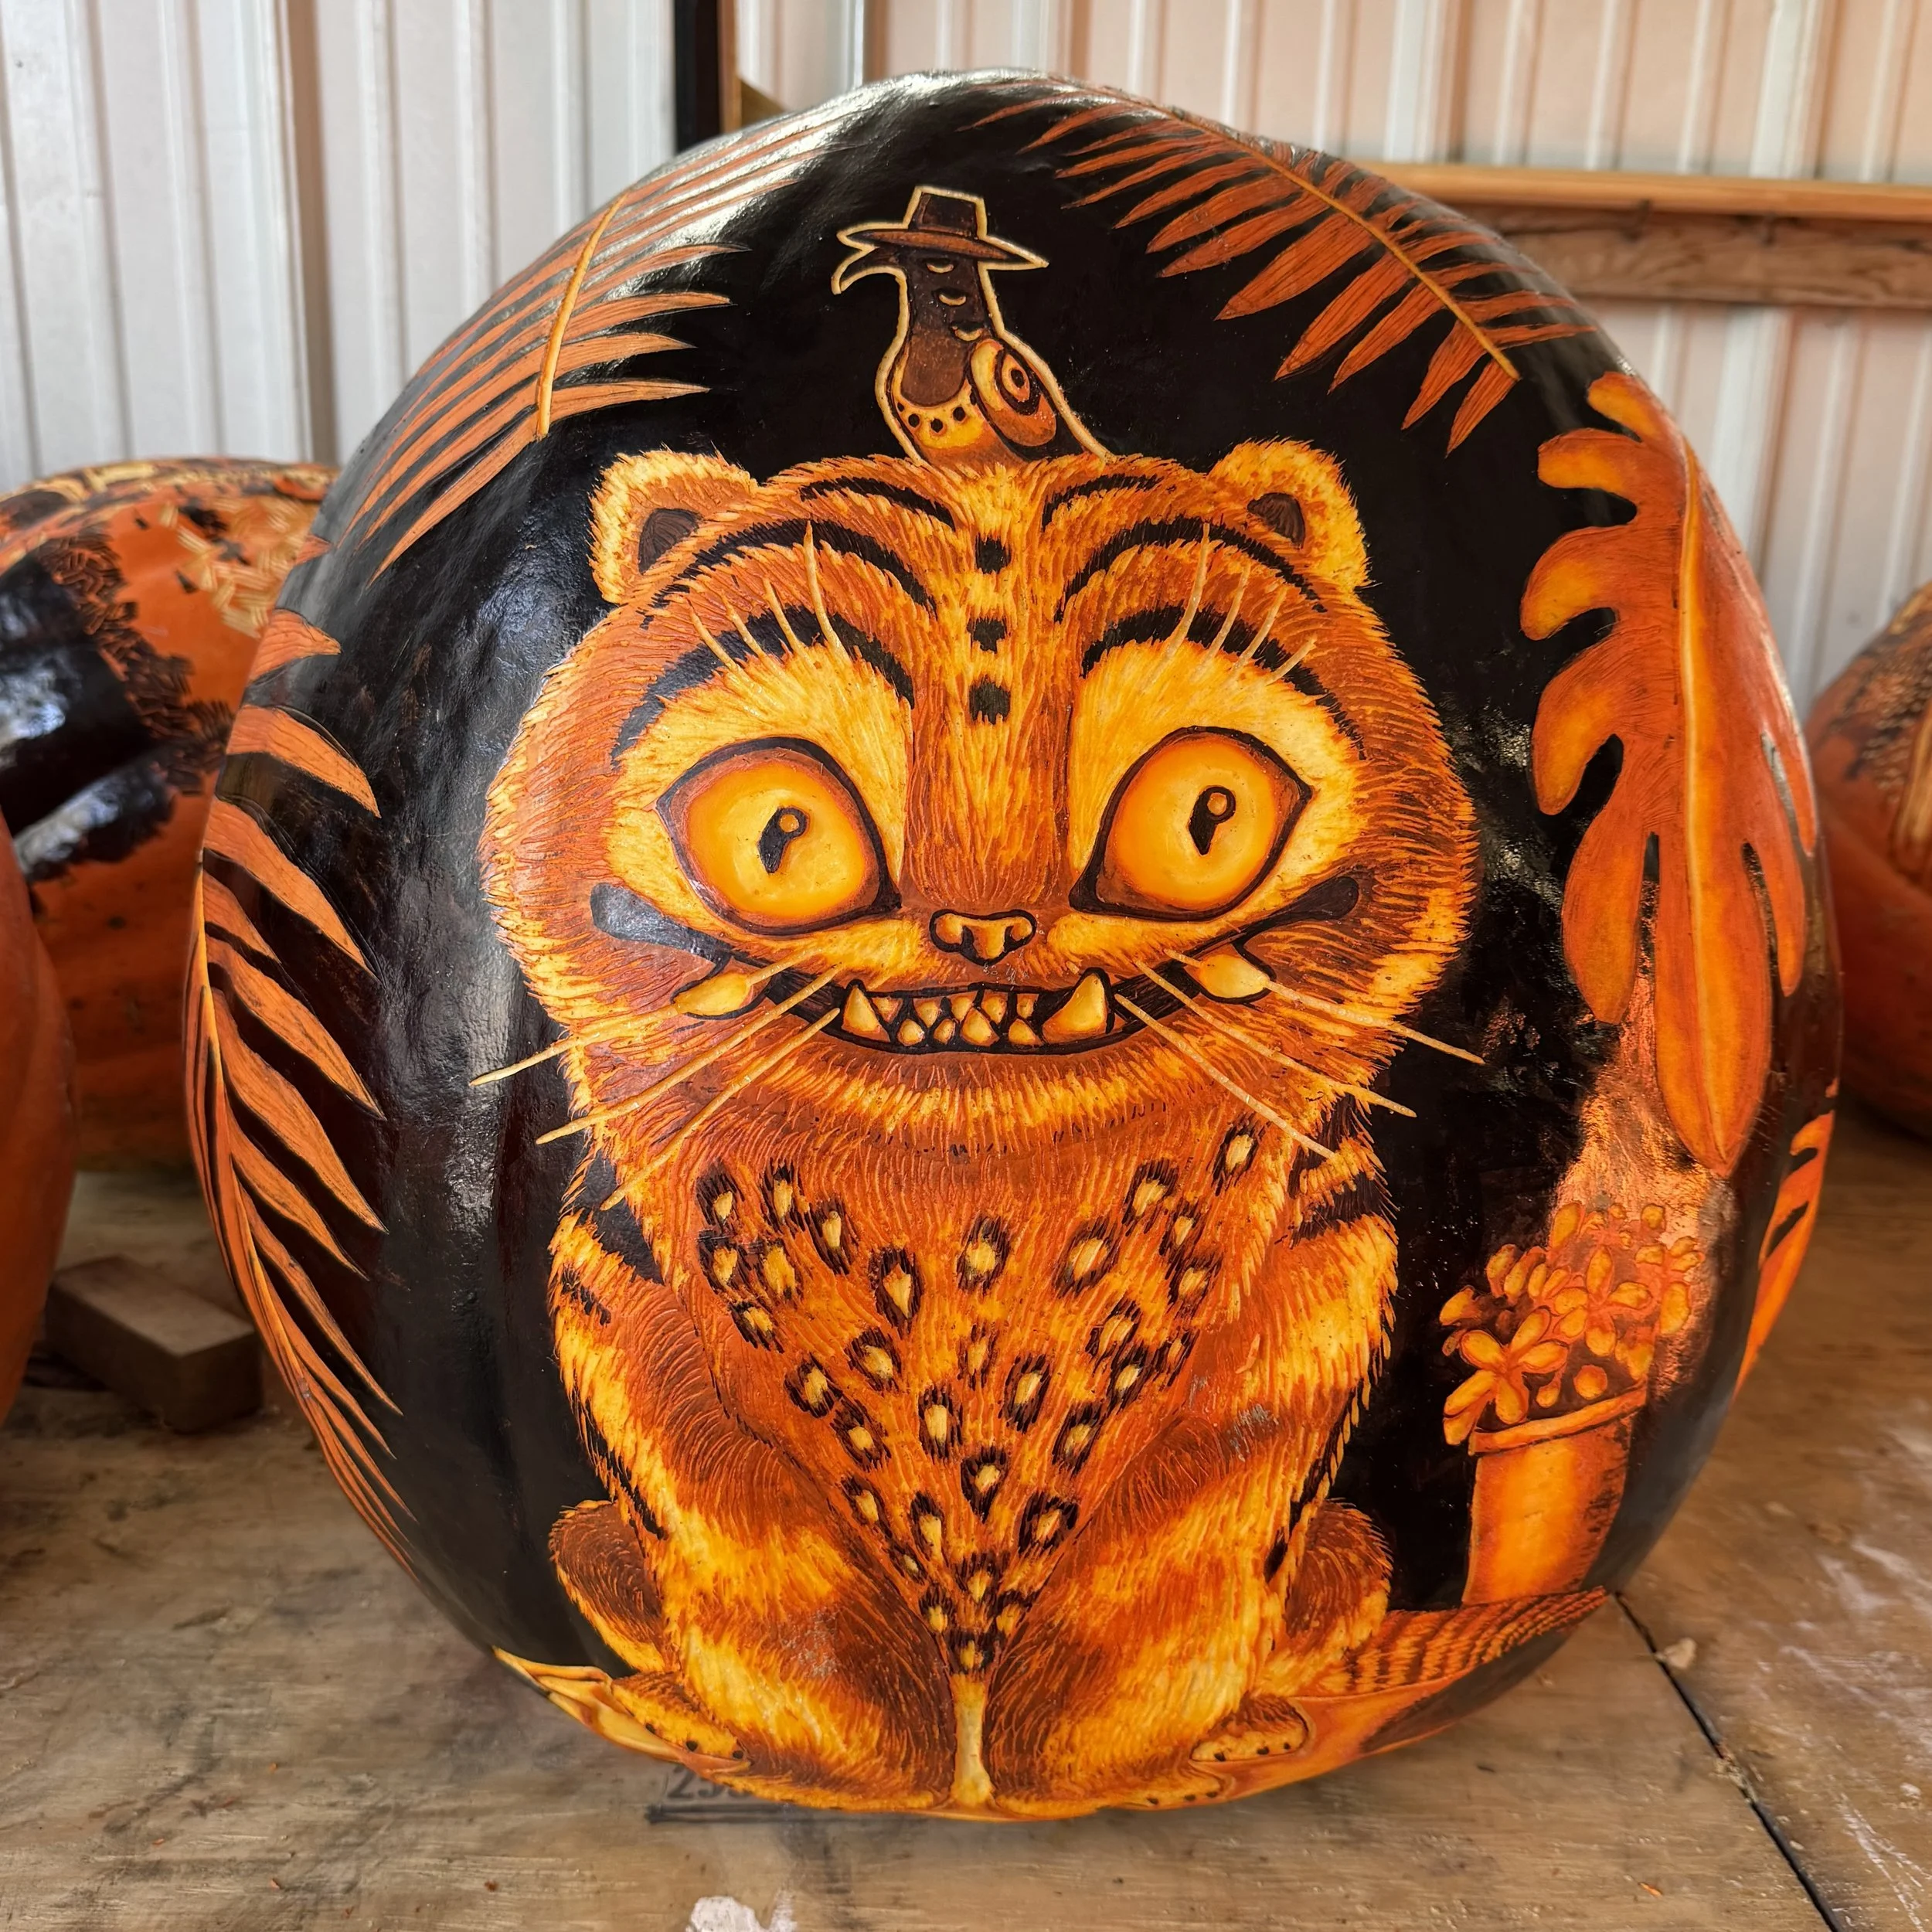
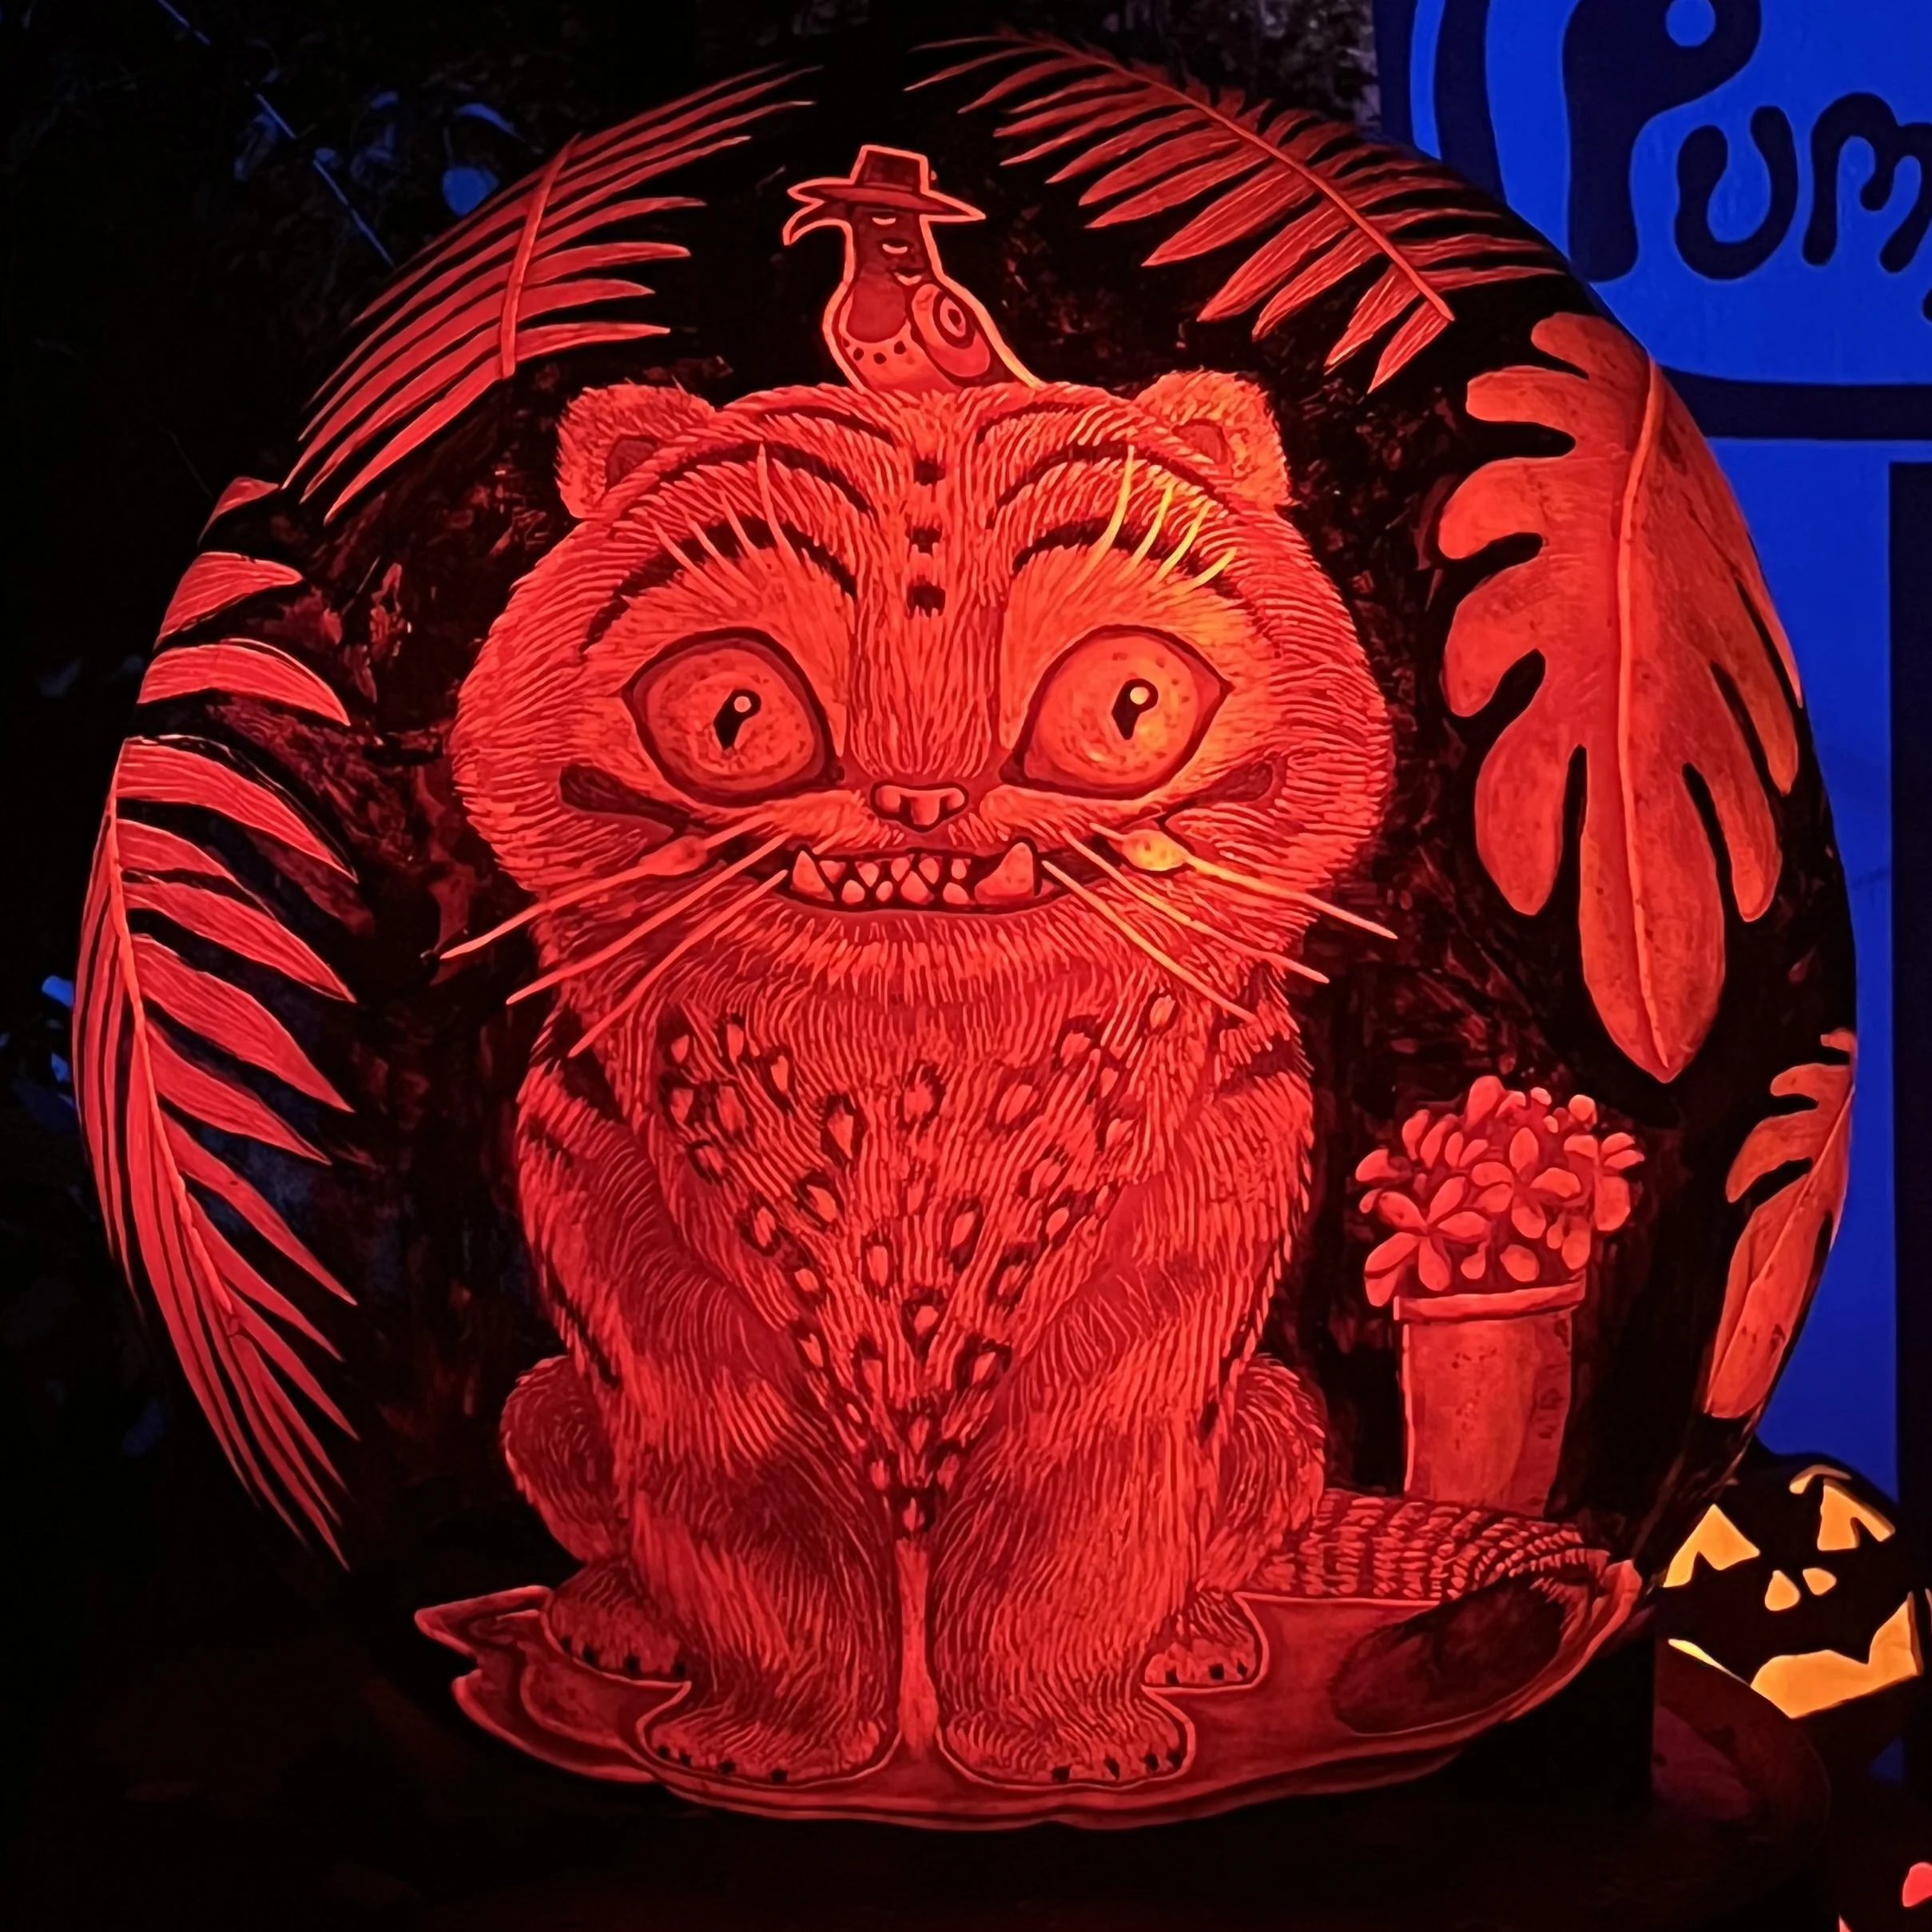
The animal jack-o-lanterns I did this year were all nocturnal animals, to go with the night theme. I had pretty good luck this year with getting photos of all the pumpkins lit, either in person or via another artist or the studio manager. The Aye-aye pumpkin was the only one I didn’t get to see in dark mode. The Amur Leopard is my favorite of this batch, really happy with how the eyes turned out. I did have a lot of fun with all the baby opossum faces as well.

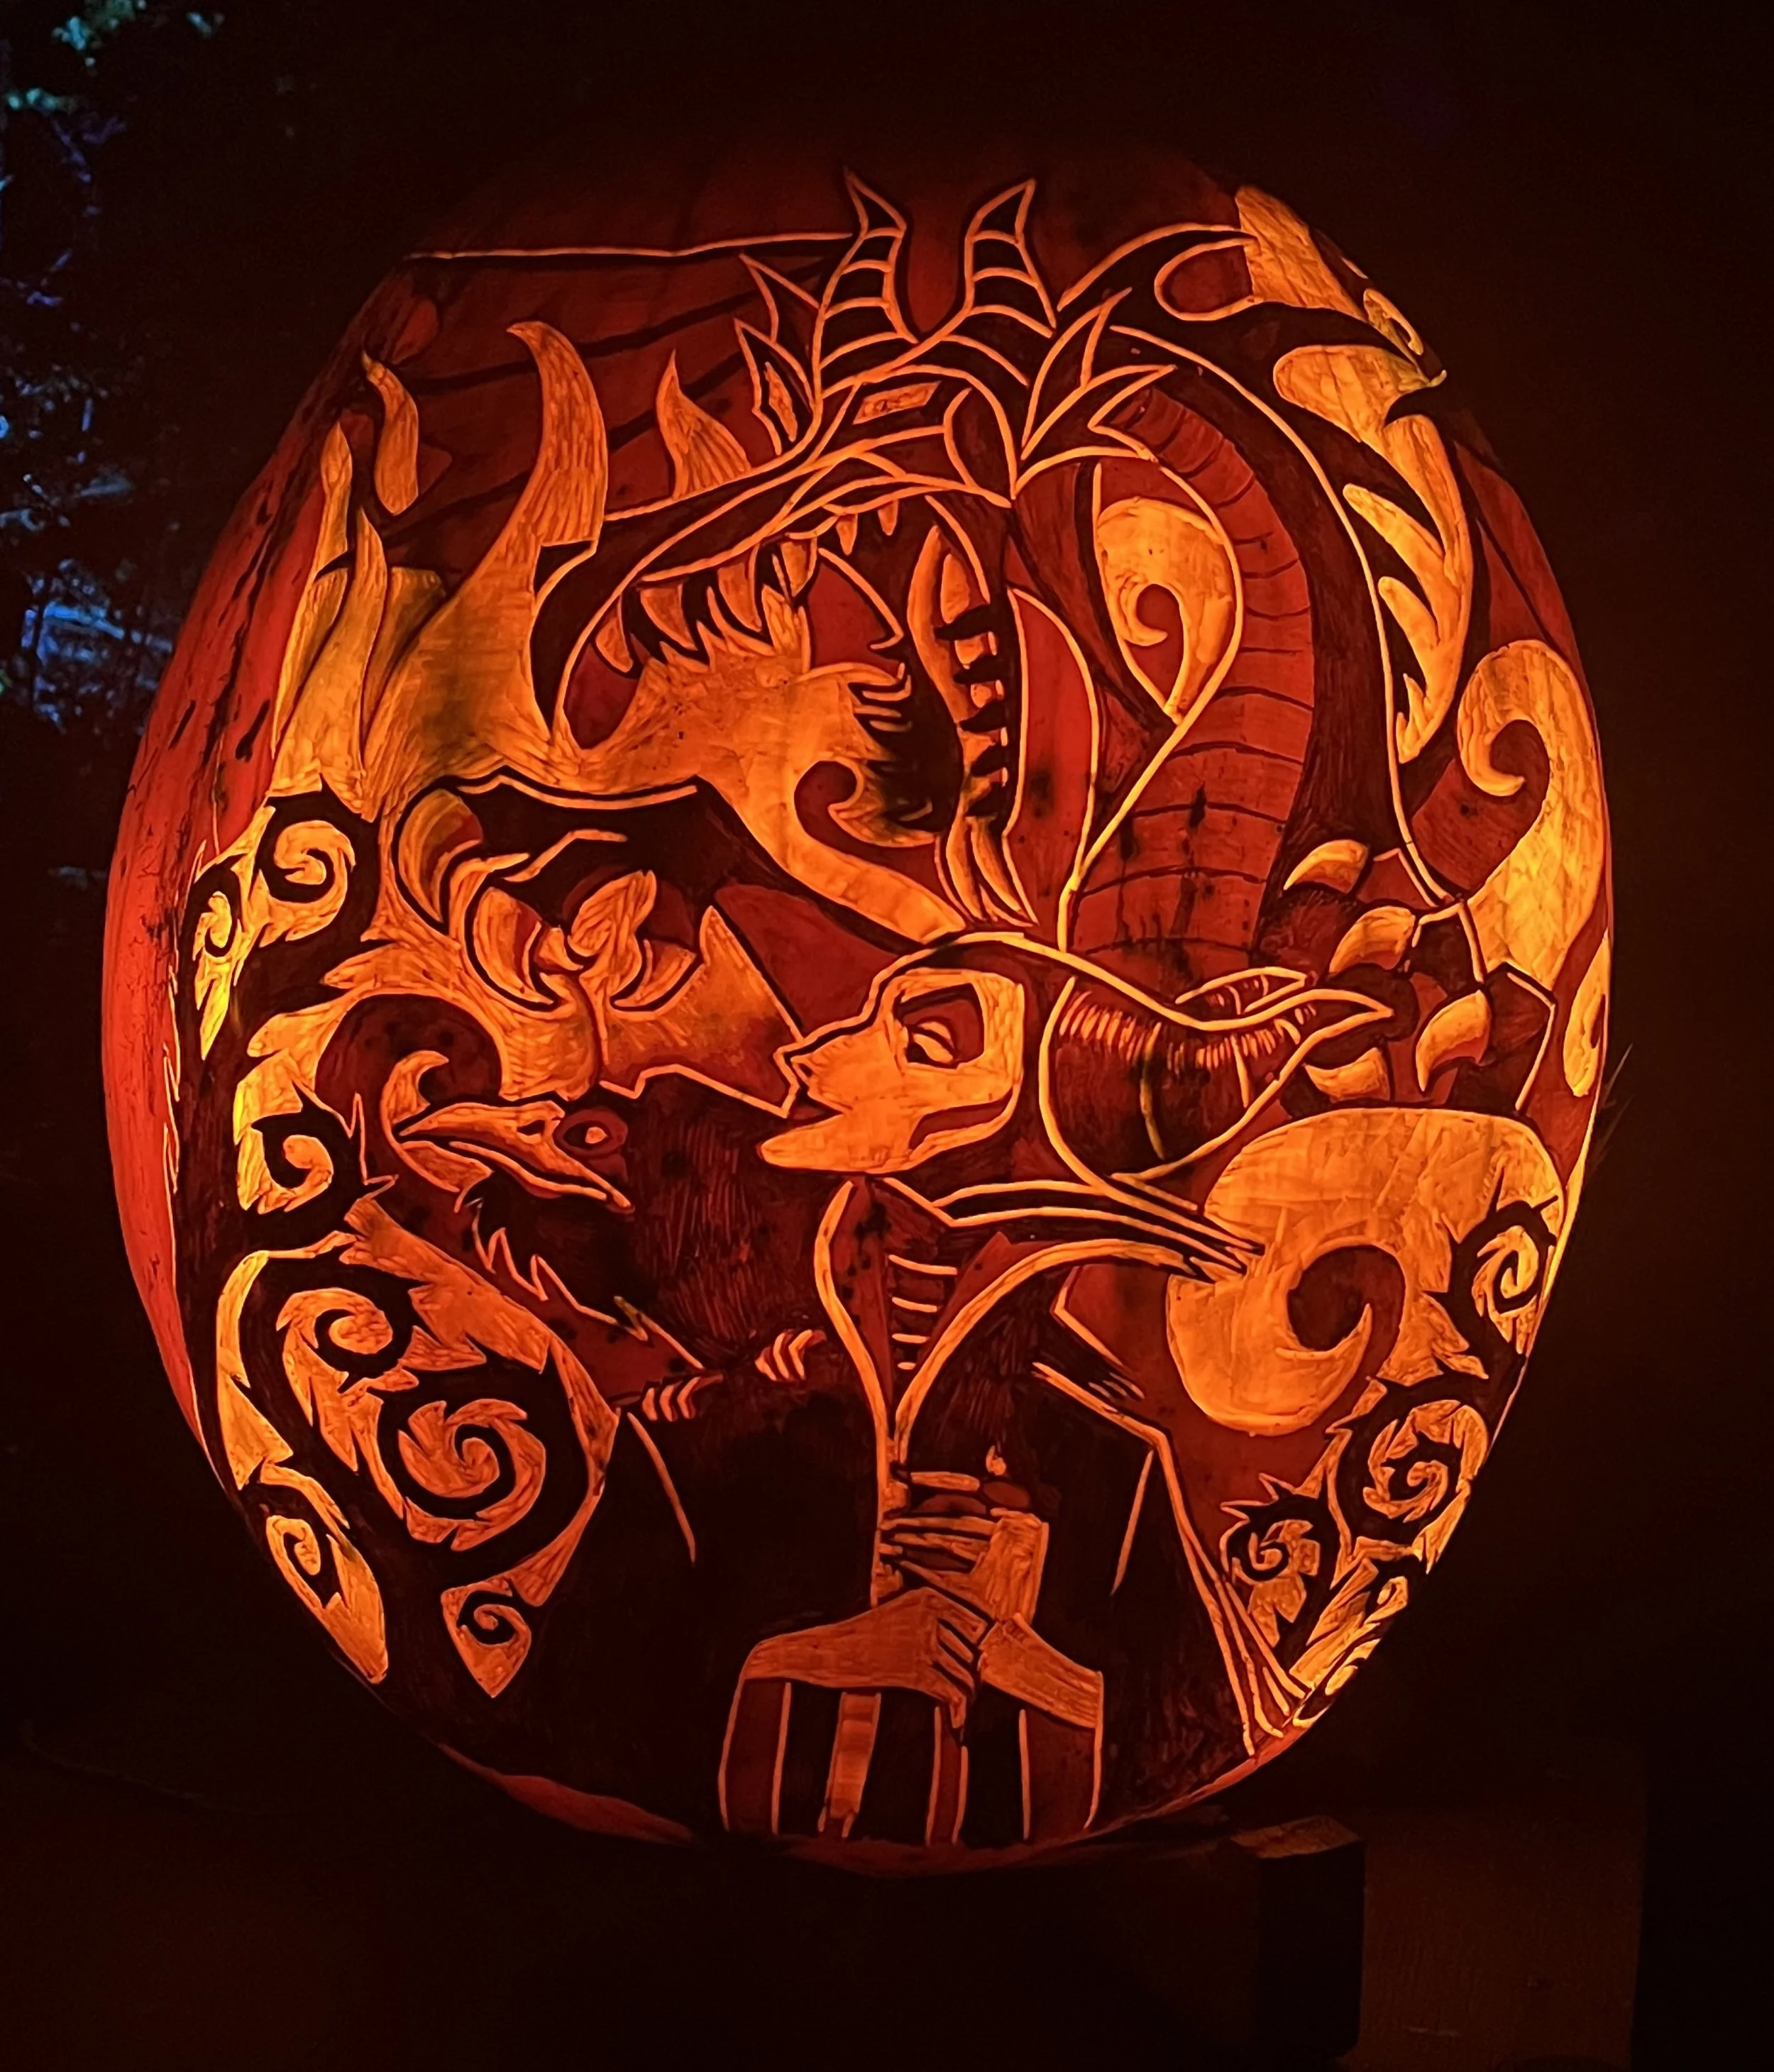
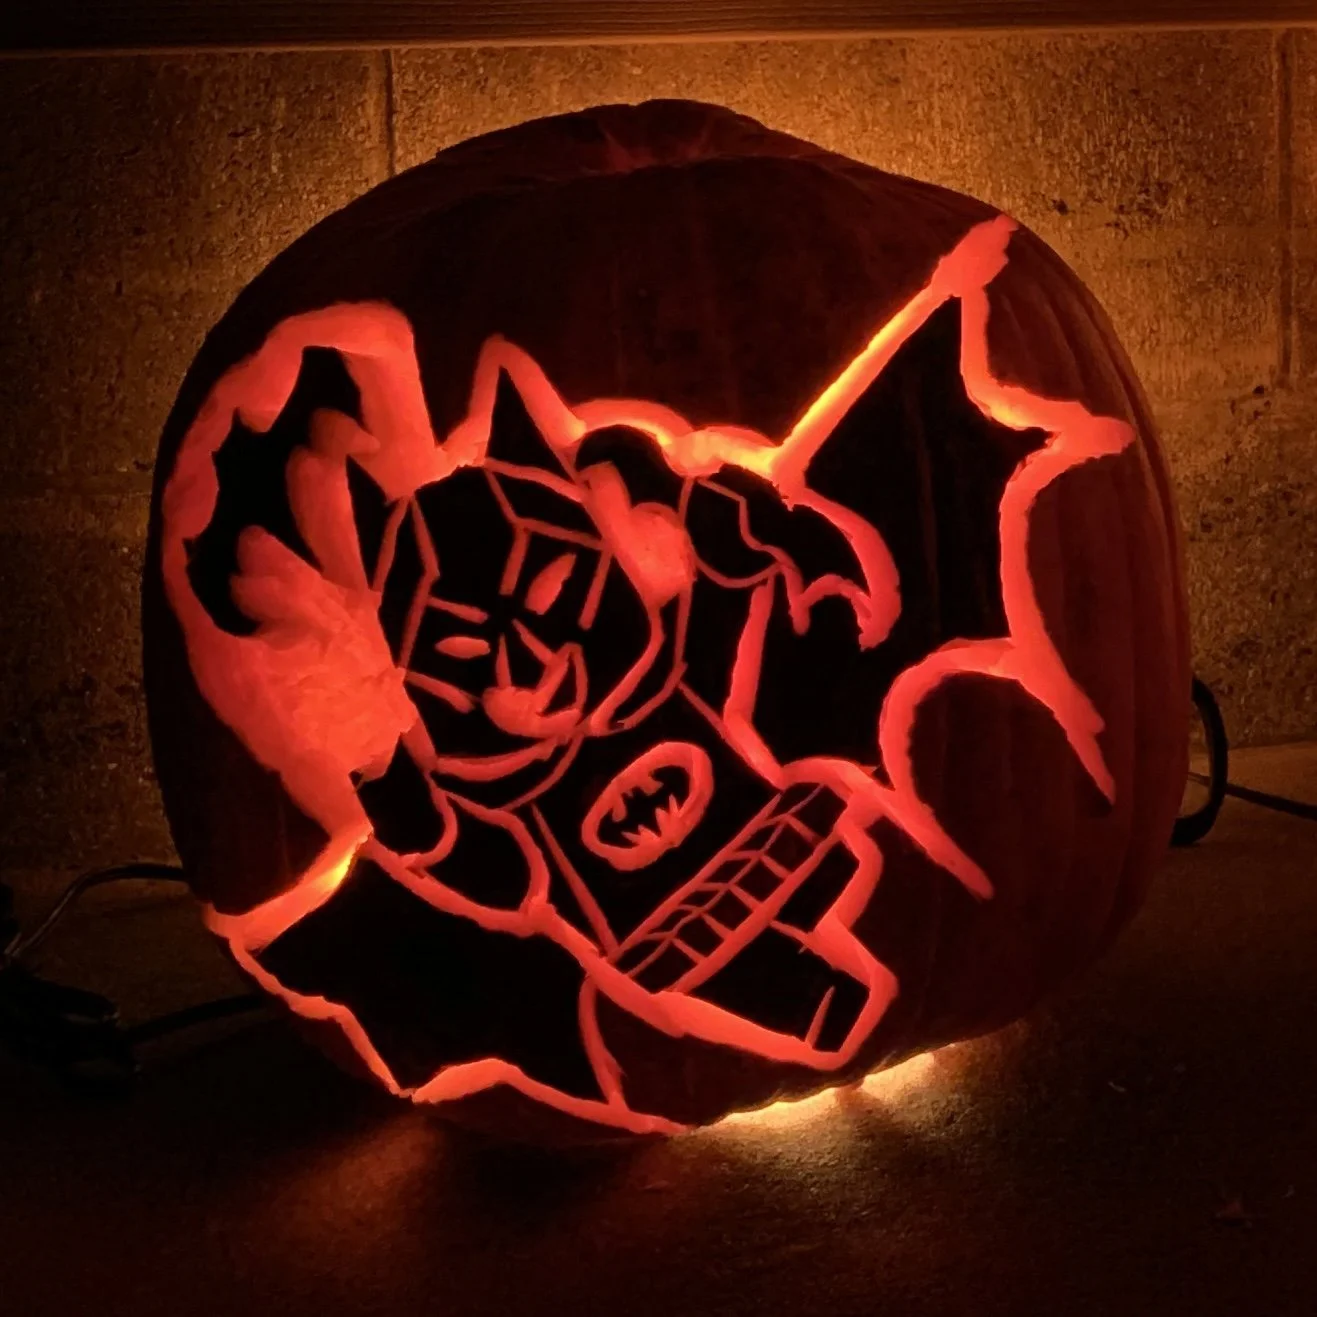
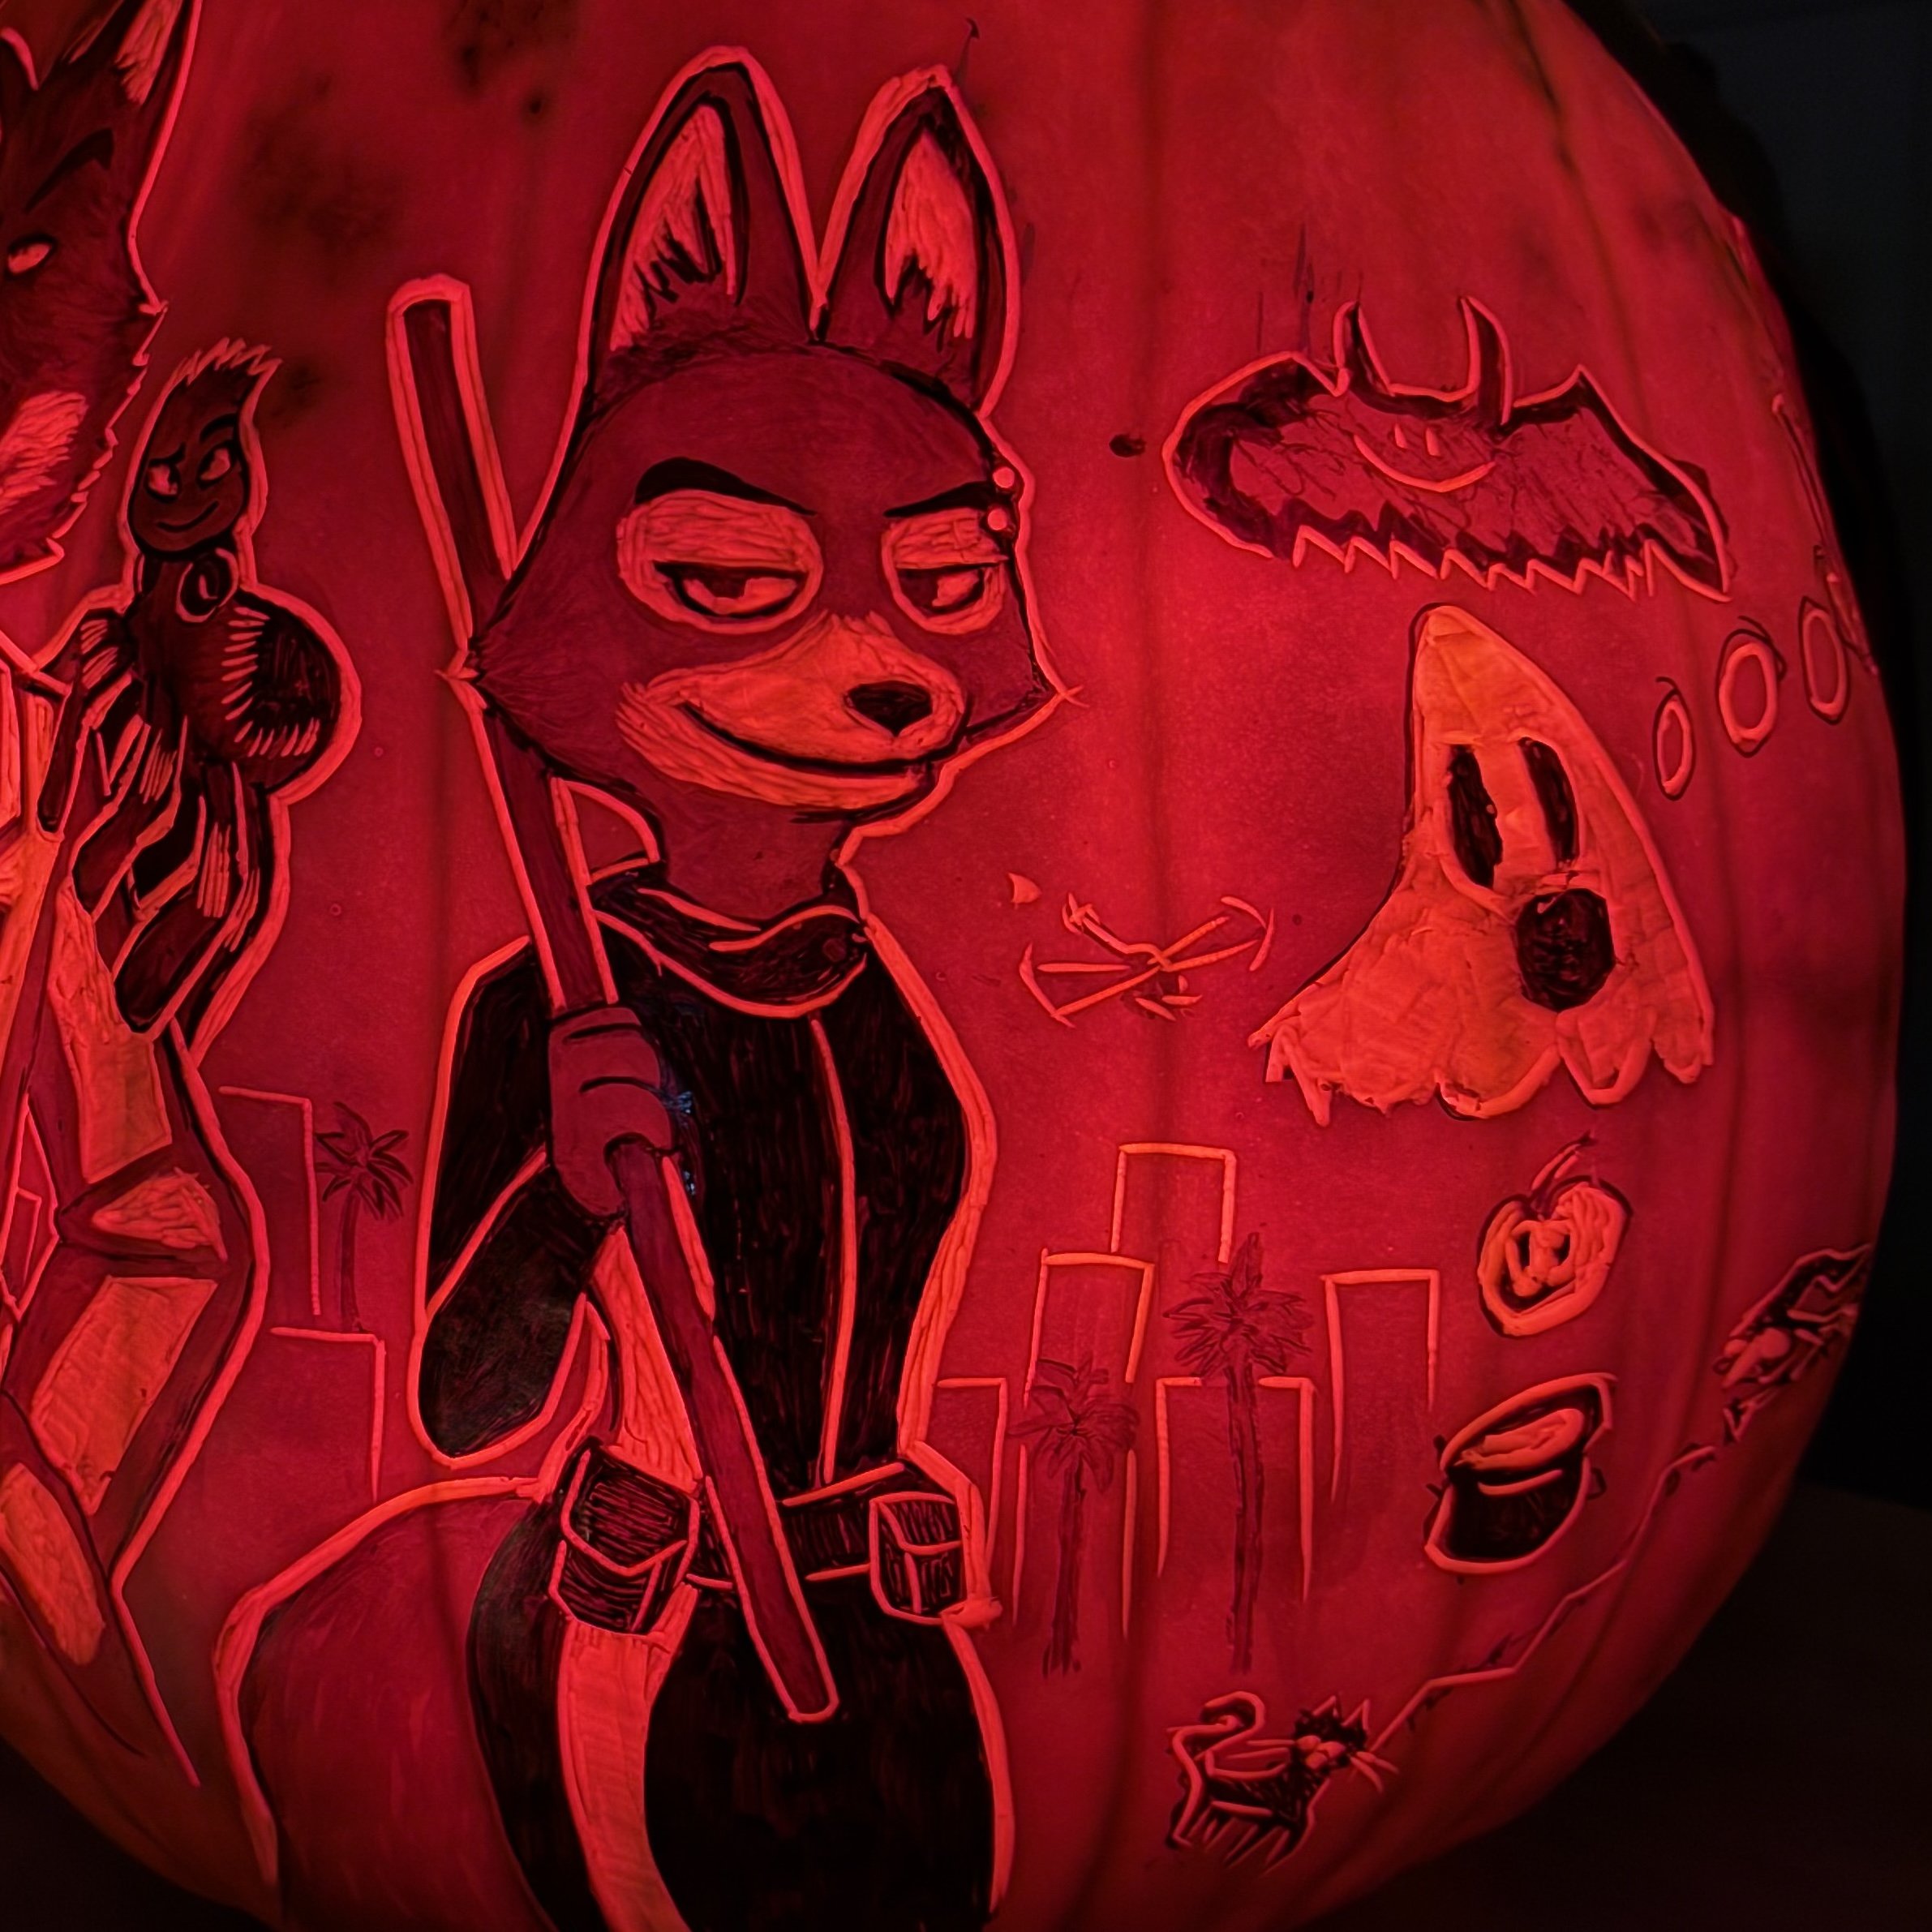
The pop culture jack-o-lanterns from this year were in a few different “skits” (that’s what the different categories within the overall theme are called): Movie Night, Monsters, Bedtime Stories, and Only In Dreams. Later in the show, it’s helpful to find a pumpkin subject that can fit multiple themes — the Maleficent pumpkin could be used in Bedtime Stories or Only In Dreams, for example. This gives the studio manager more flexibility in replacing pumpkins, depending on which section has the more urgent need for a replacement.
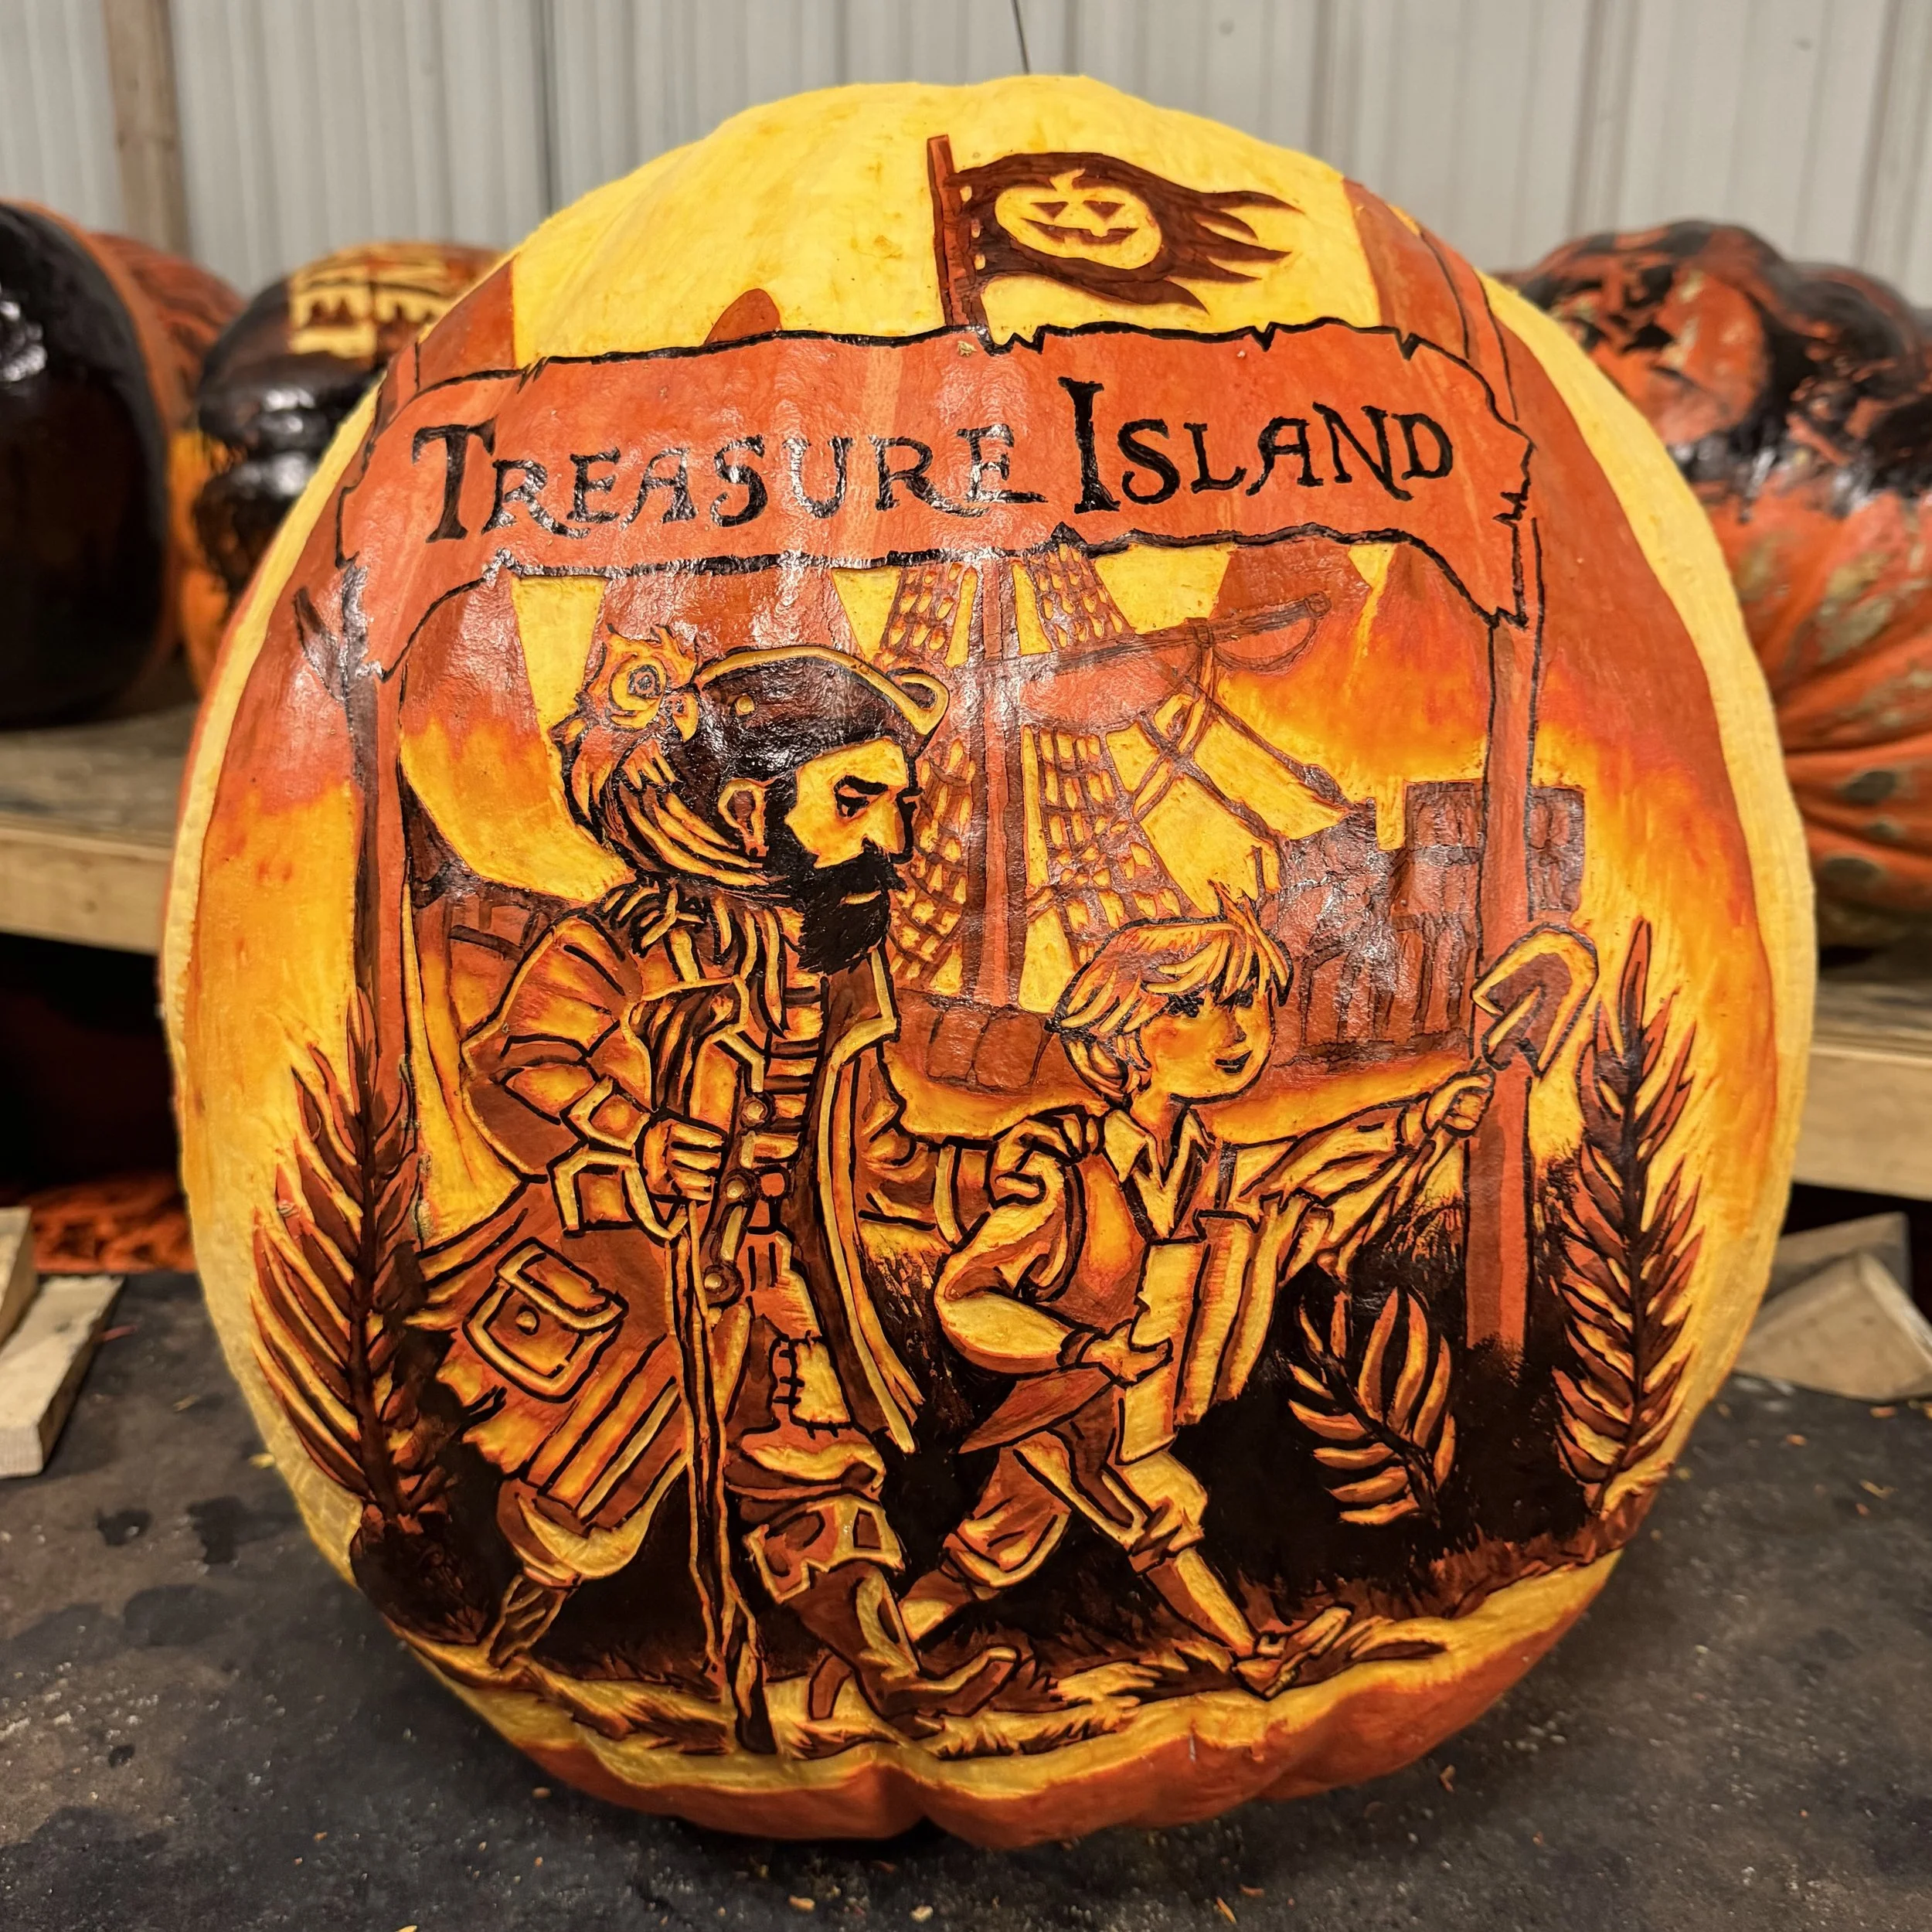
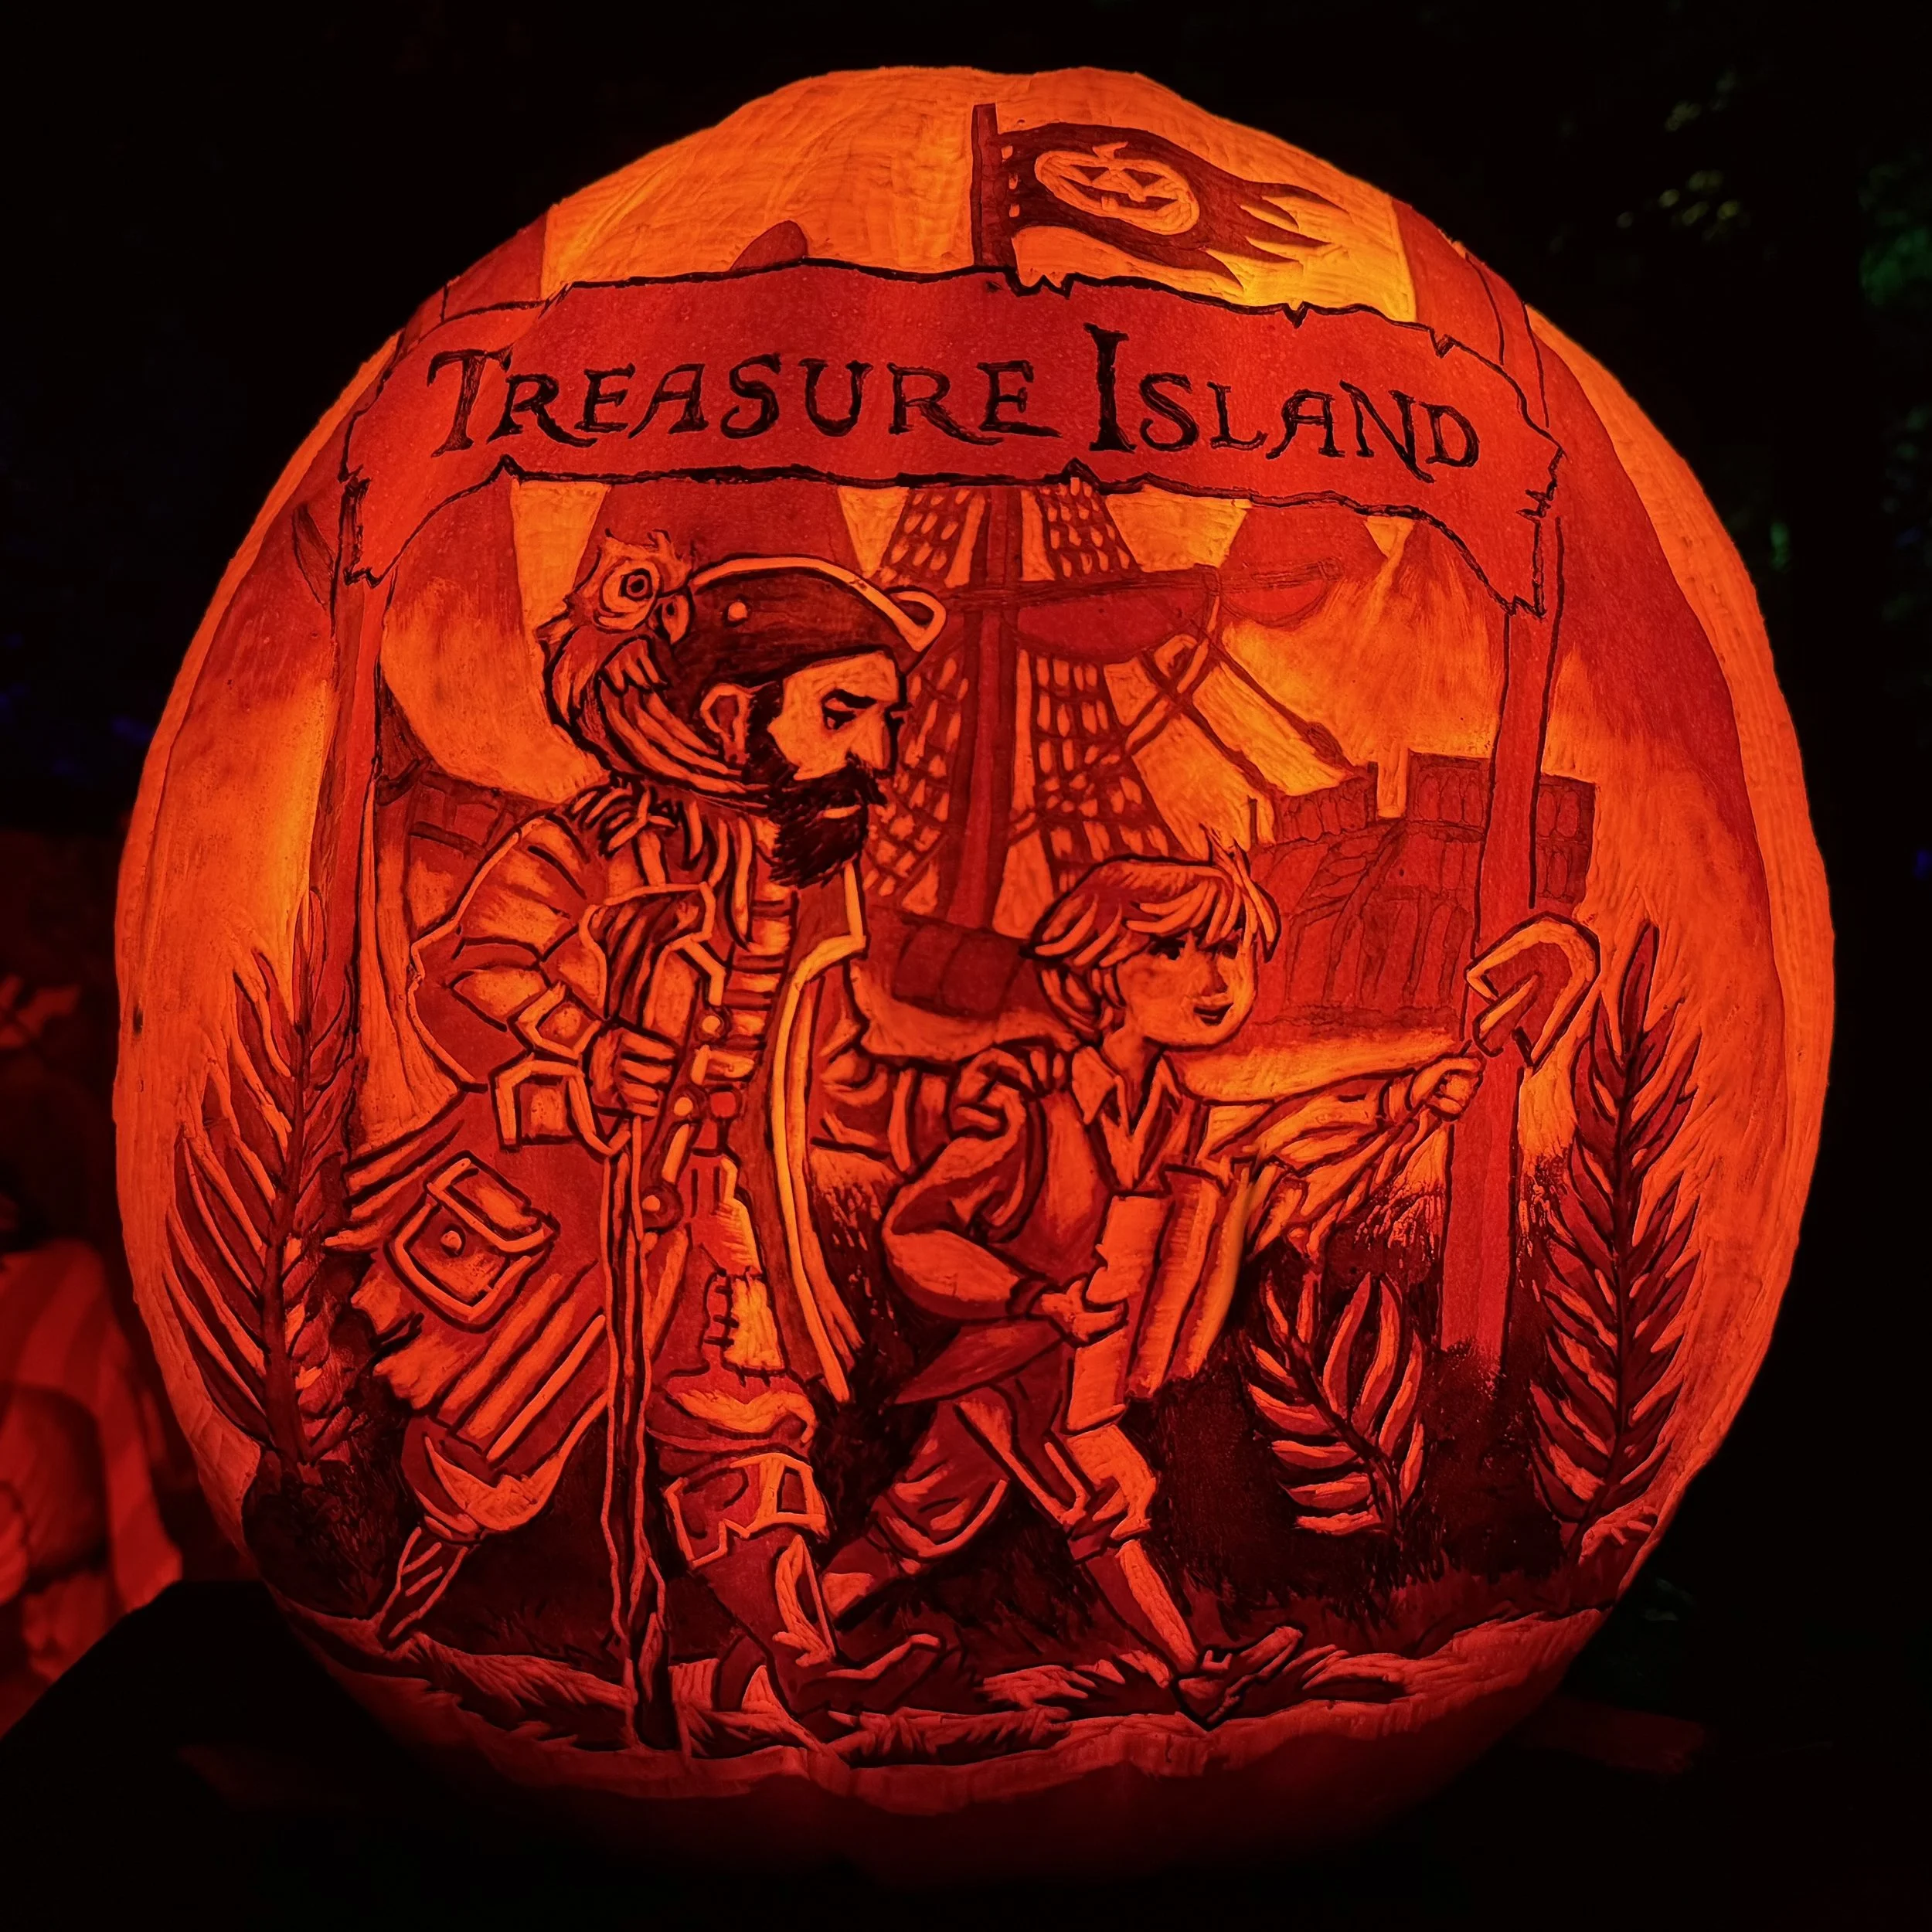
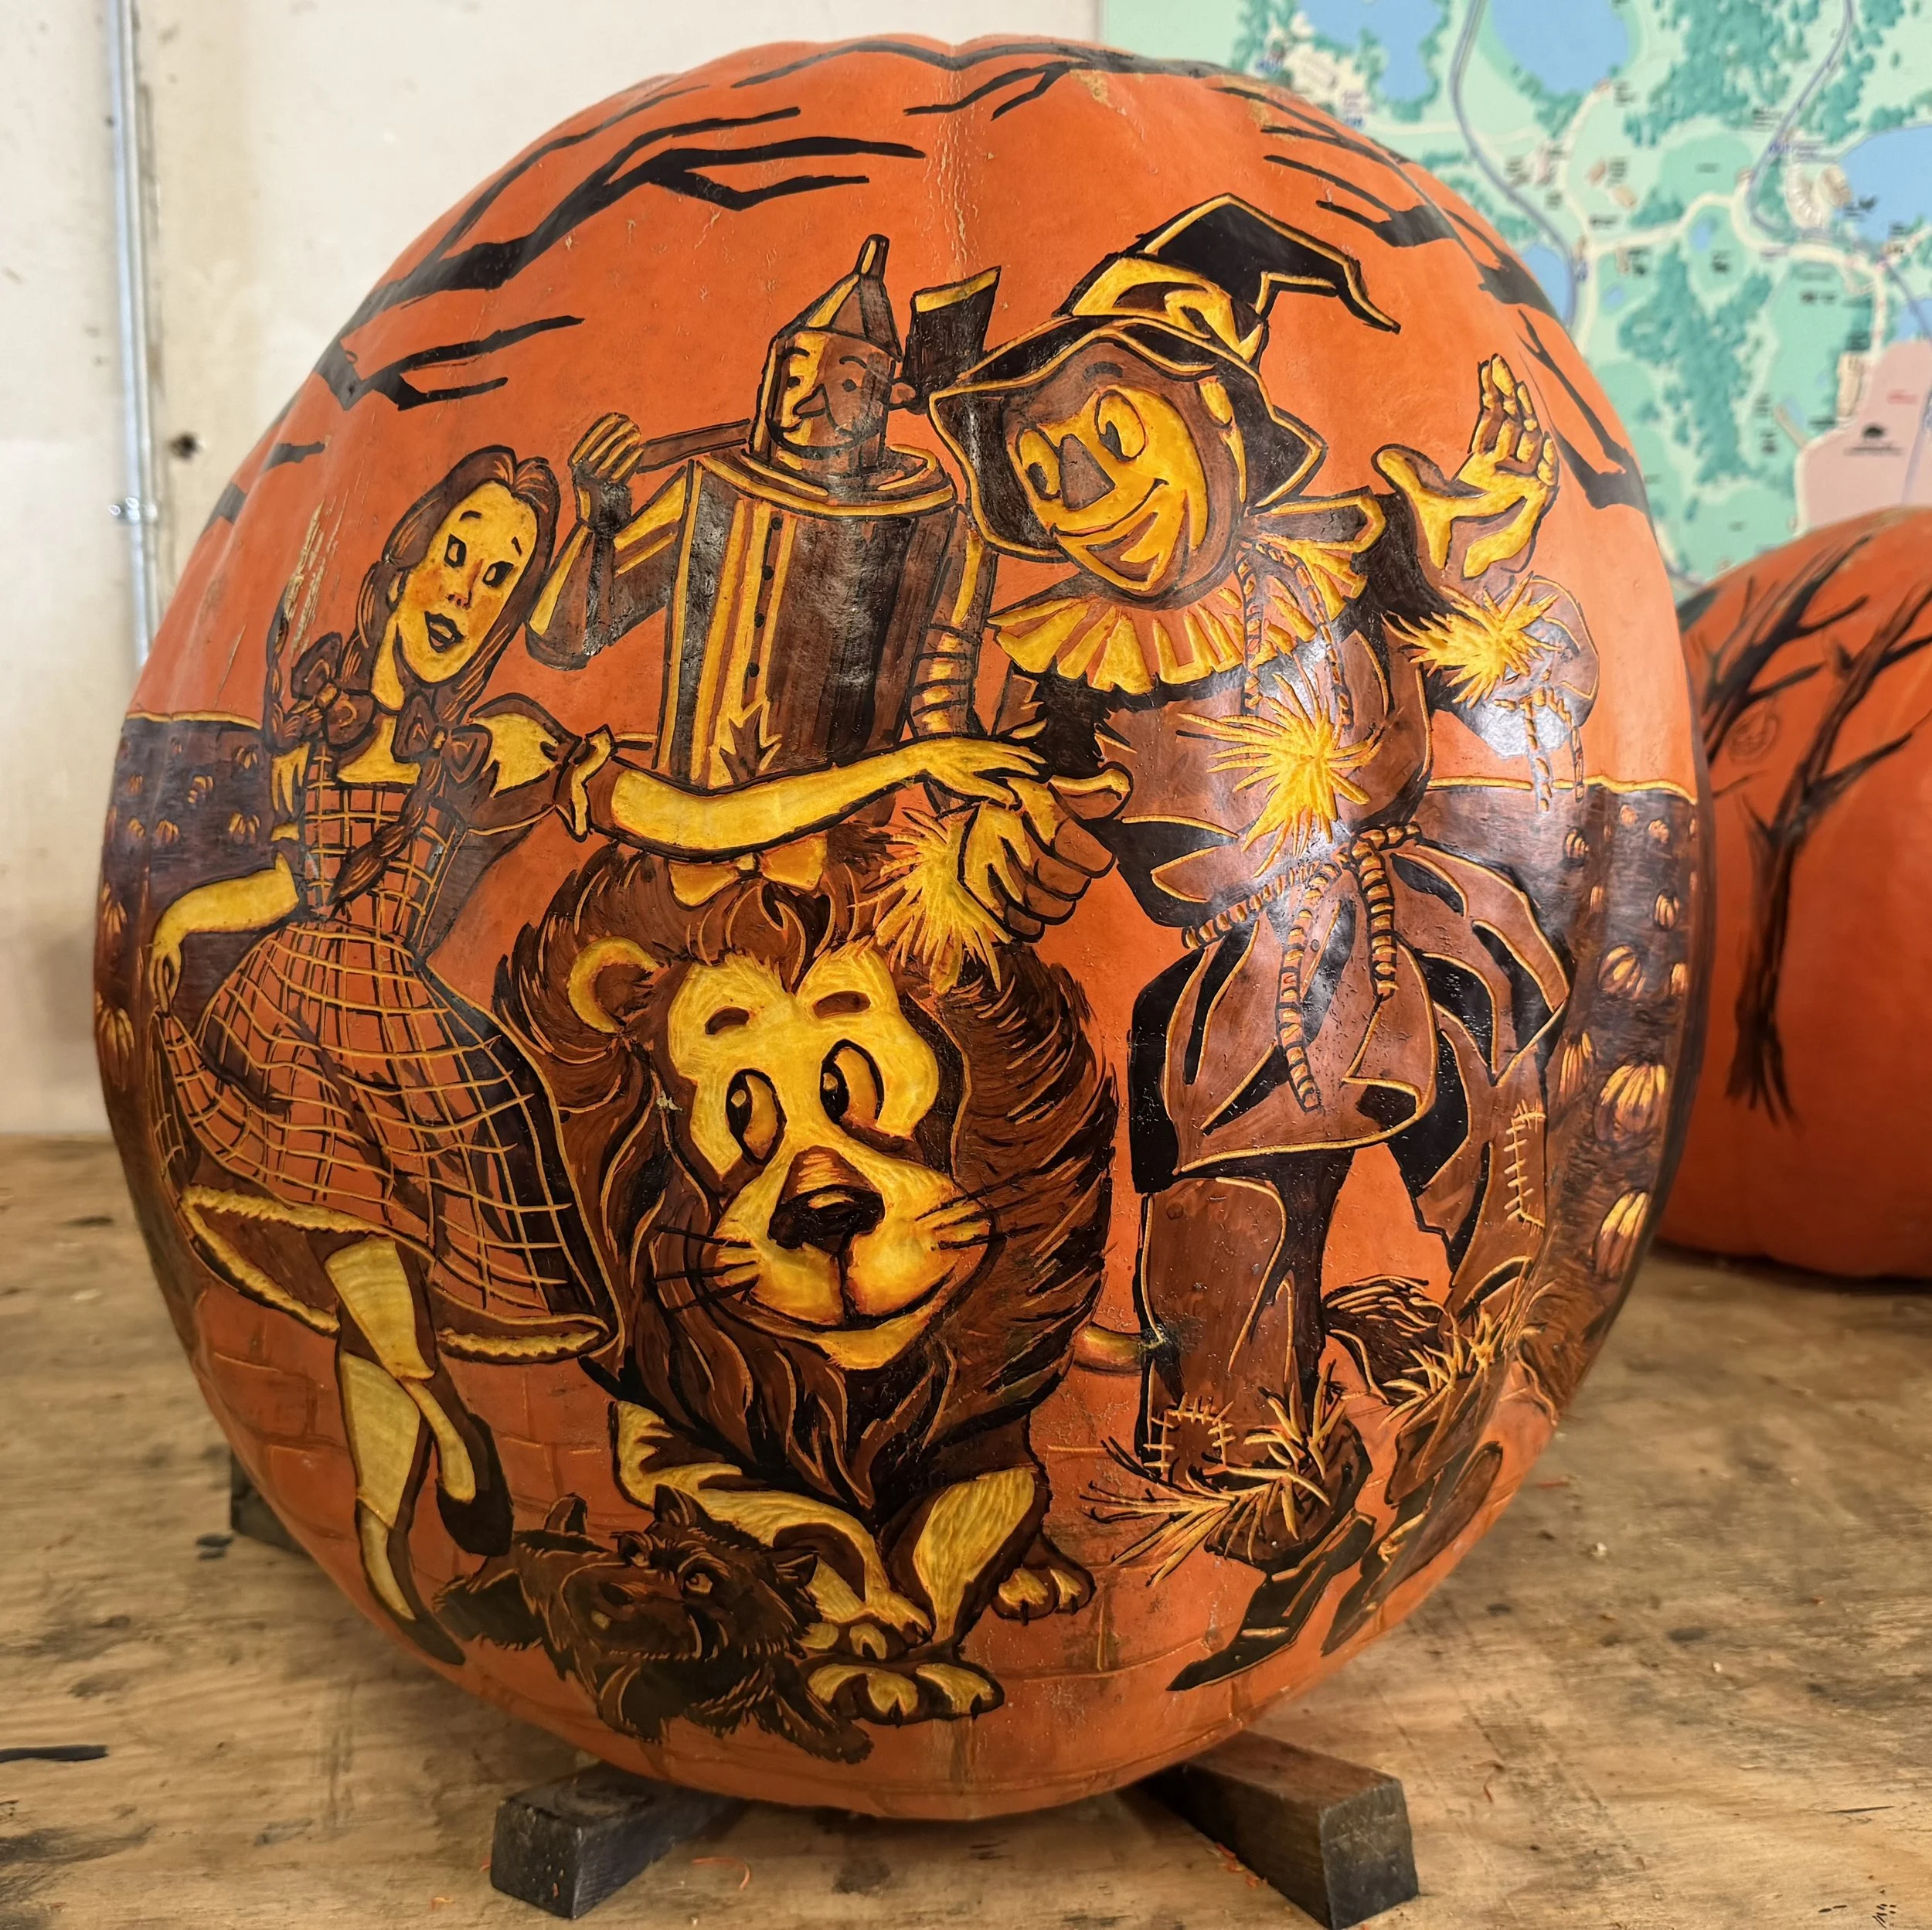
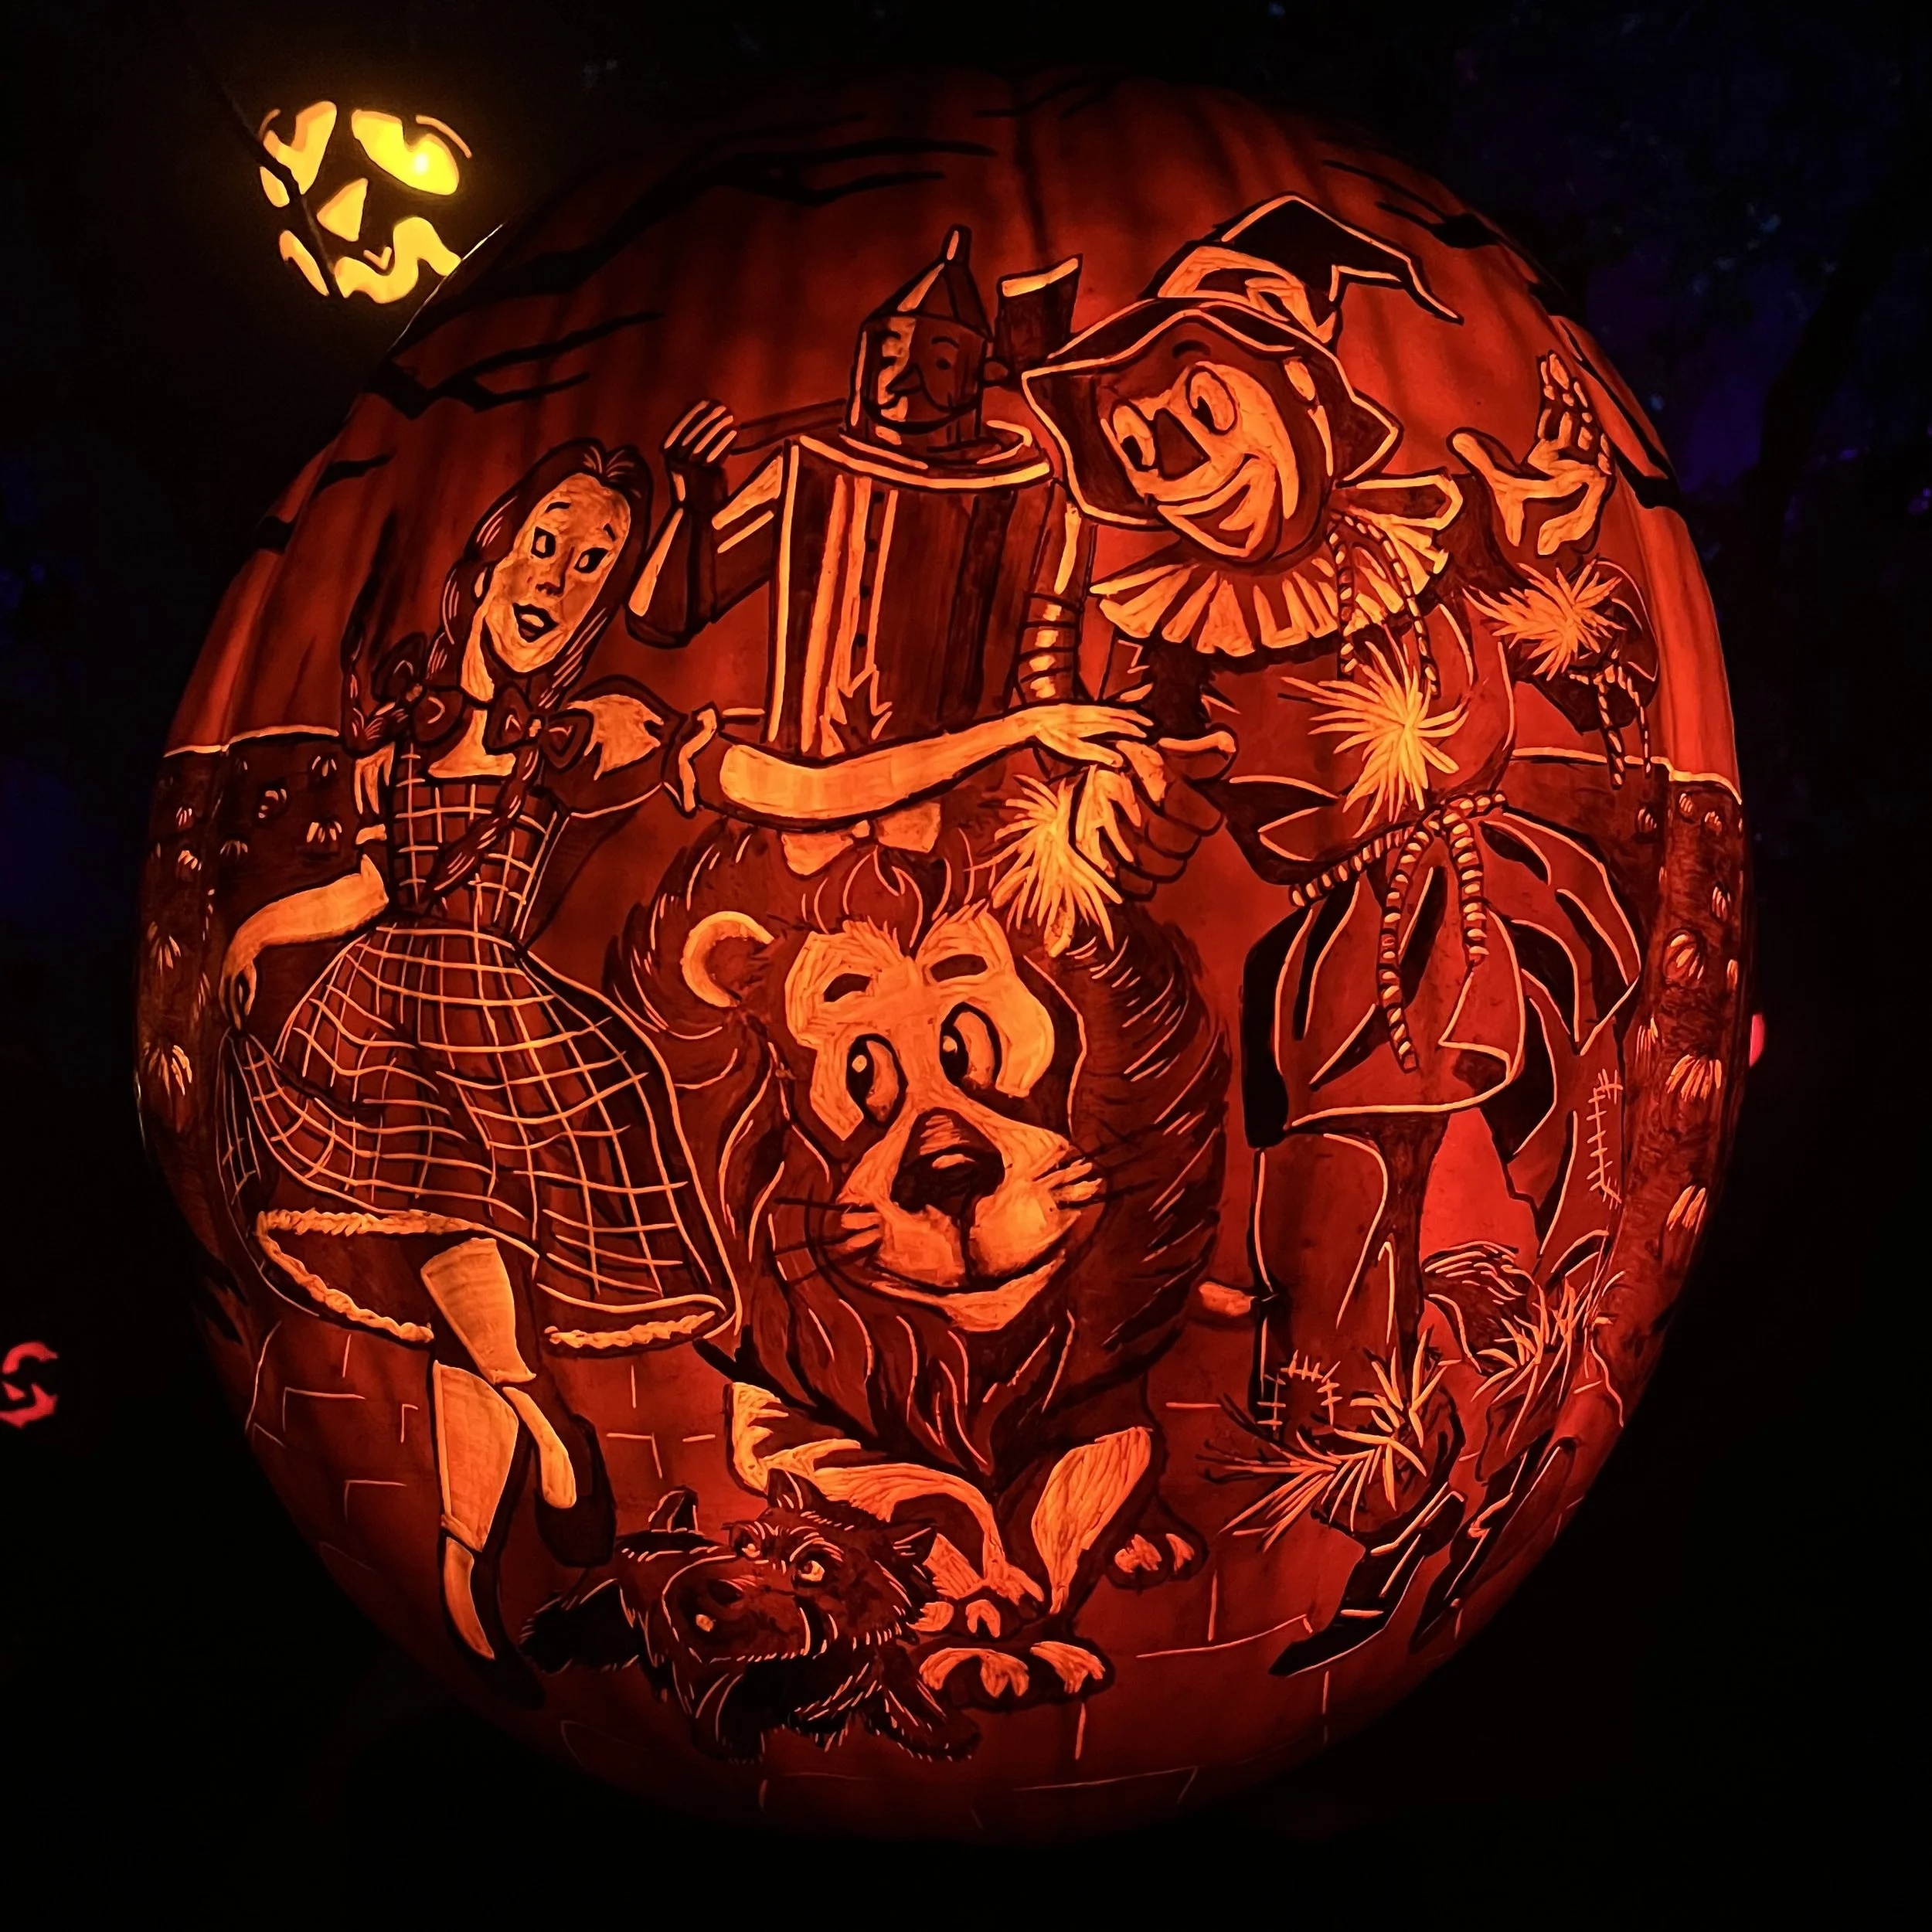
After the first round of pumpkins, it is also allowed (and encouraged) to come up with “off-book” subjects for pumpkins. Each skit starts with pre-determined subjects for each pumpkin, and there’s usually a few key subjects that are always supposed to be represented, but allowing artists to branch out and bring their own ideas to the table keeps the show feeling fresh and the artists inspired to do their best work. It’s also beneficial to have unique subjects to put out on the trail without having to worry about what pumpkins they will be next to. For example, I drew my Wizard of Oz pumpkin September 27th but didn’t get to carve it till October 19th, because there was already an earlier Wizard of Oz pumpkin on the trail that was going strong — in contrast, the Treasure Island and Maleficent pumpkins were both draw/carves (pumpkins that are drawn and carved without an extended gap between the stages) that I picked off-book subjects for, and these were able to be placed on the trail as early as next day to replace any tired pumpkin in their respective skits.
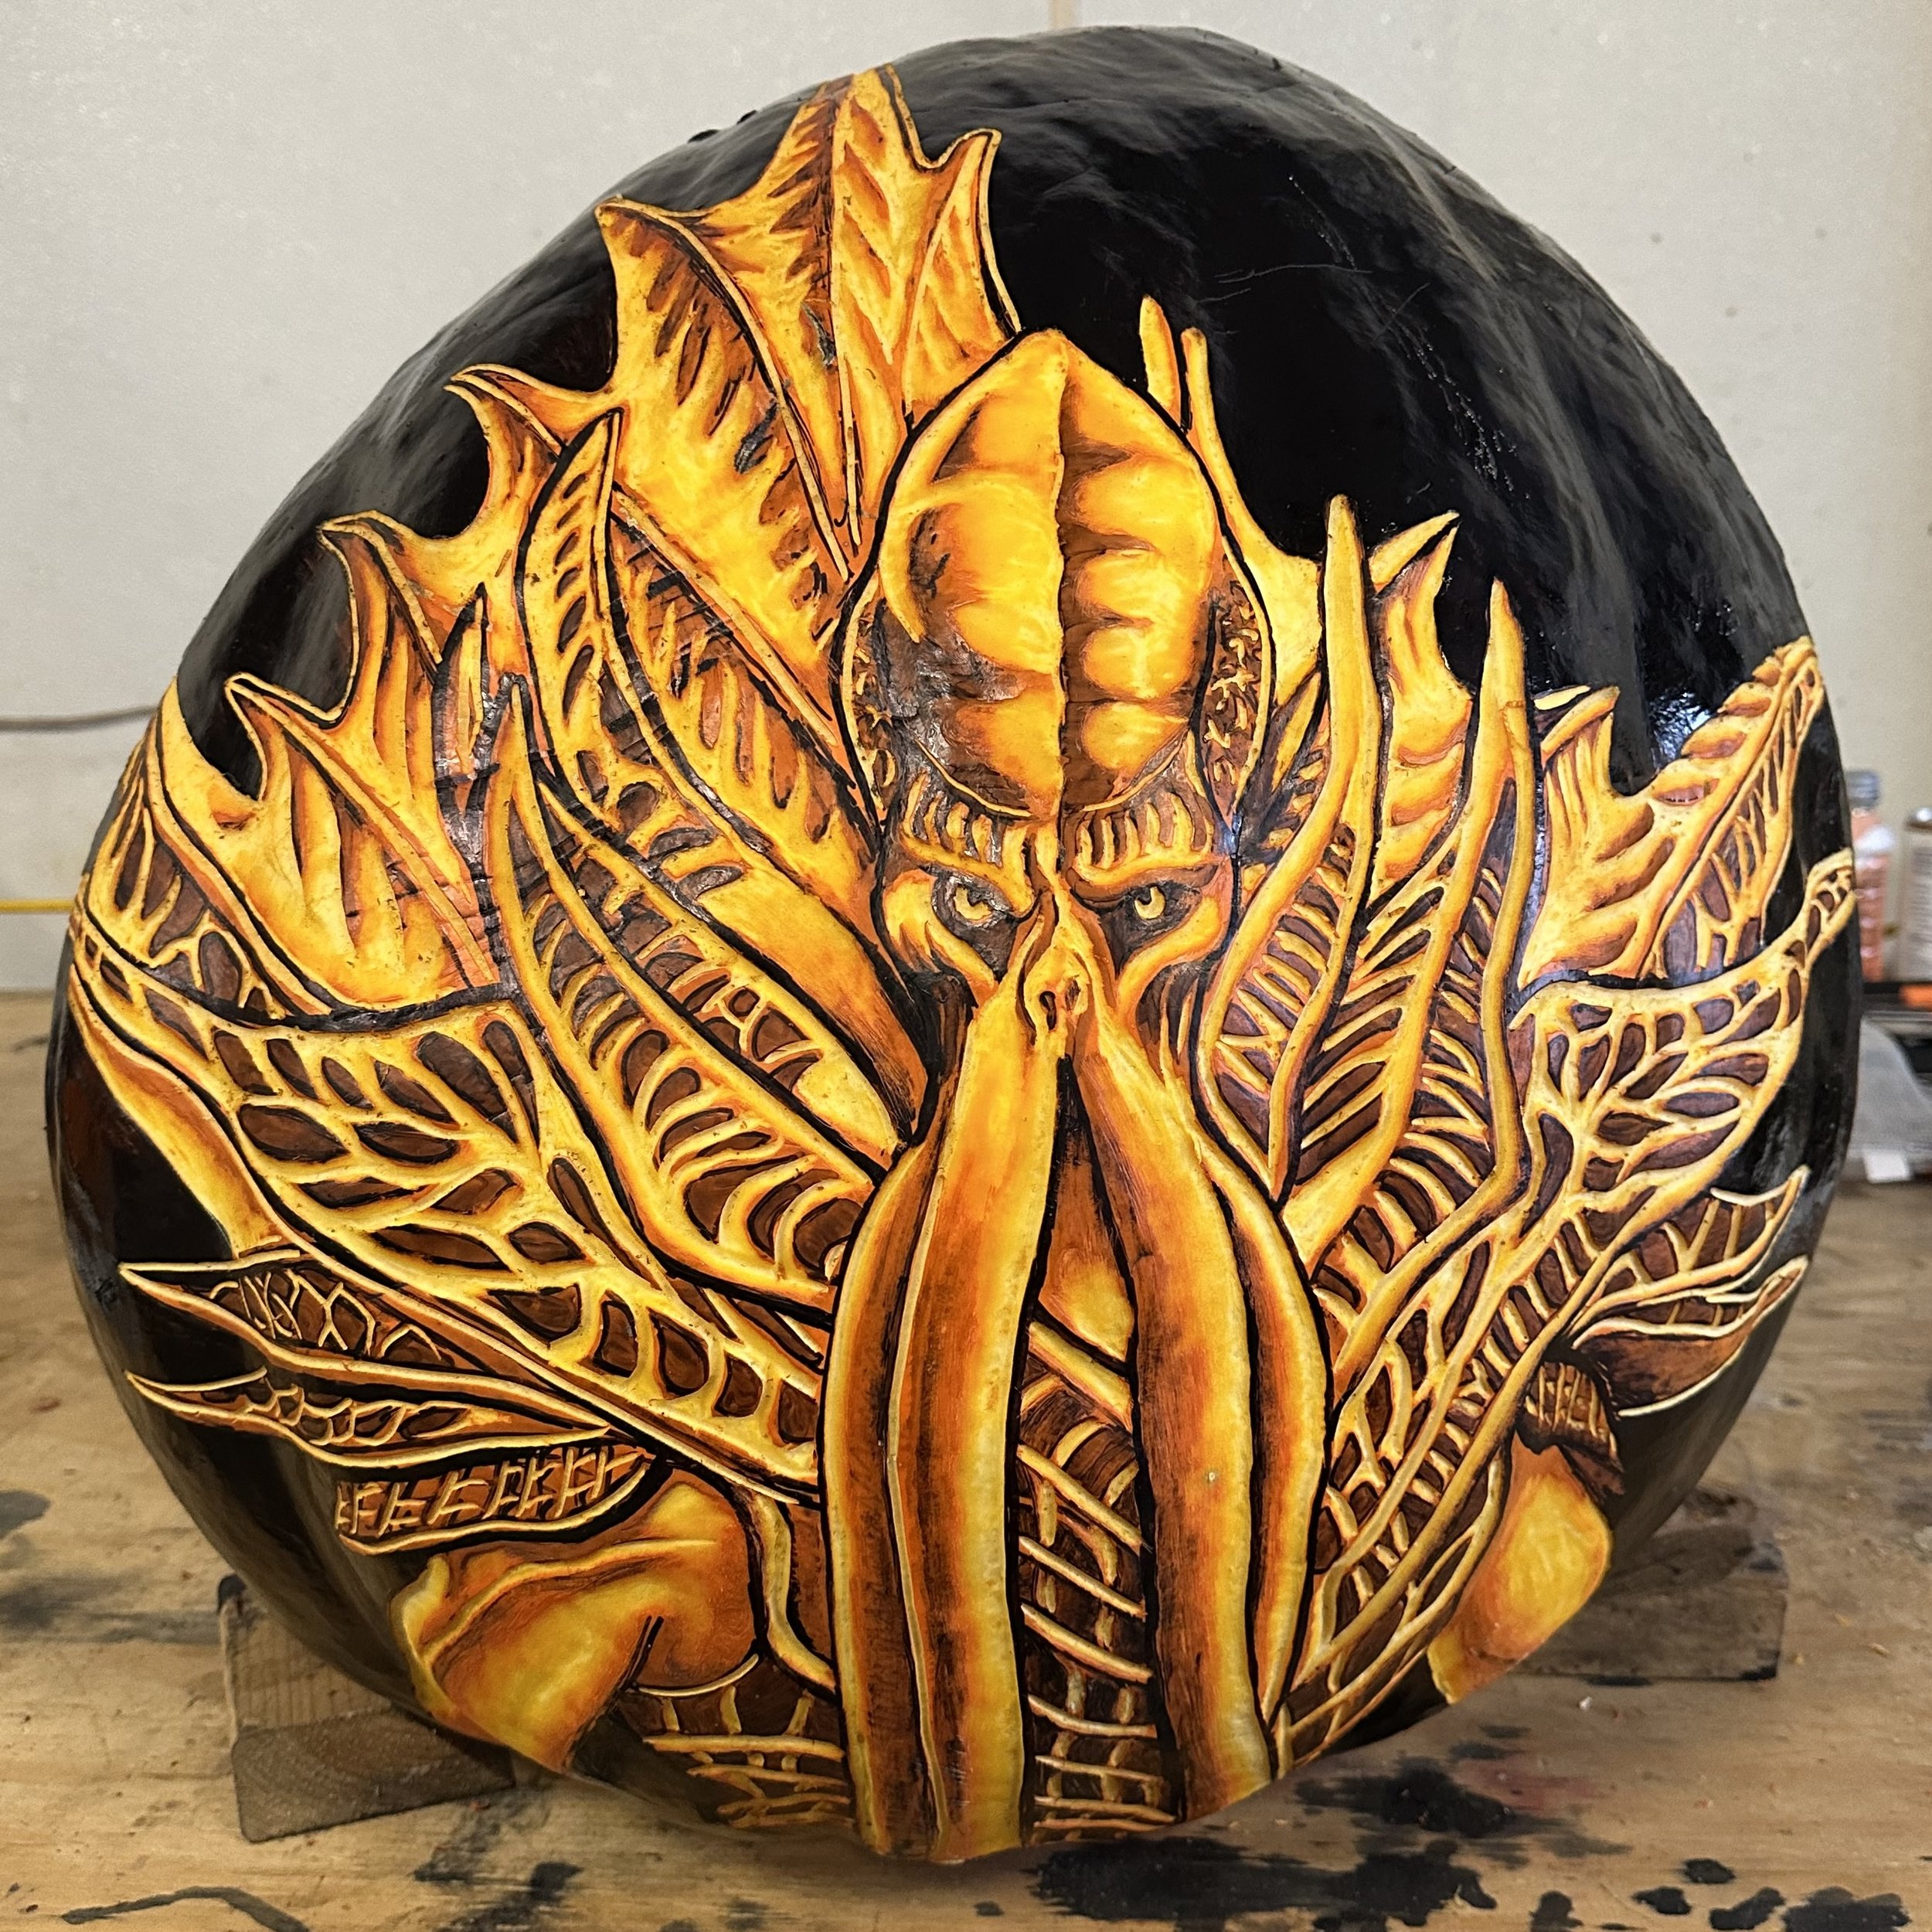
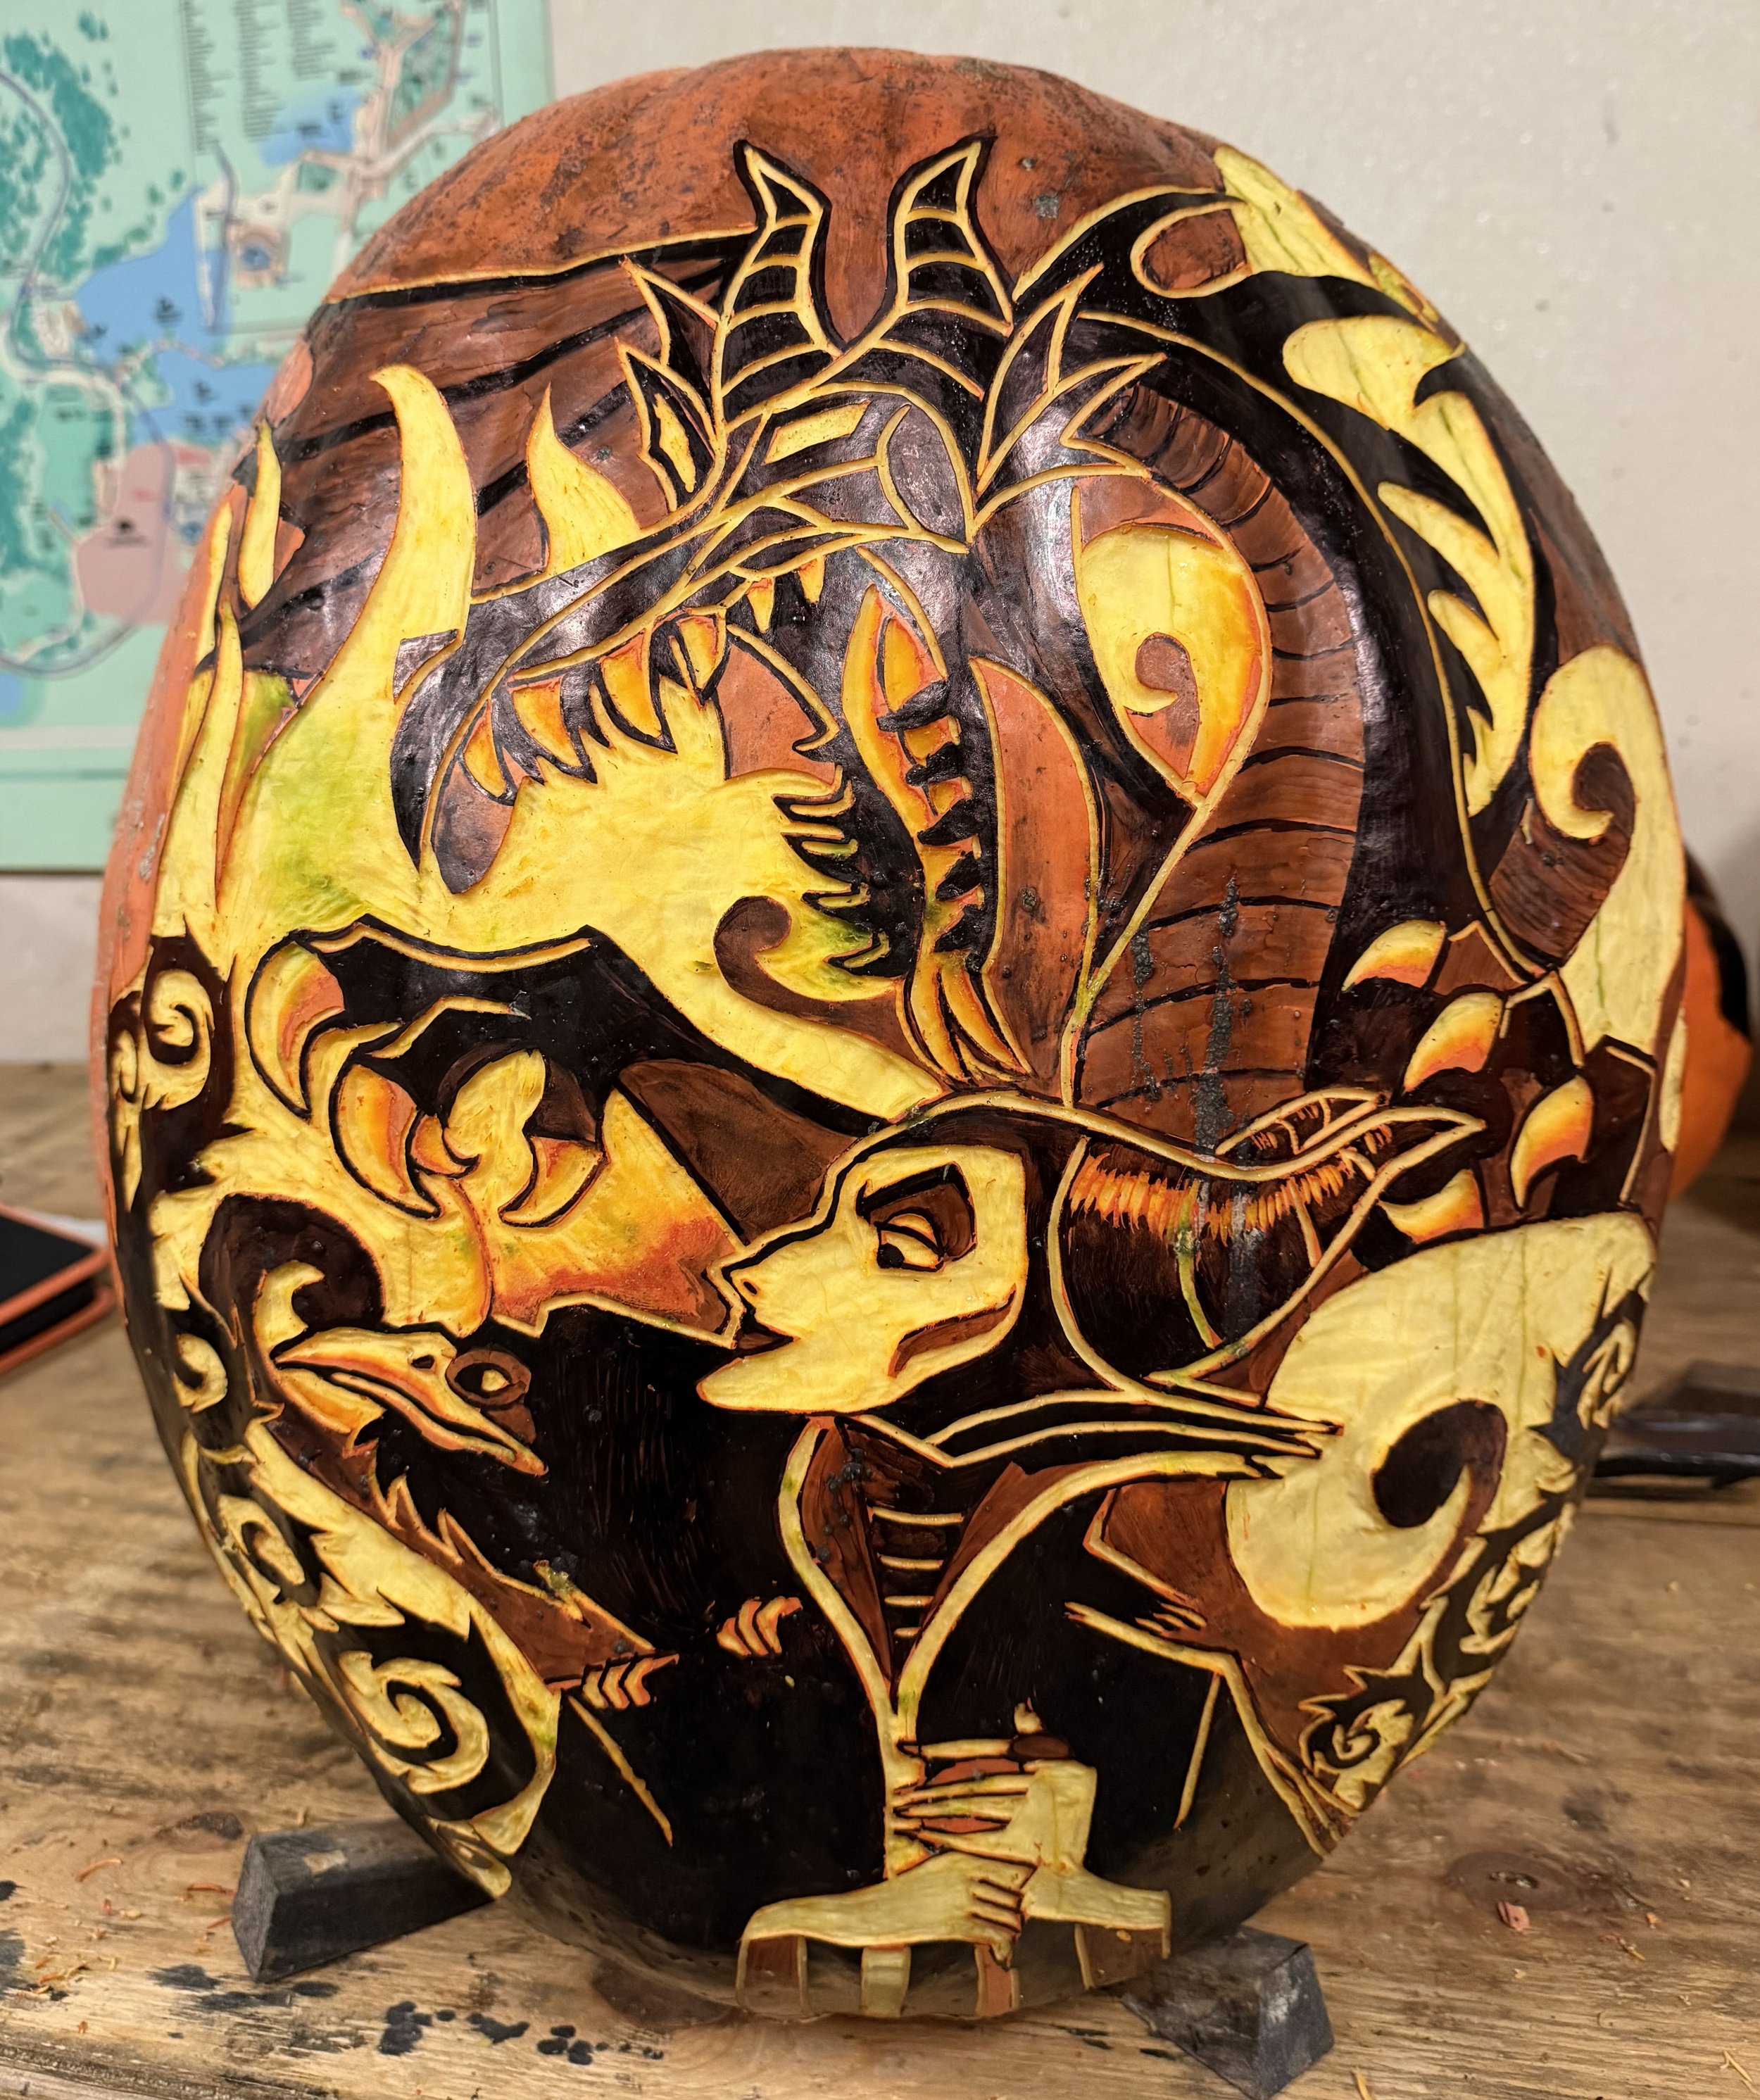
It is really hard to pick a favorite from this group — they were all a lot of fun to work on for different reasons! I like how the softer shading quality and almost painterly look came out on the Treasure Island pumpkin. The Mind Flayer pumpkin took a lot of precise detail work, and I really love how it looks lit up (sometimes the contrast in the lit pumpkin doesn’t quite live up to my hopes, and that was not the case this time!). Maleficent had a lot of crazy swirling details and I liked that composition a lot. KPop Demon Hunters was the “viral” pumpkin of this batch since the movie came out this year and has been super popular, and it’s always fun getting to do a pumpkin that can ride the hype wagon. The Wizard of Oz pumpkin (my last carve of the season) I was aiming for a “less is more” approach — normally I will either black out or back carve large background areas, but the whole sky and much of the yellow brick road was unadorned pumpkin skin. The studio manager gave me a great suggestion for how to handle the brick on the road without over-rendering it and I’m super pleased with how it turned out. It was also fun introducing a “spooky” setting and having the characters walking through a pumpkin patch with bare trees instead of the traditional poppy field.

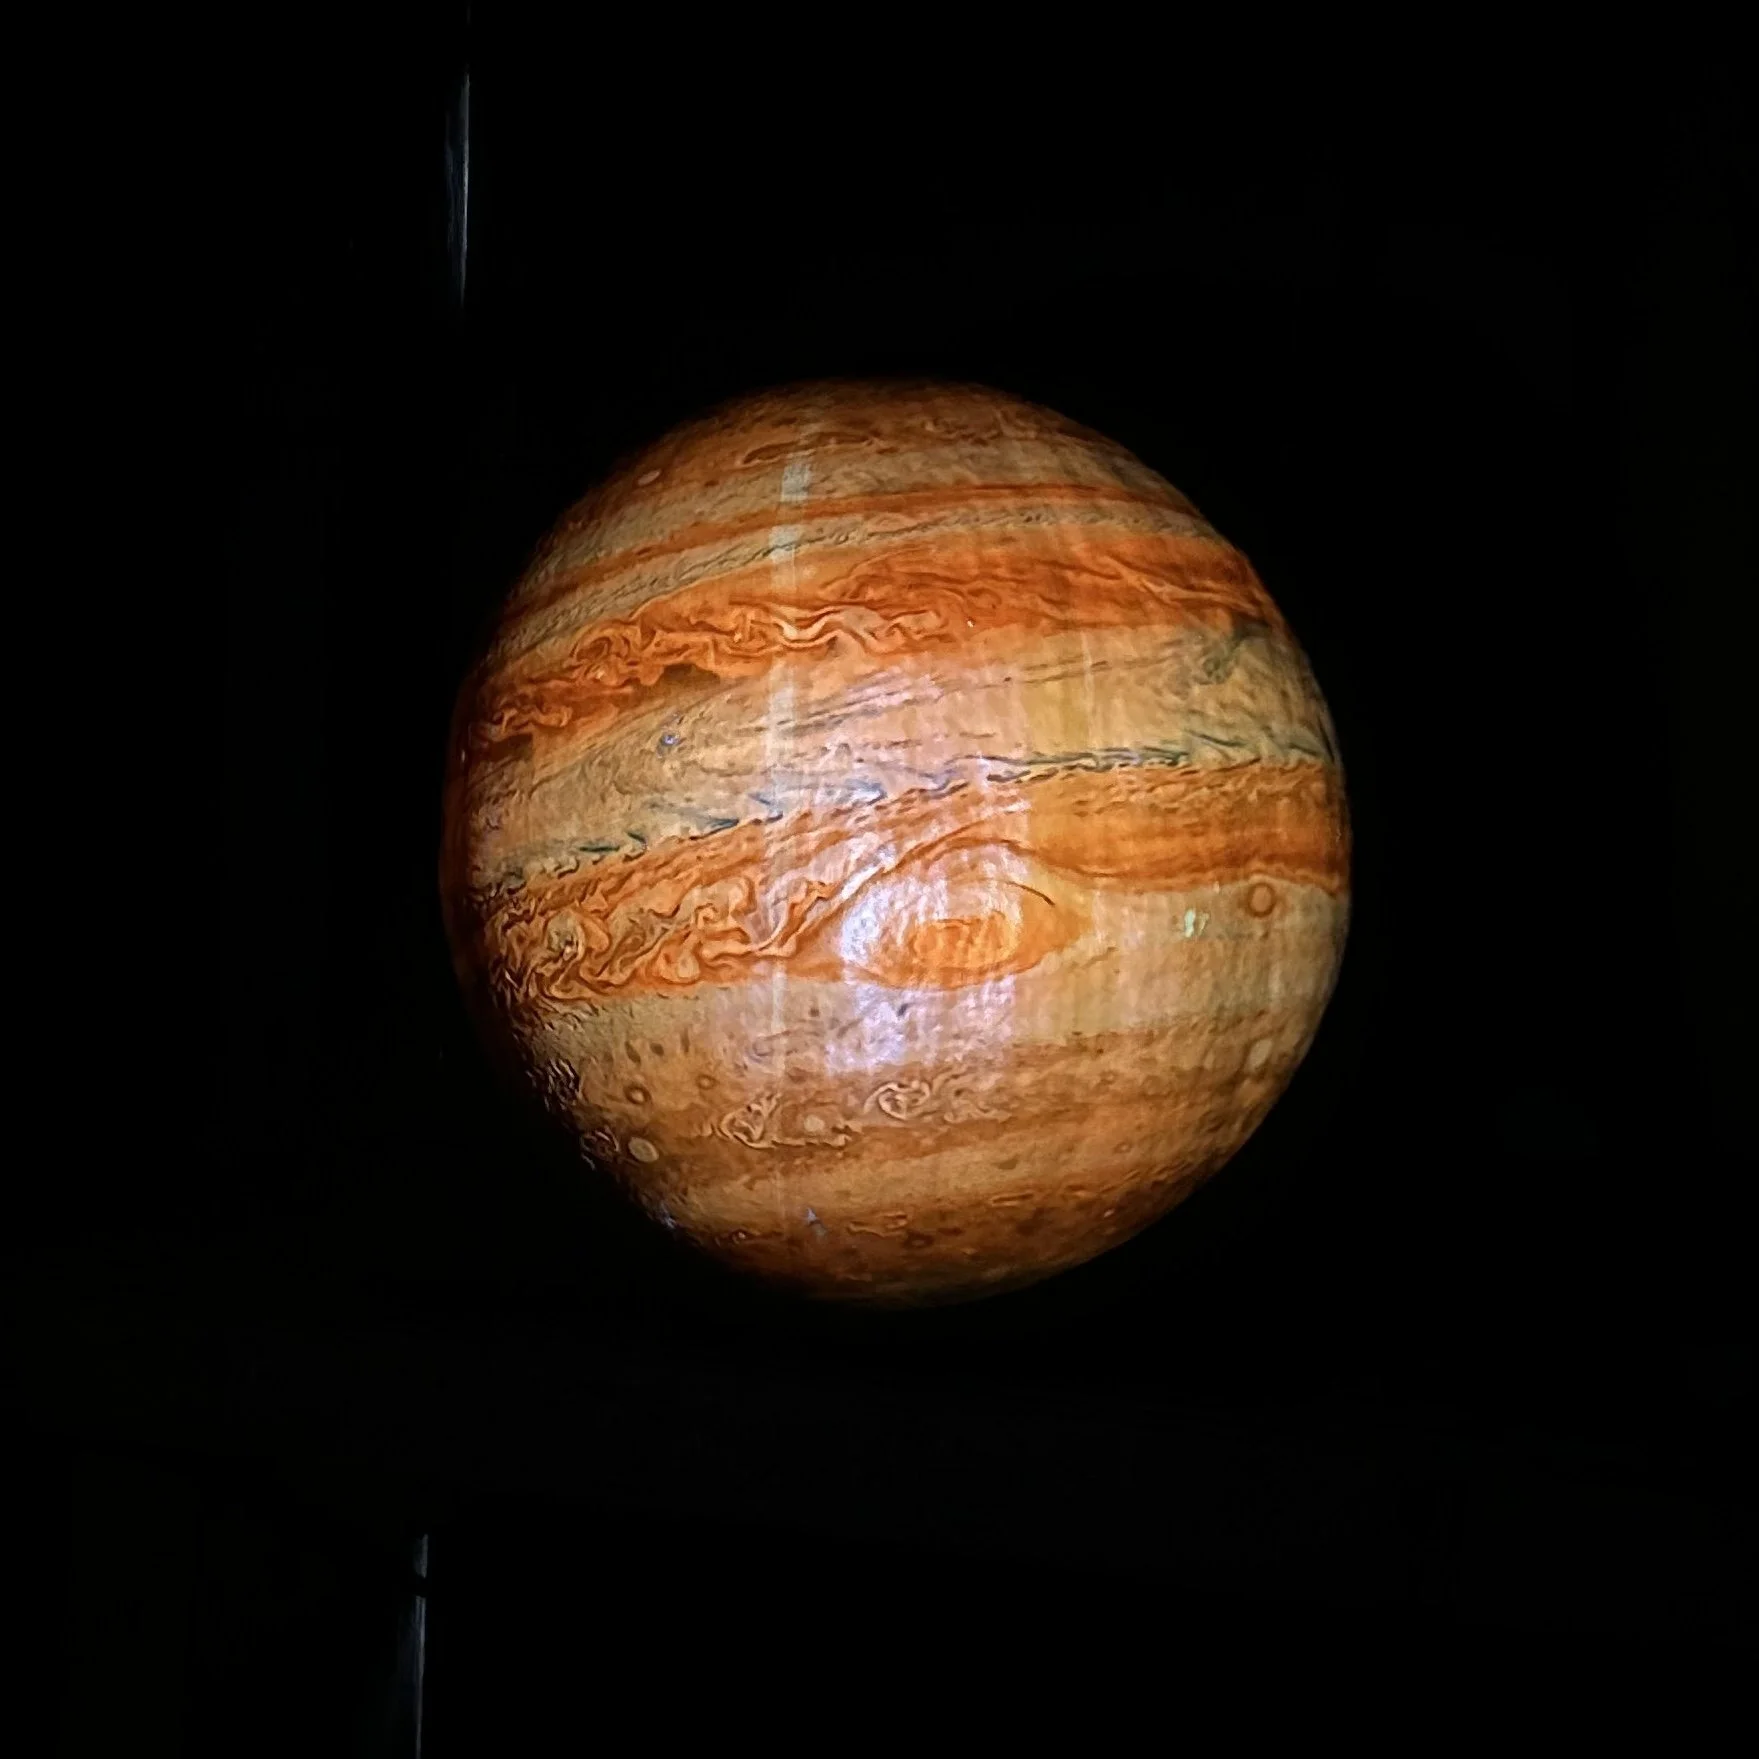
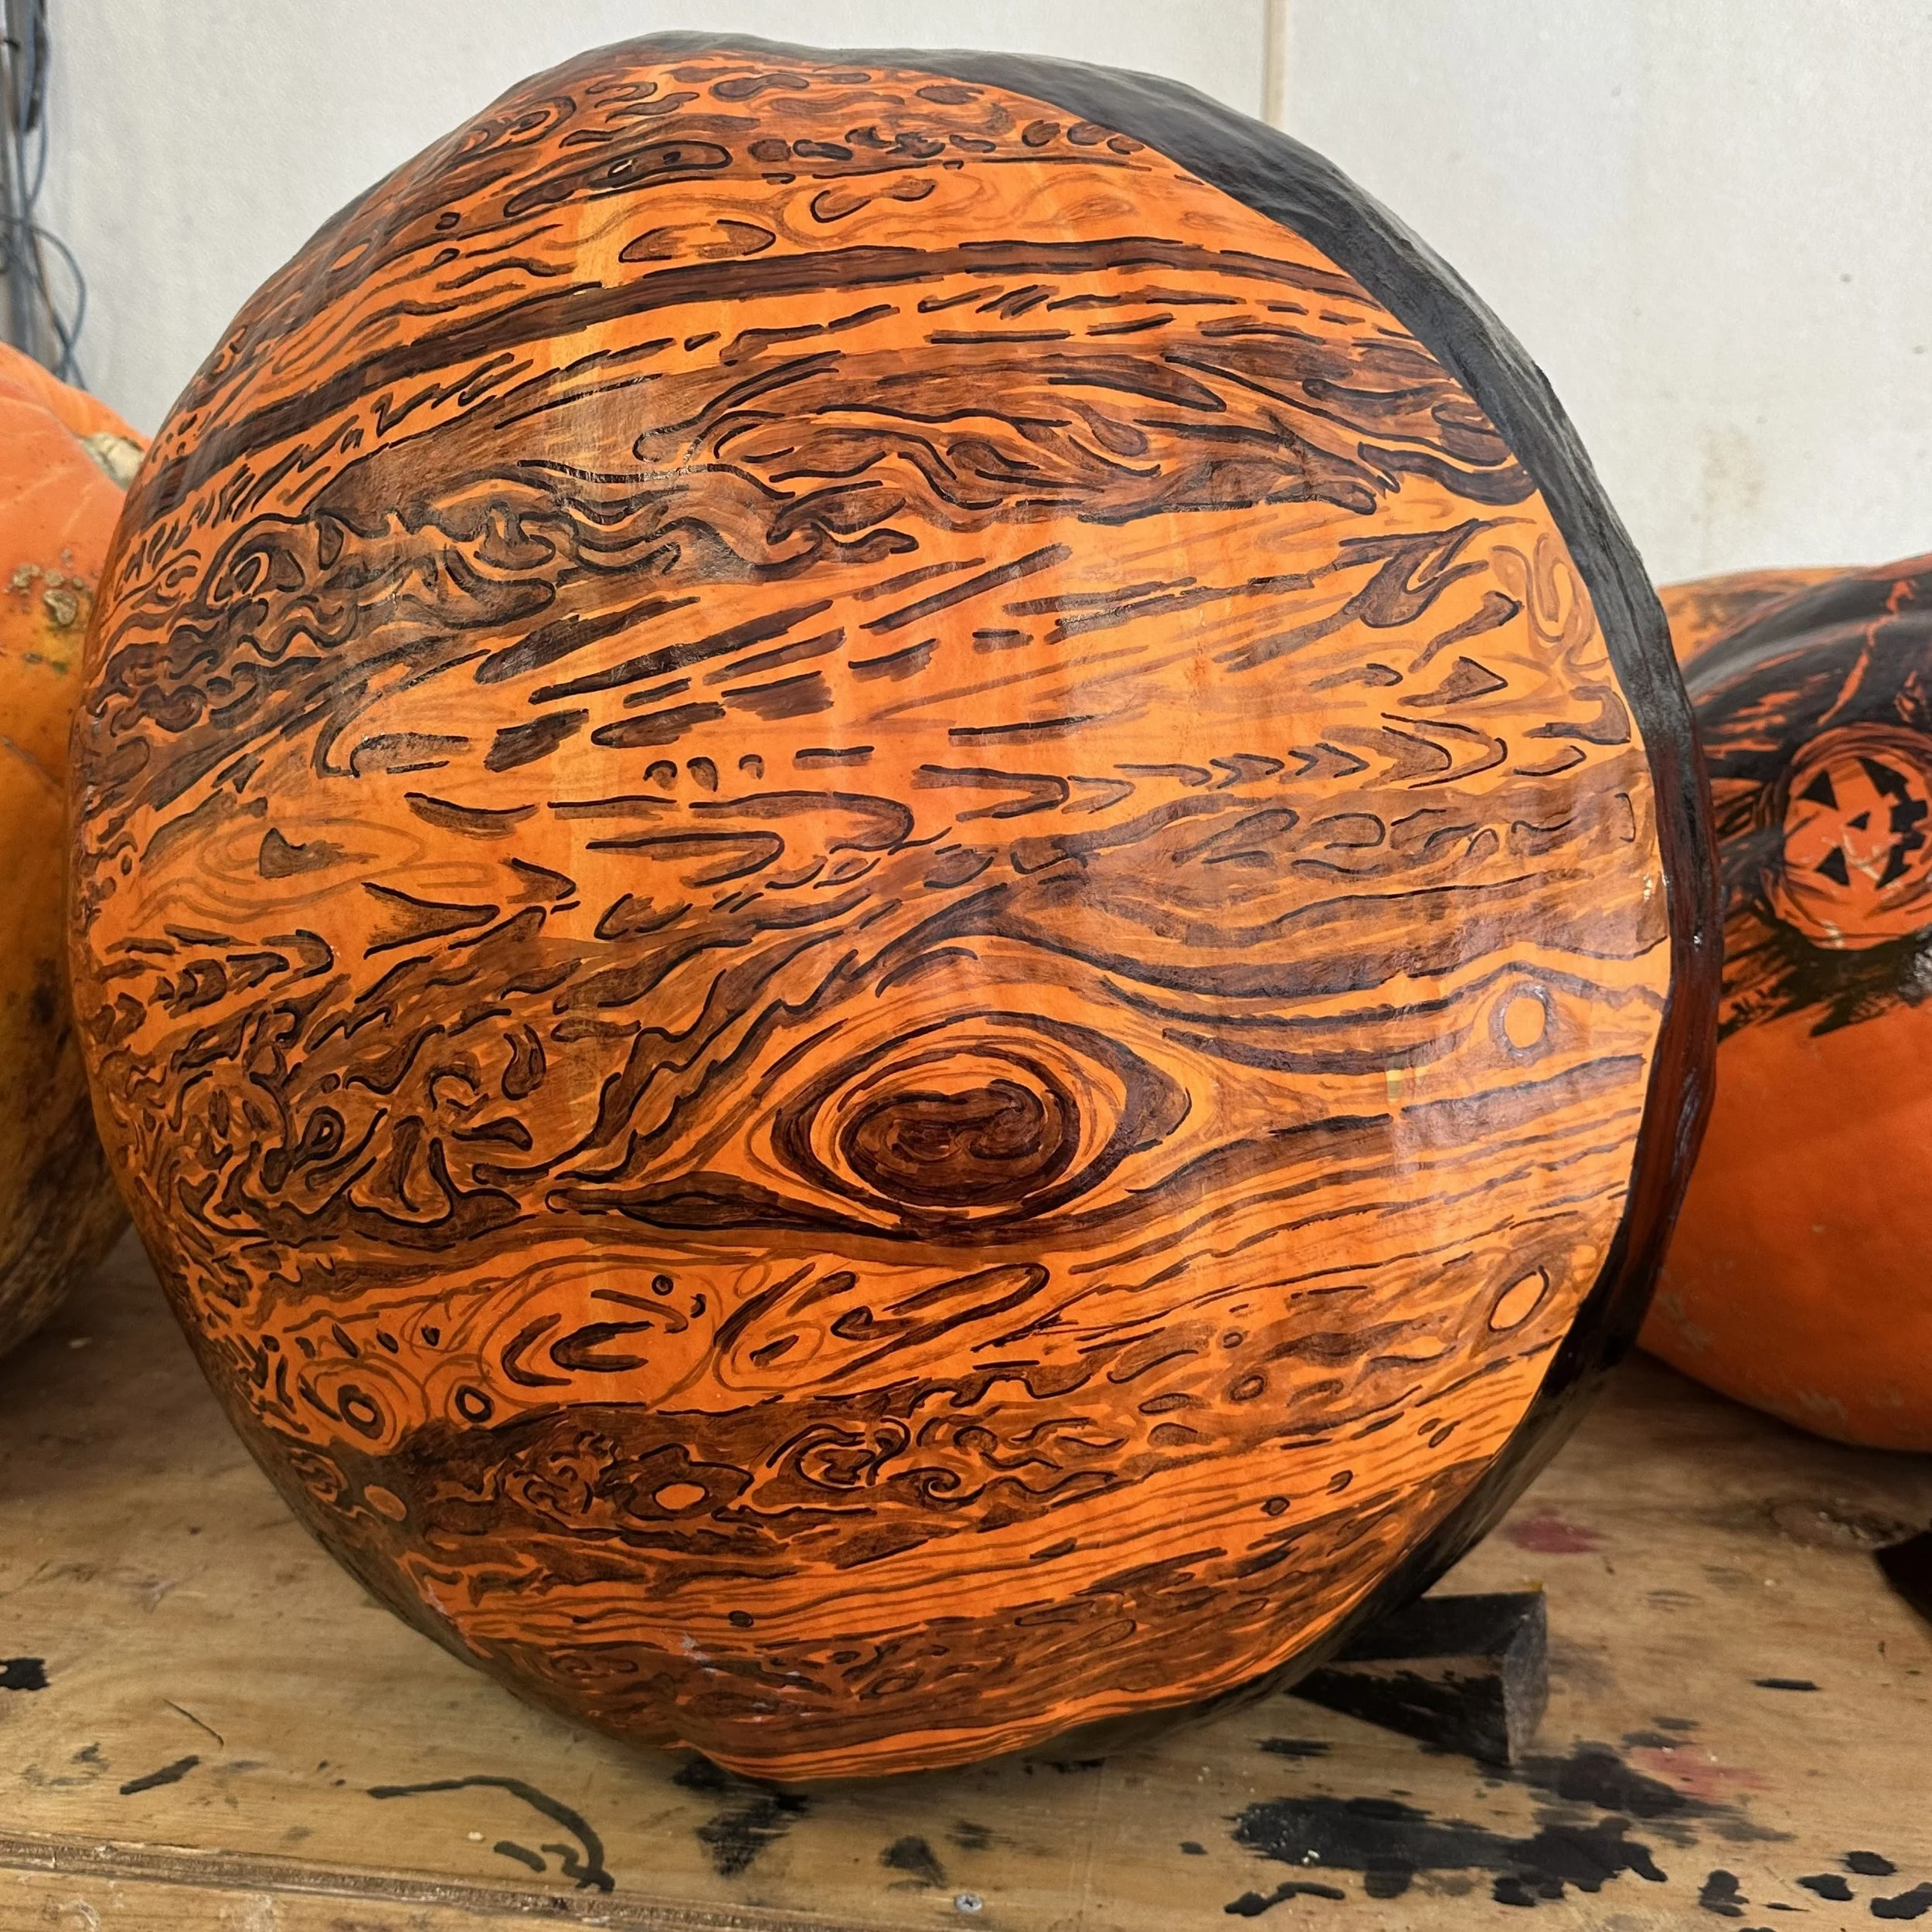
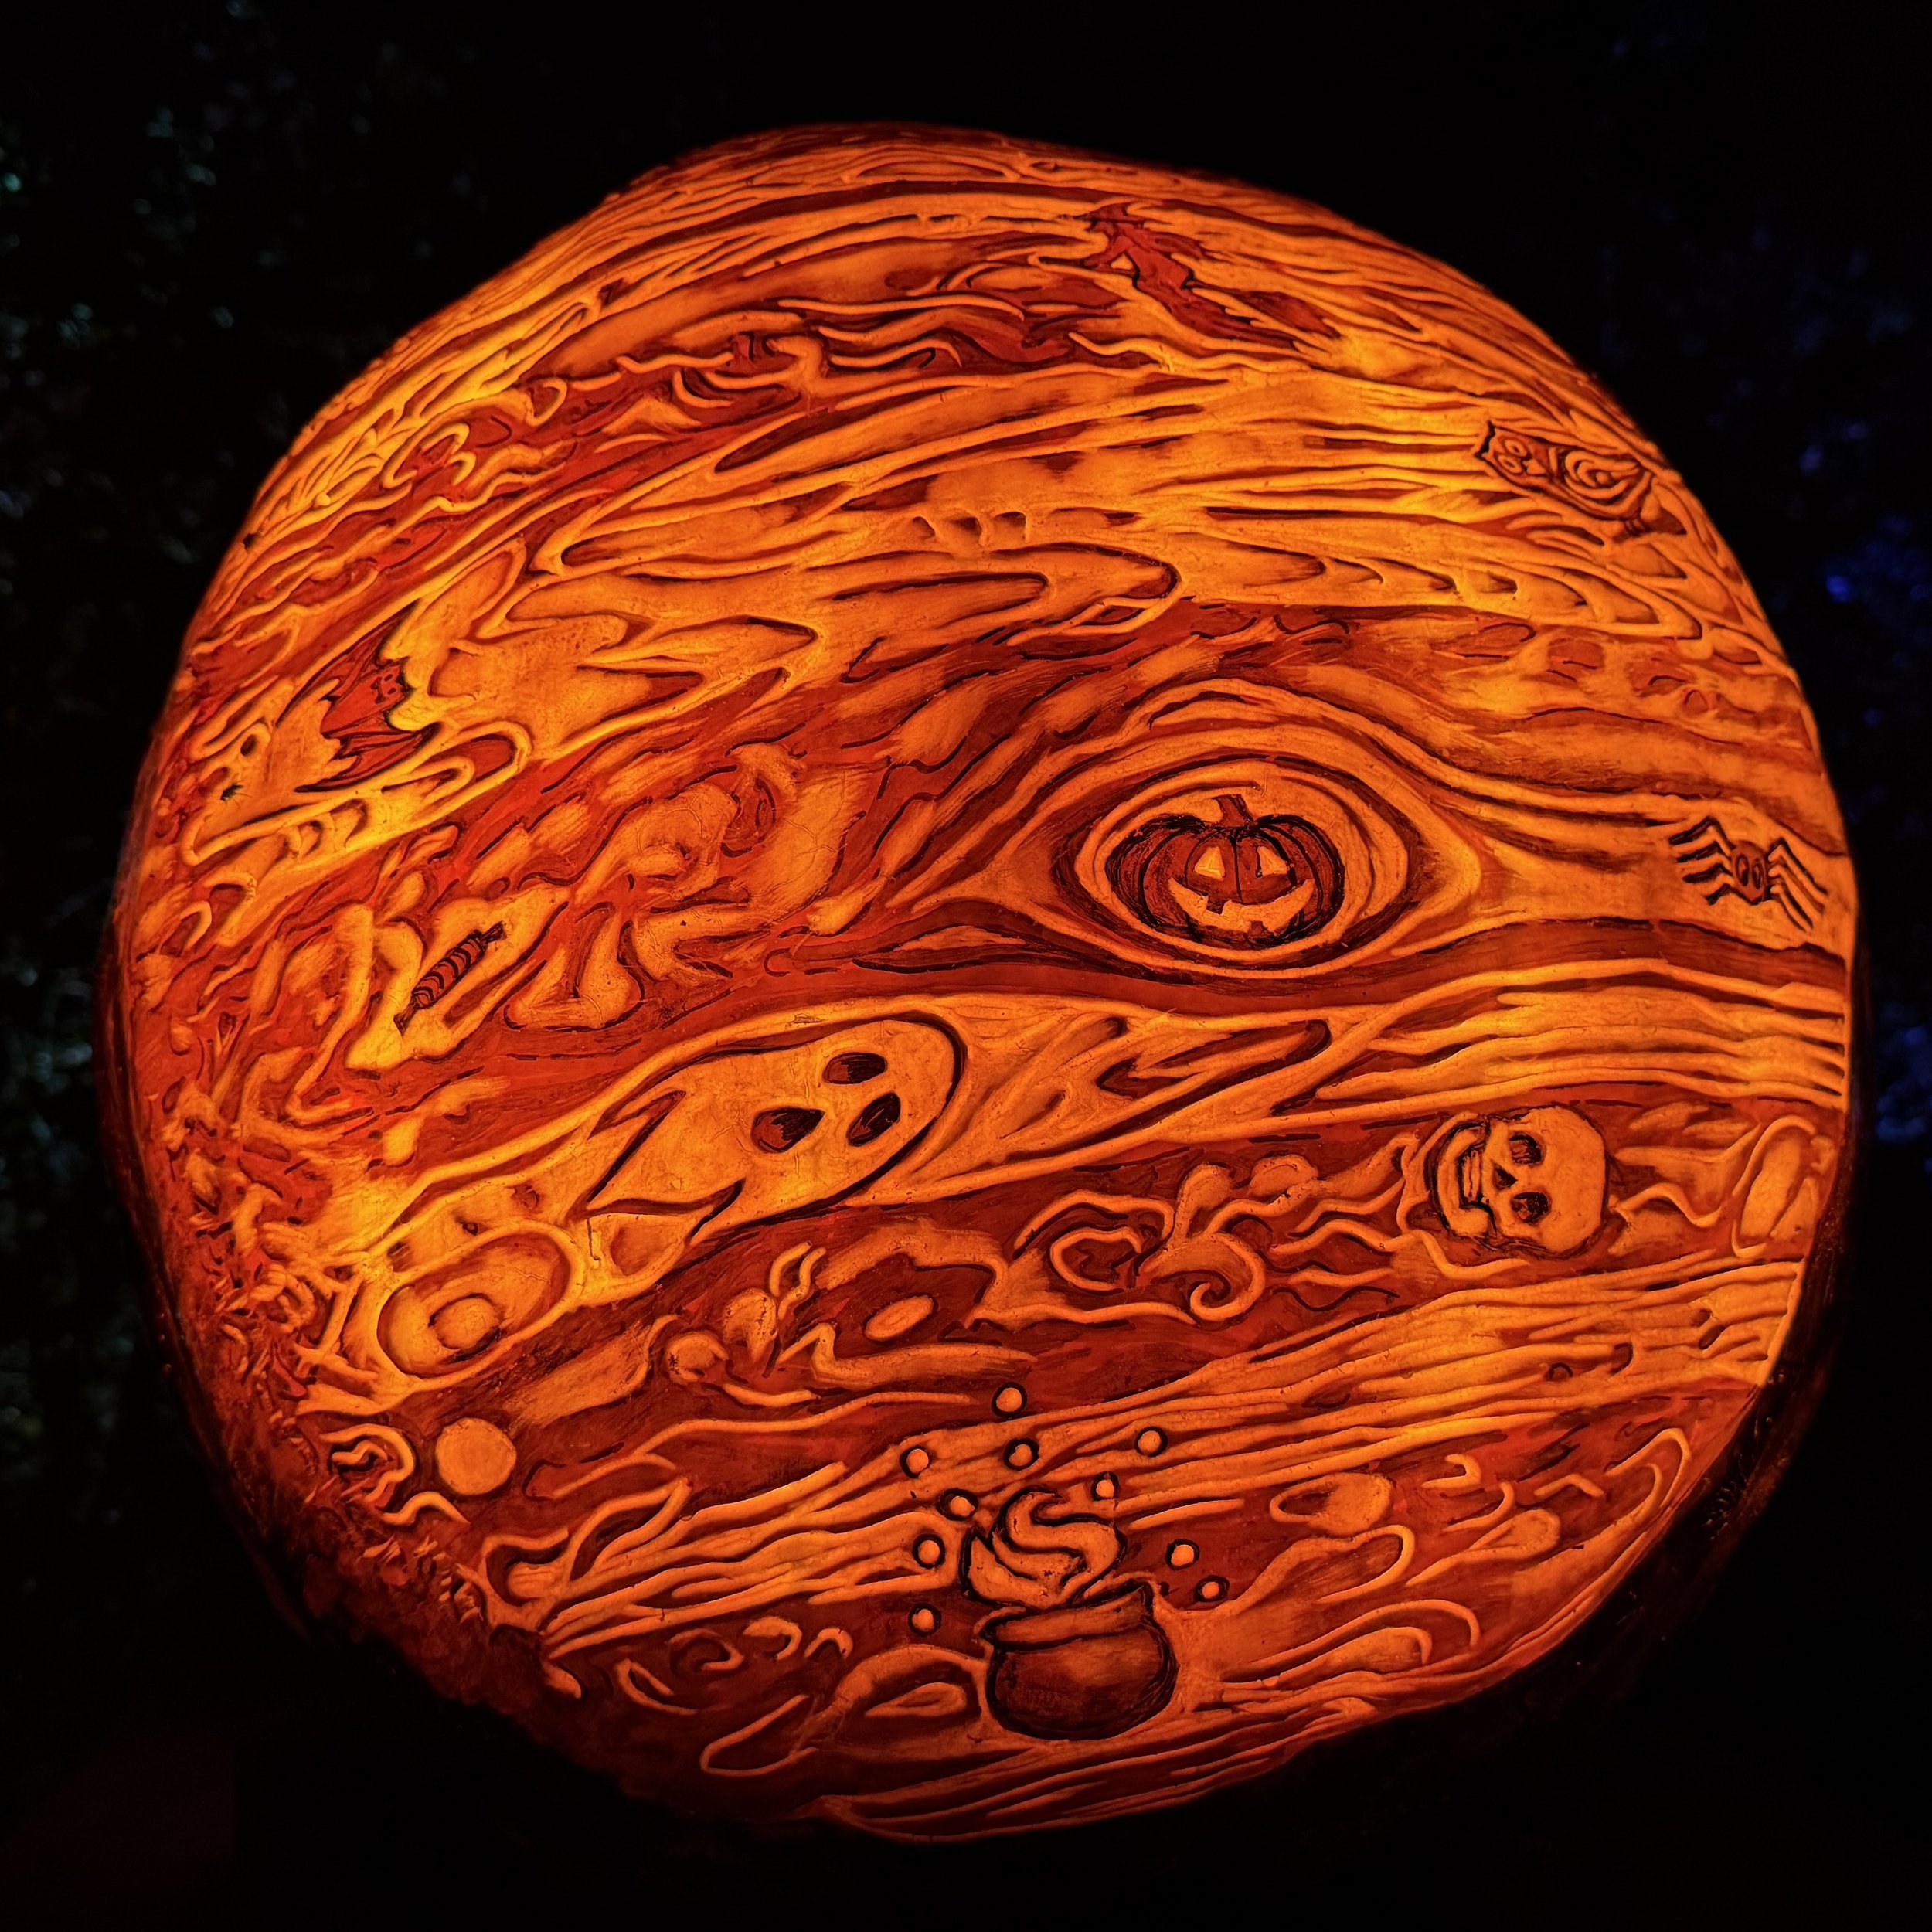
Jupiter Seek-And-Find — Behind the Scenes
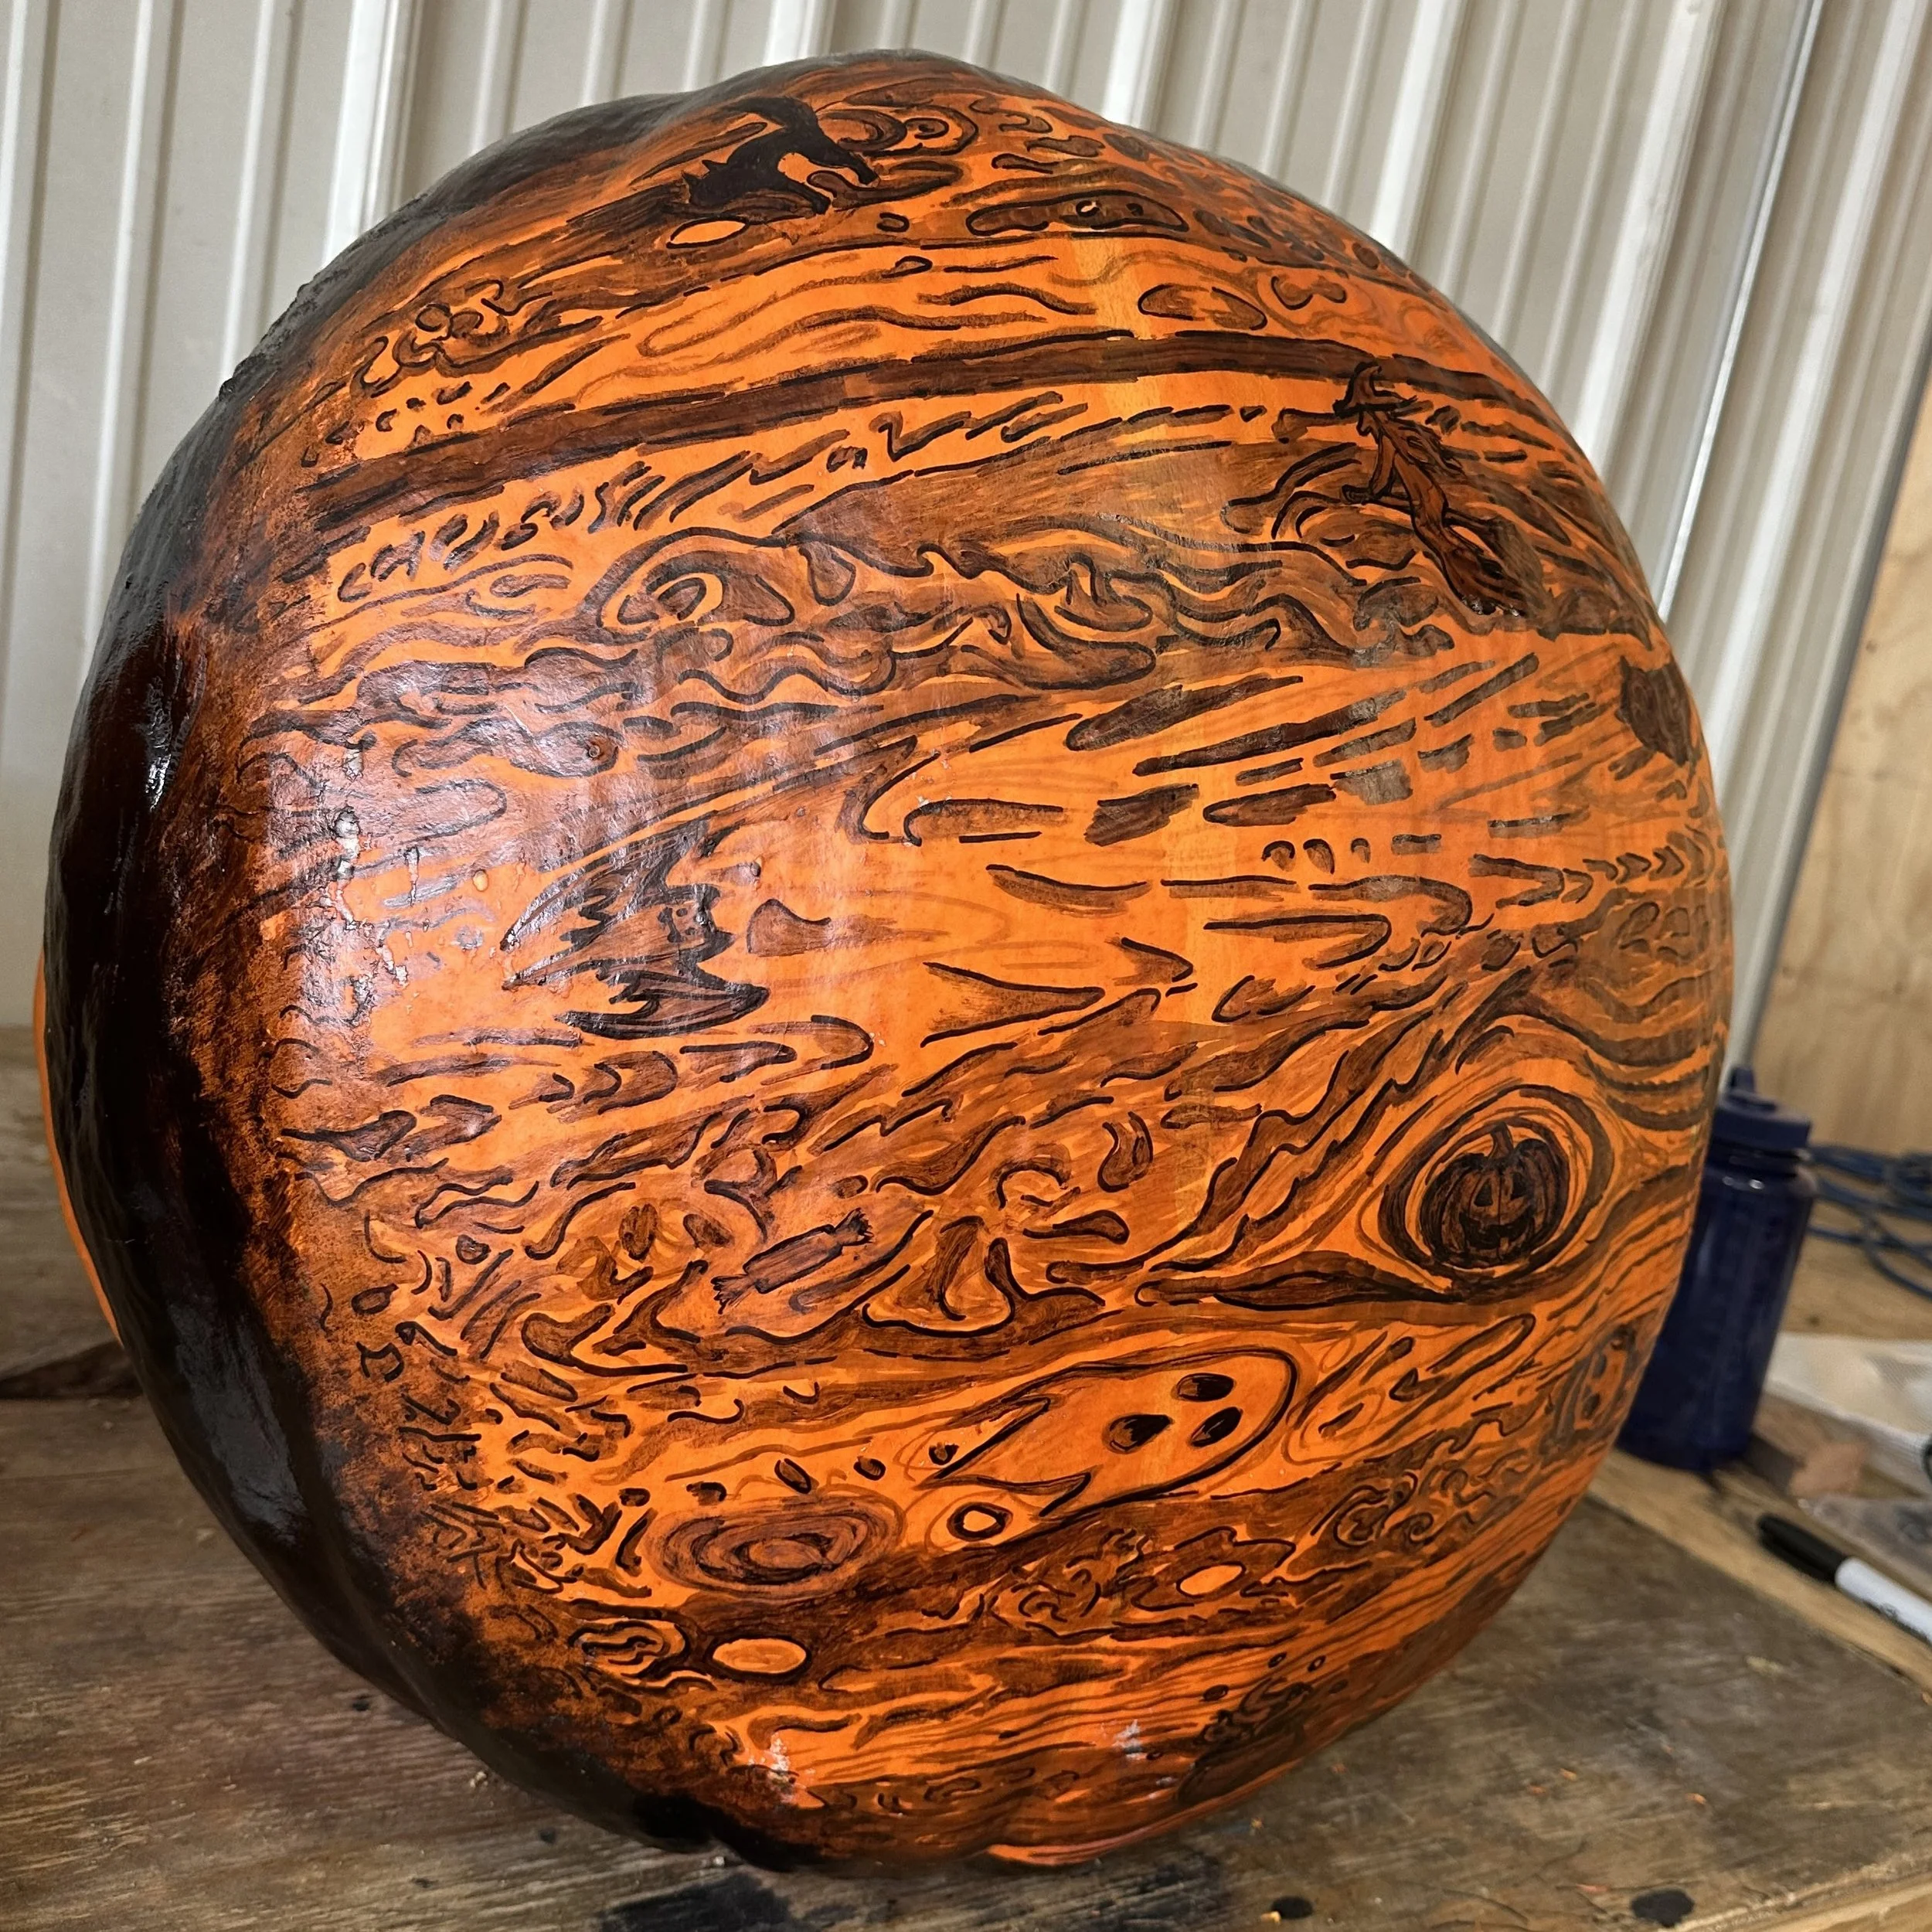
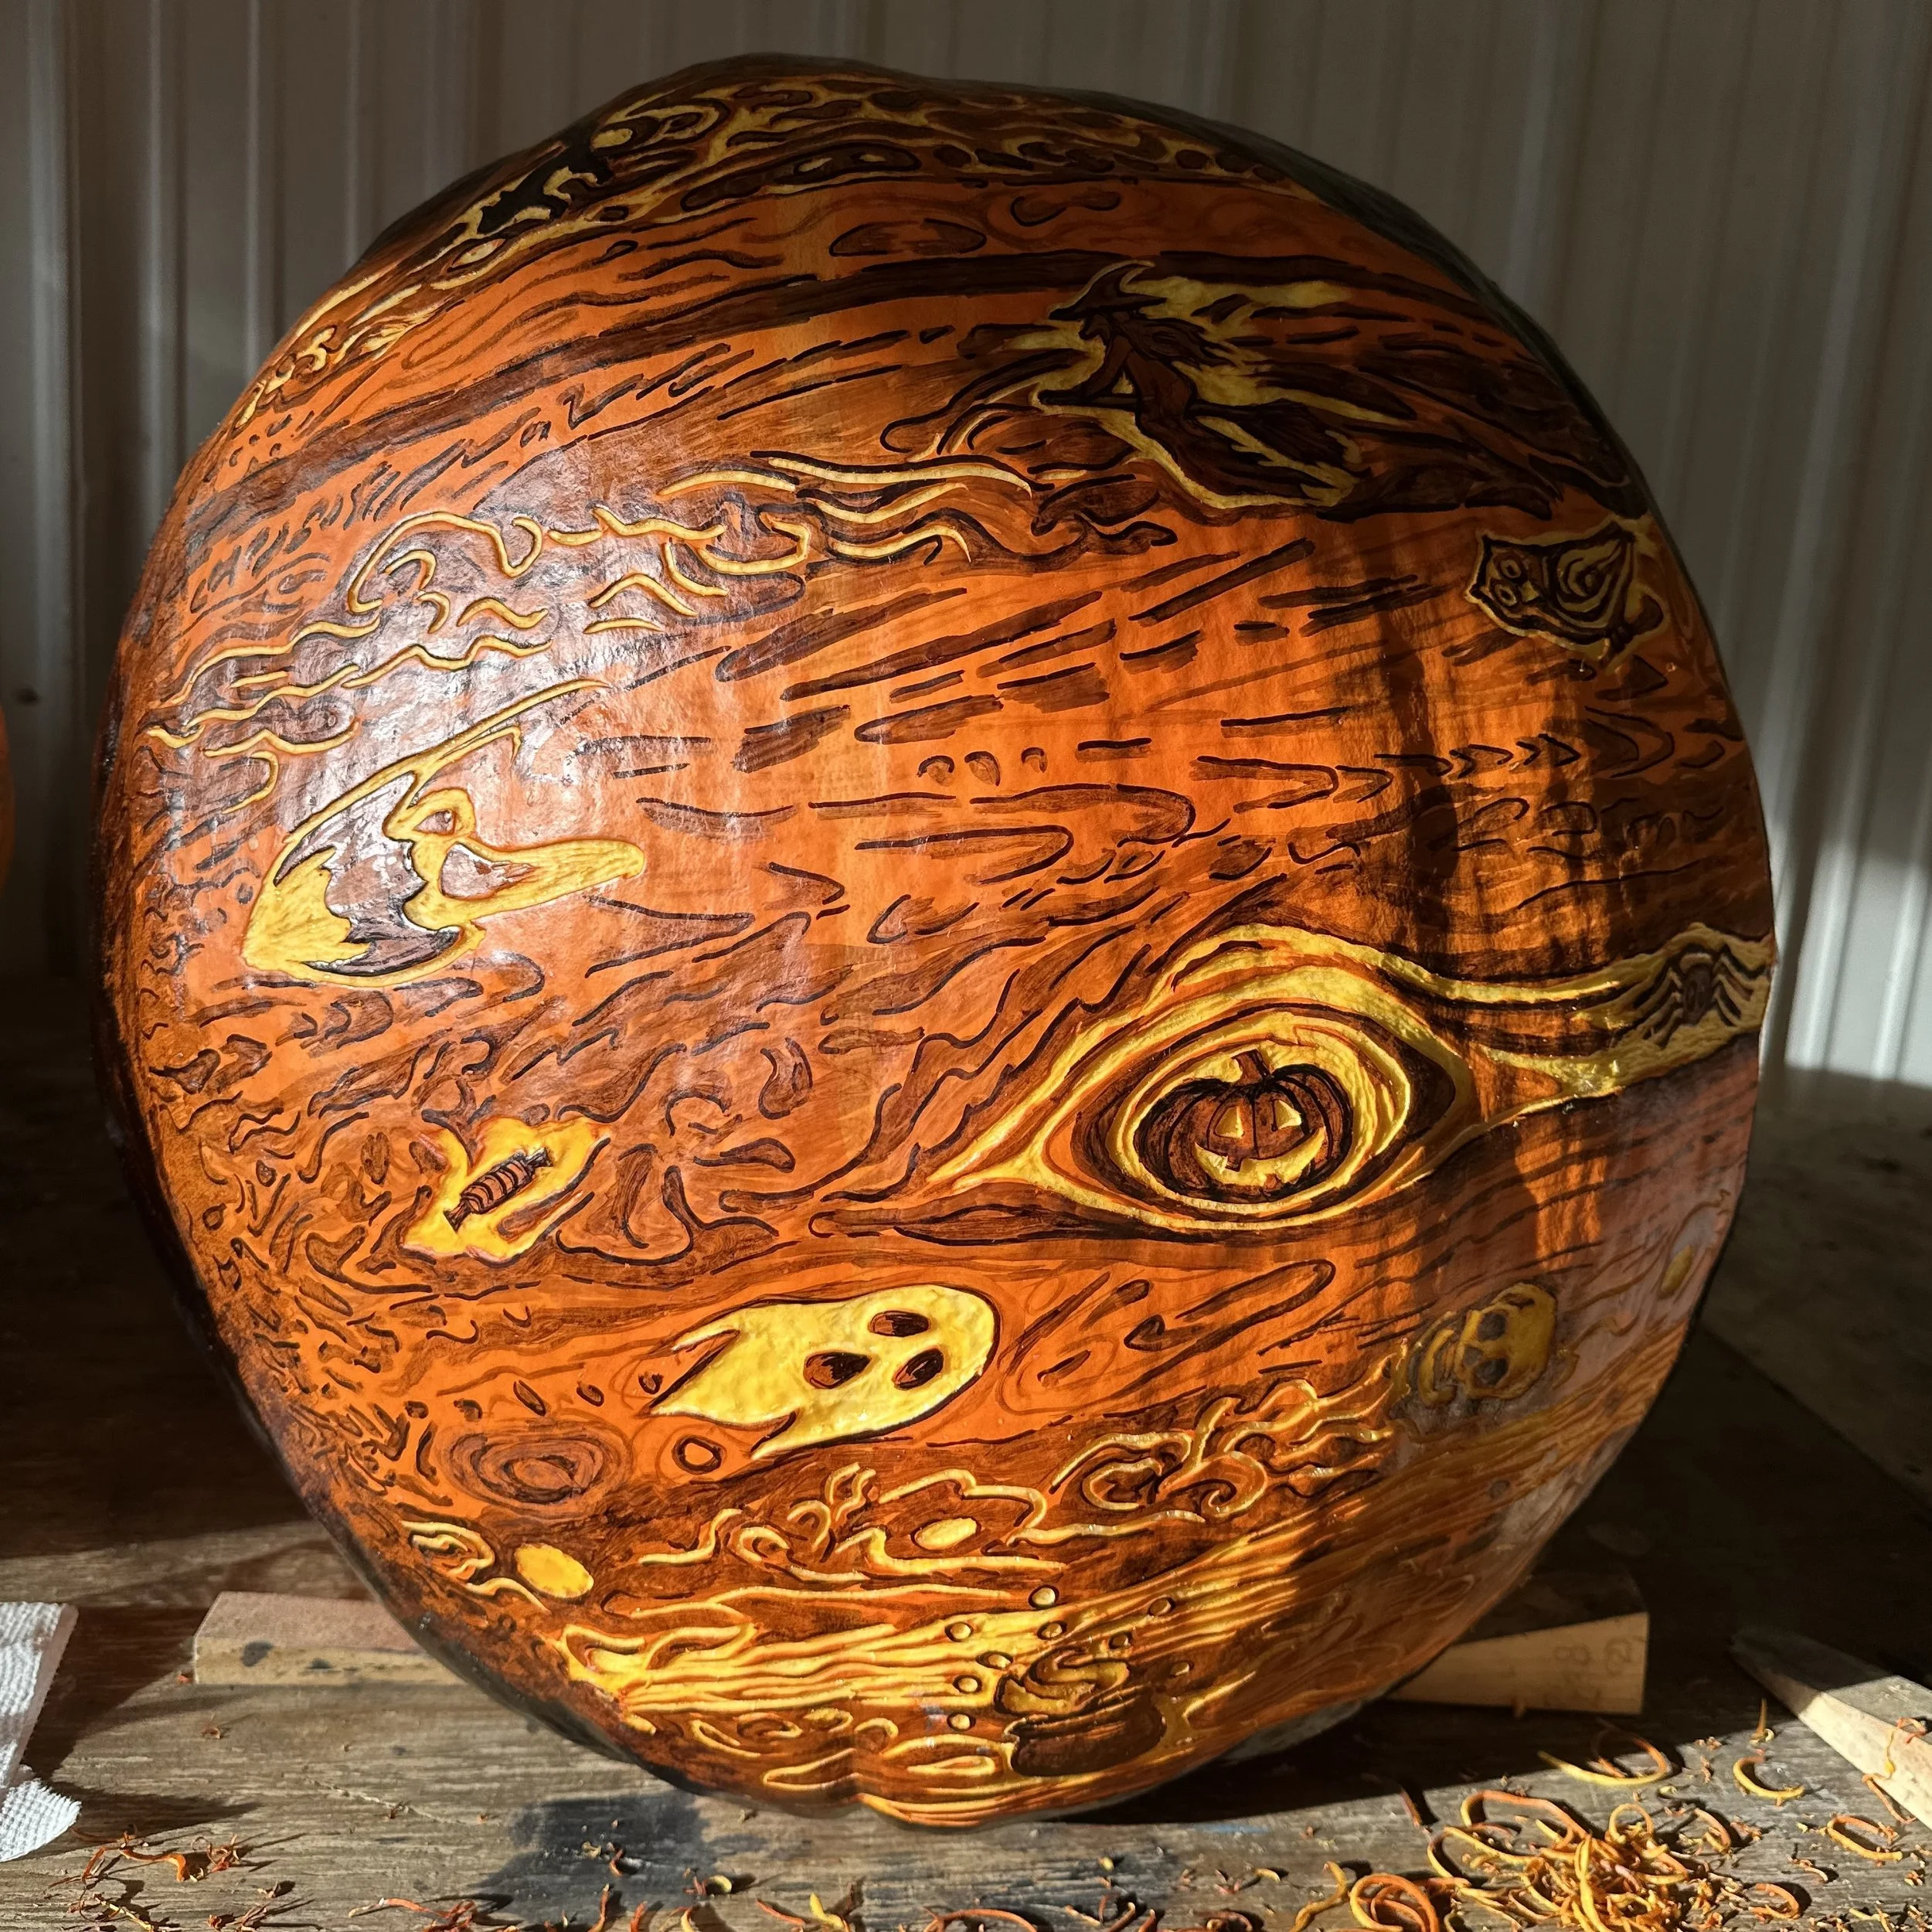
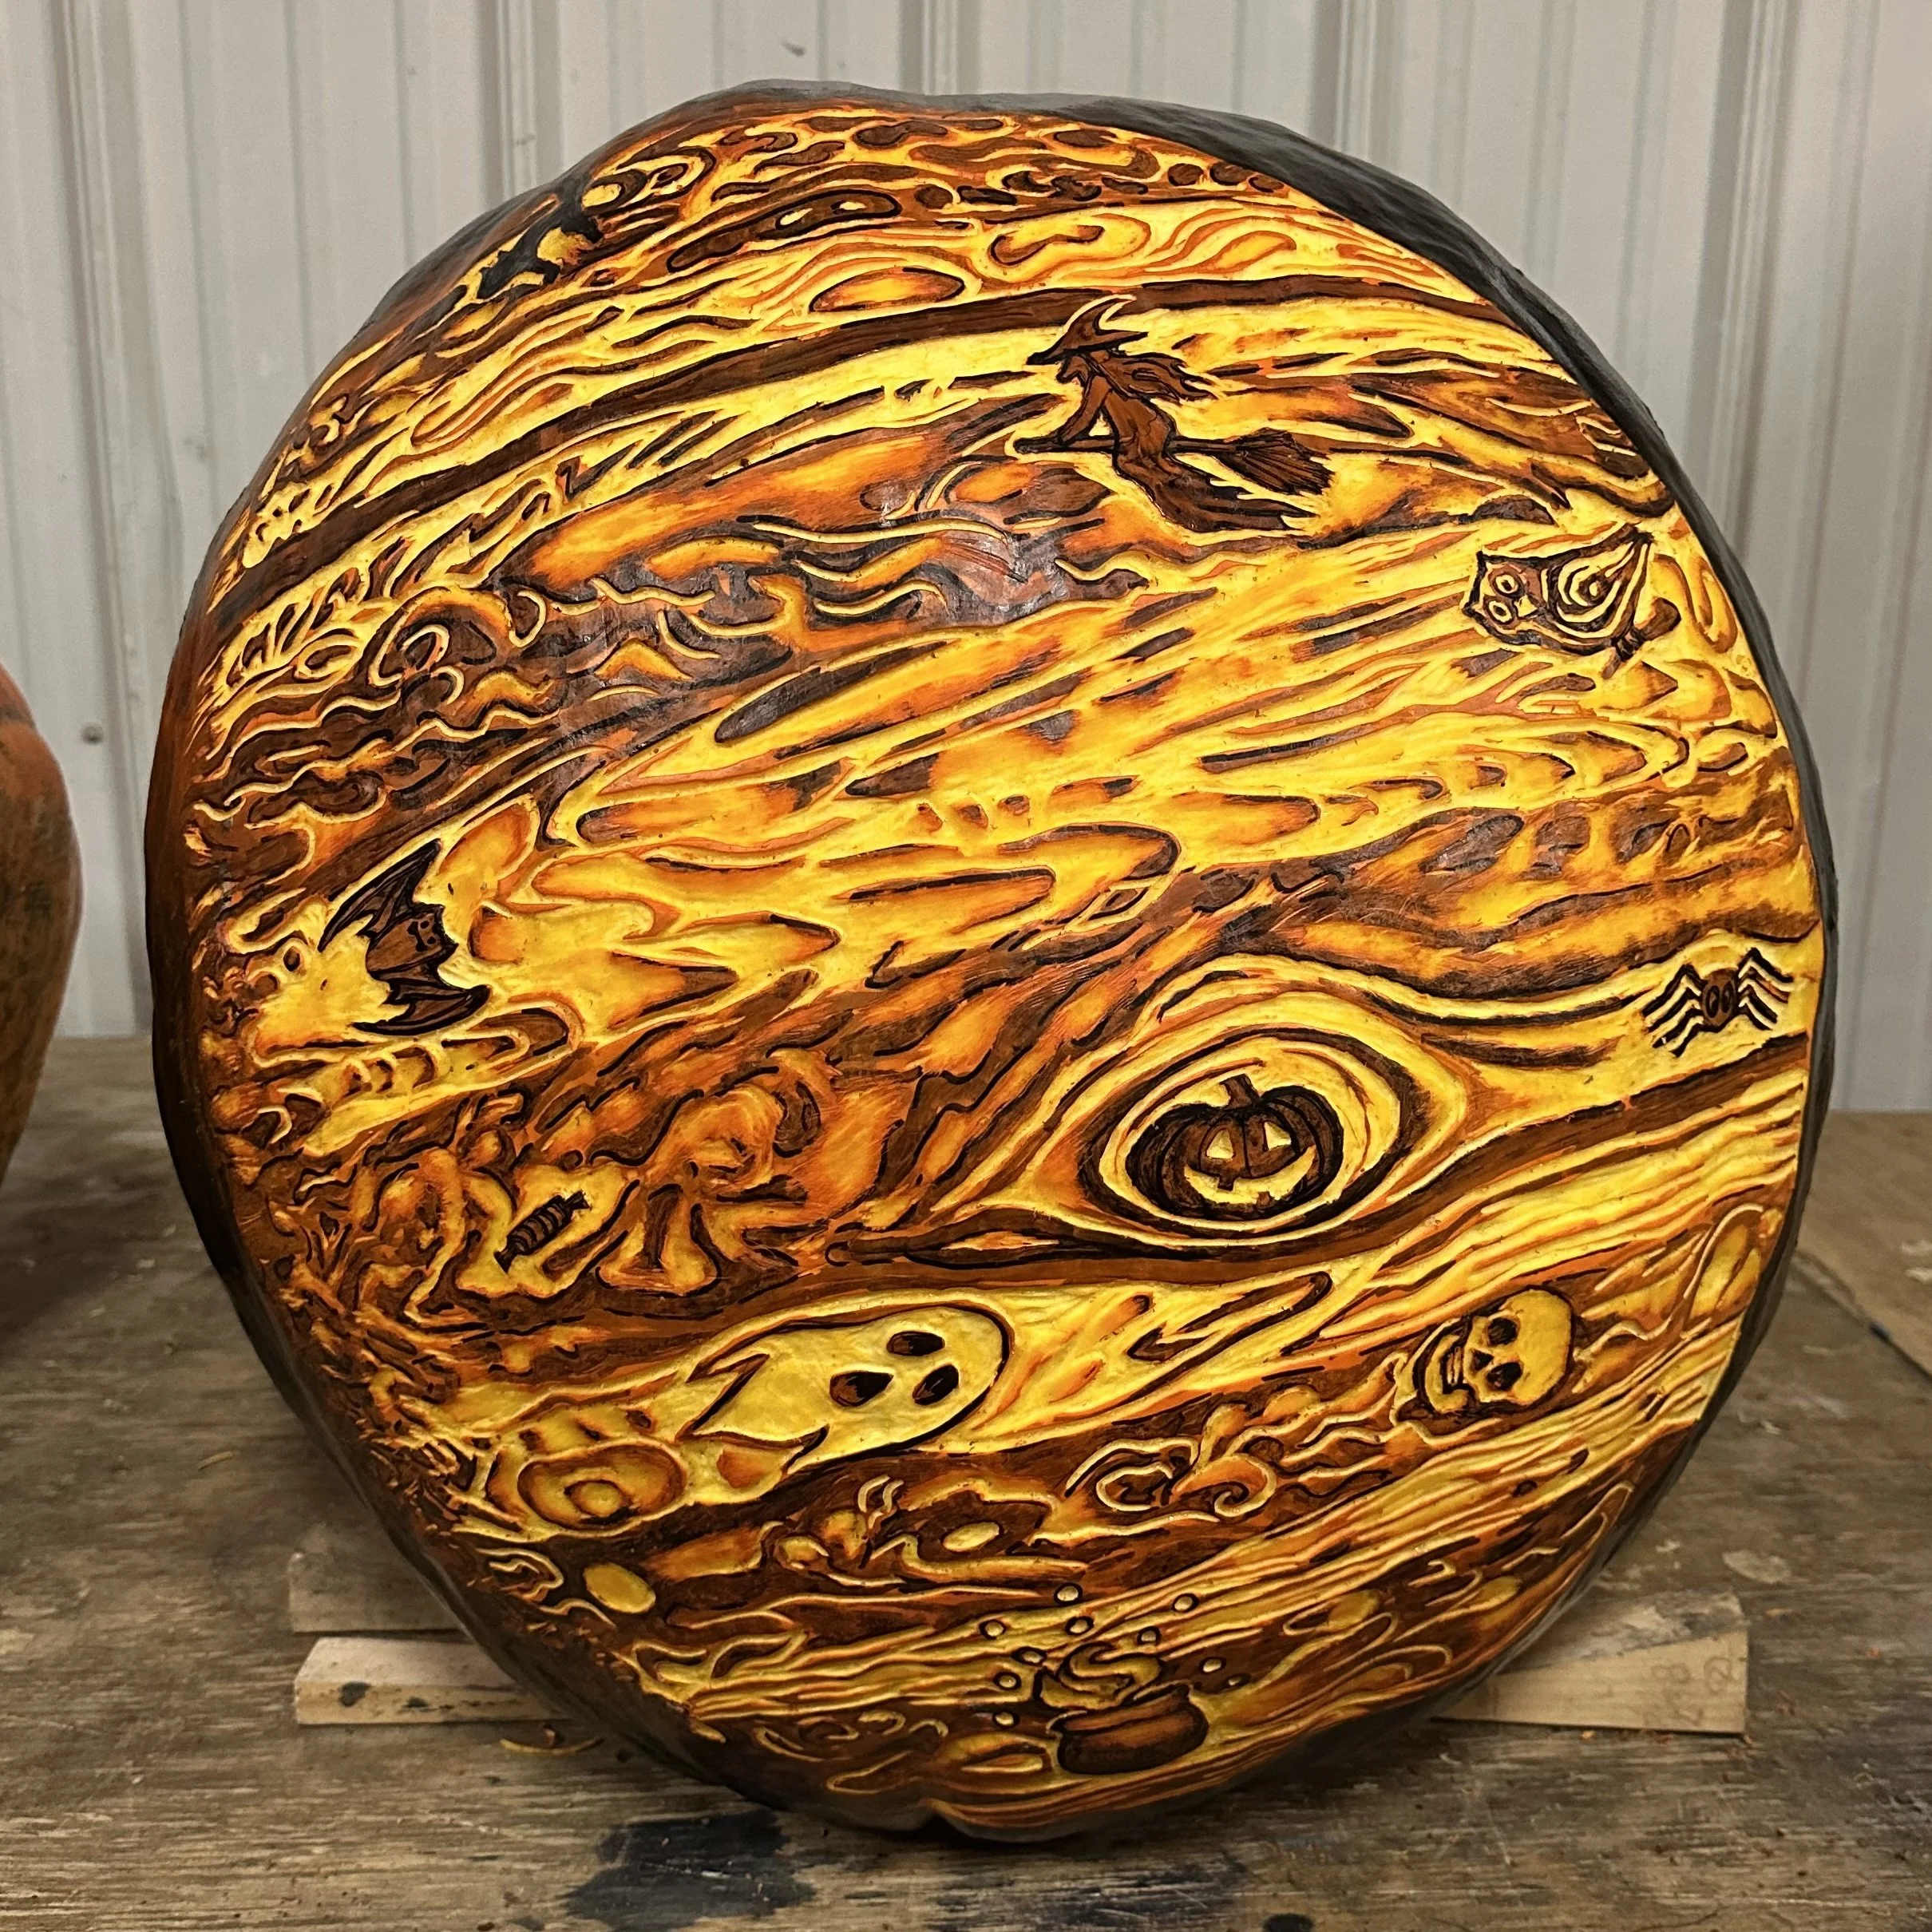
One of the skits for the show was “The Night Sky” and I found a beautifully round, HUGE pumpkin that was perfect for a Jupiter pumpkin. I’ve shared some of the process pictures below. Doing the projection in the darkroom at the studio was extra fun on this one, since the image was just Jupiter on a black background, so it really looked like there was a planet just chilling on the workbench. I got the main landmarks and textures traced on, brought it back into daylight and did the shading.
The original plan was to do a straight up Jupiter pumpkin, but one of the other artists suggested that I could hide some subtle spooky images among the swirls. So of course I had to do that now! Even though the drawing portion of the jack-o-lantern creation process is done in permanent alcohol-based ink to avoid rain washing the design away, it’s easy to make changes using isopropyl alcohol and paper towel or q-tips to erase. I added ten halloween-themed spooky secrets and turned it into a Jupiter Seek-And-Find pumpkin. Can you find them all?
(For more halloween-themed hidden secrets, check out my 2024 pumpkin post).

Bringing It Home
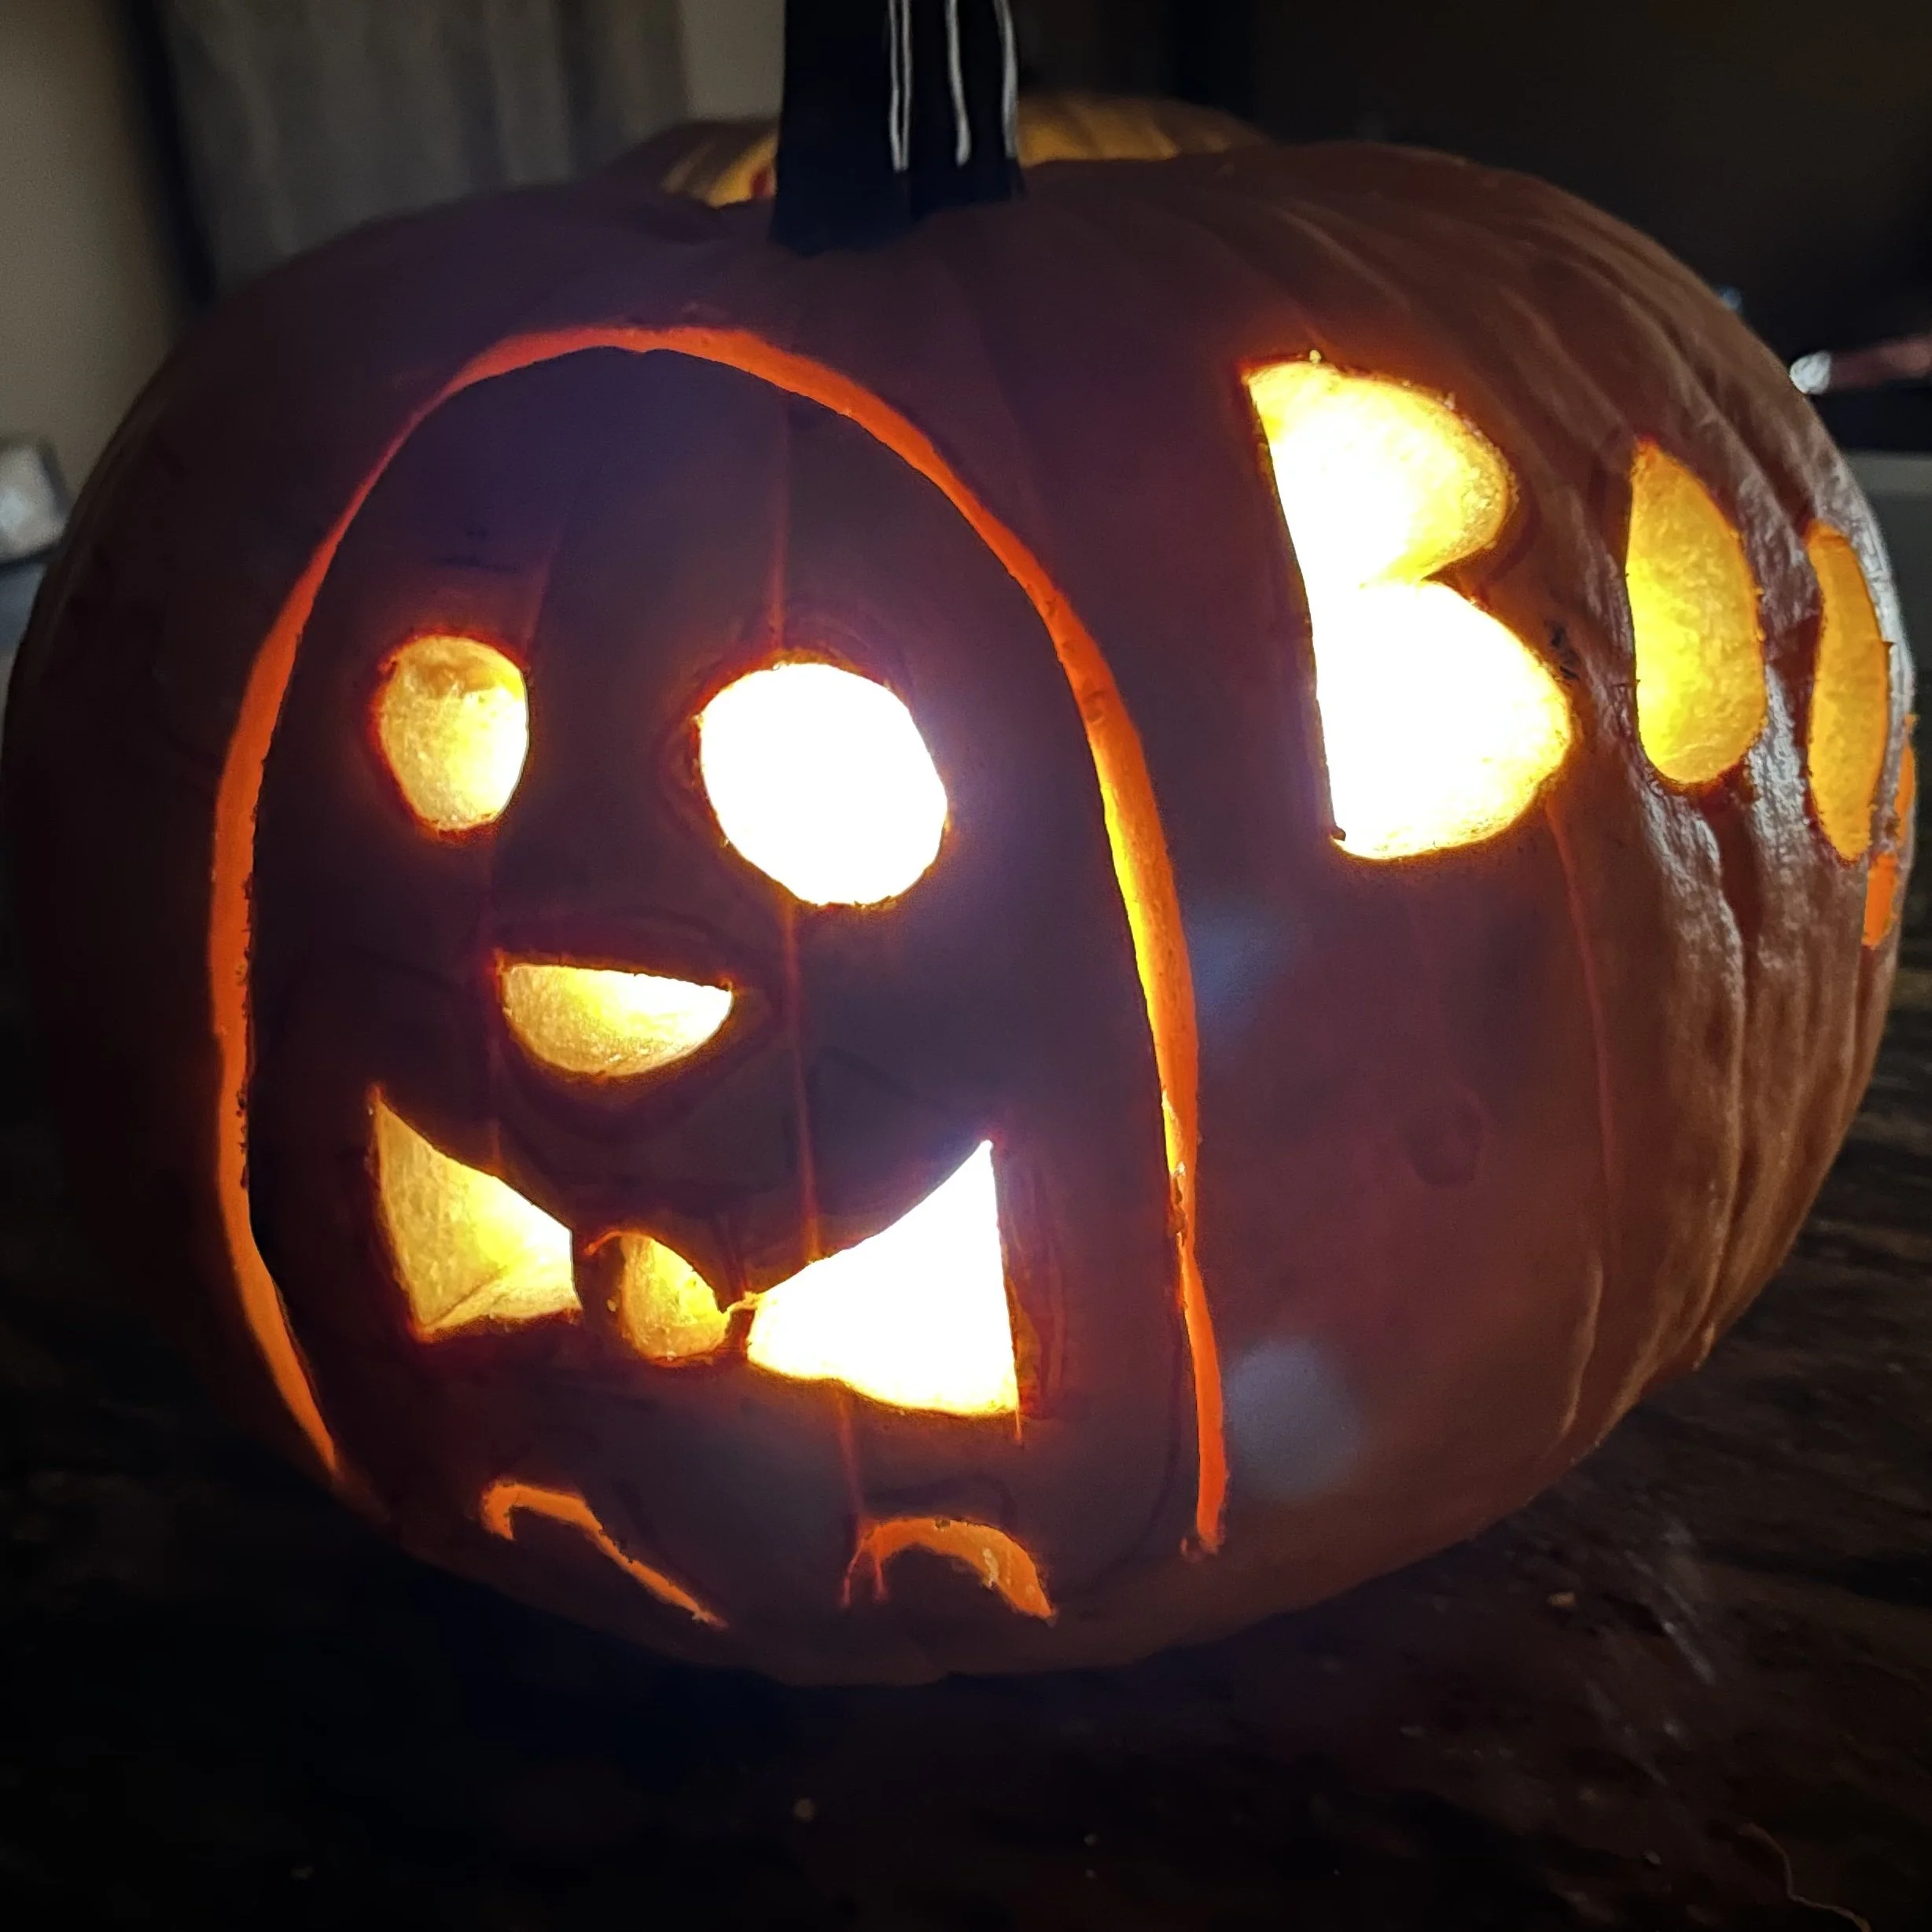
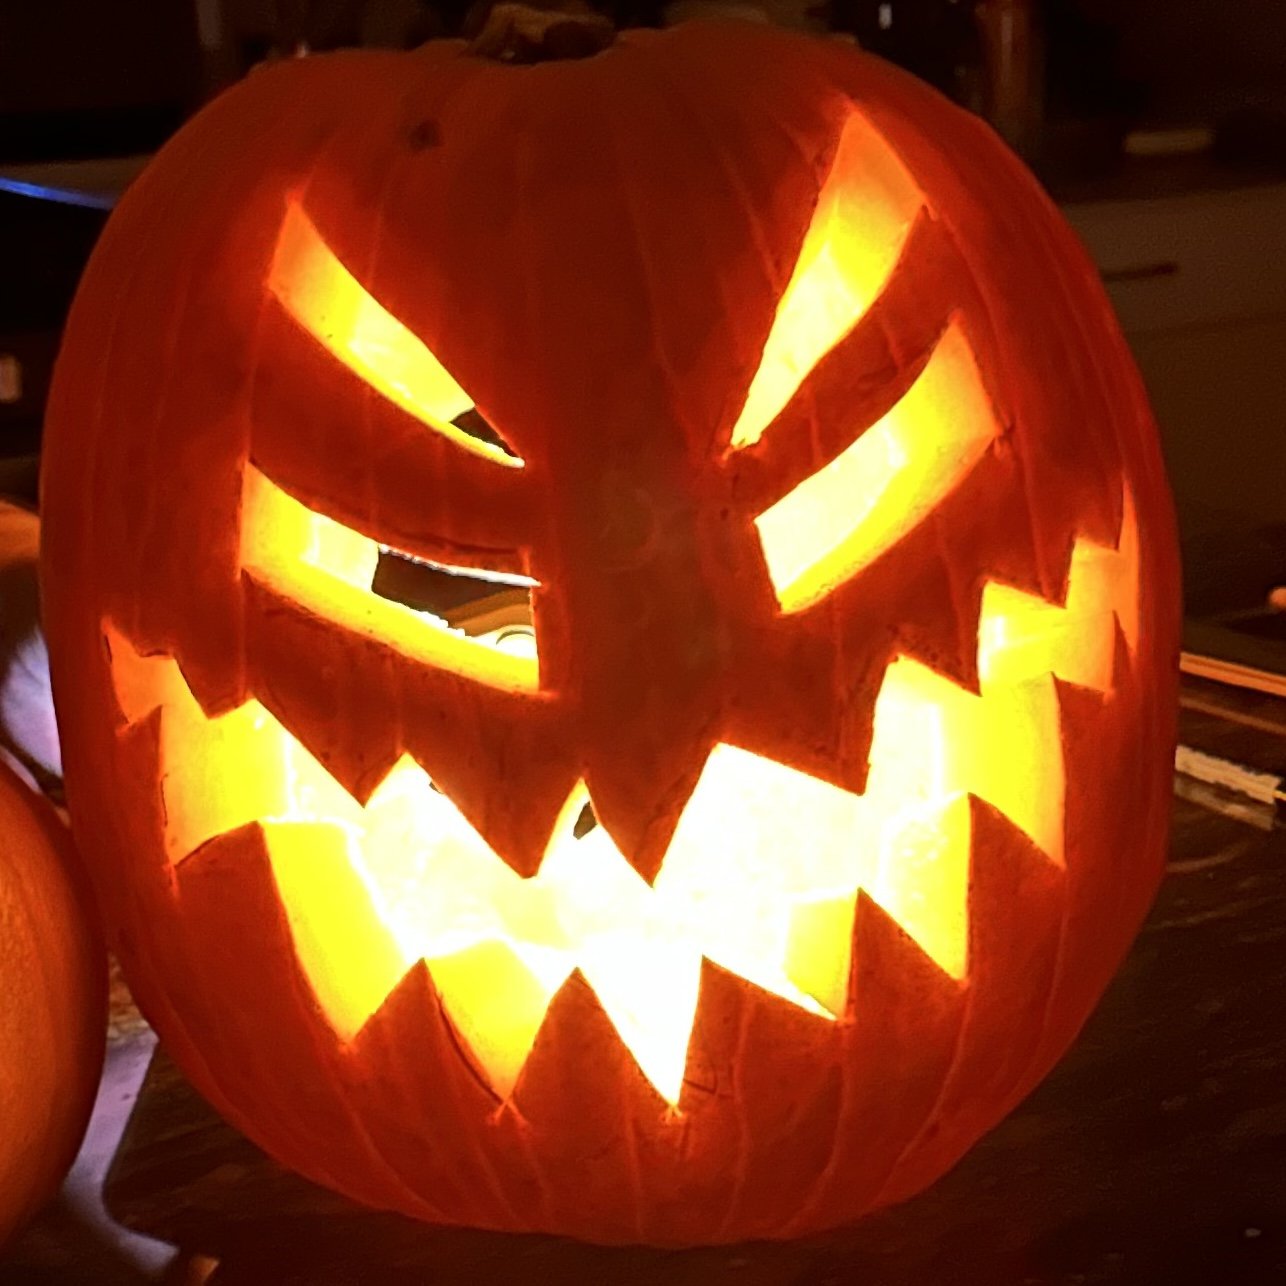
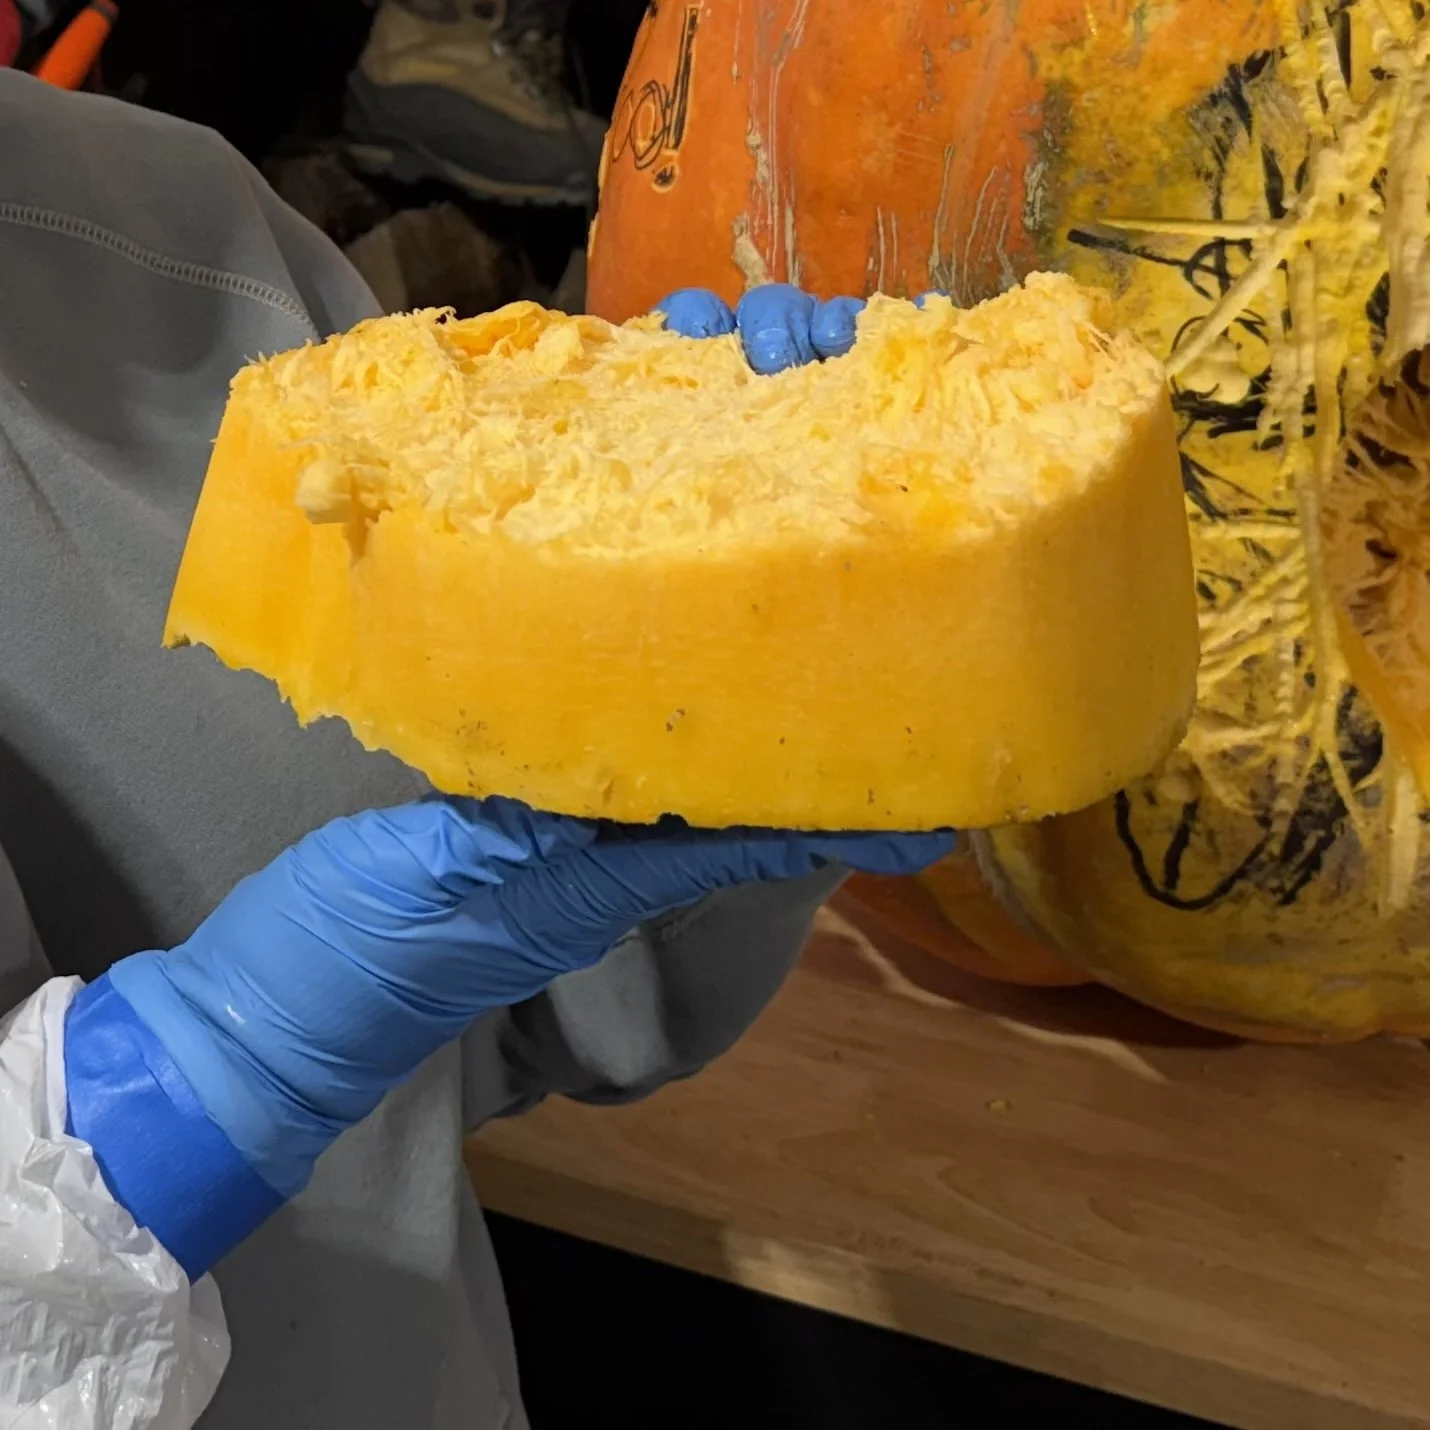
The last few years, by the time I got around to carving our home pumpkin, I was feeling pretty burned out from carving. On top of that, the technique we use for the show simply DOES NOT WORK on your average pumpkin you’d get at a grocery store. The pumpkin skin is too thick, and does not carve away smoothly at all with the tools I use on my zoo pumpkins. So I would end up either frustrated trying to do a detailed design, or just stick with the standard cut-all-the-way-through technique (results shown below). This is not to say people don’t make awesome jack-o-lanterns with the more traditional pumpkins and methods, because they absolutely do. For me thought, it ends up feeling like switching from using fine art supplies to using sidewalk chalk, while trying to get a similar result.
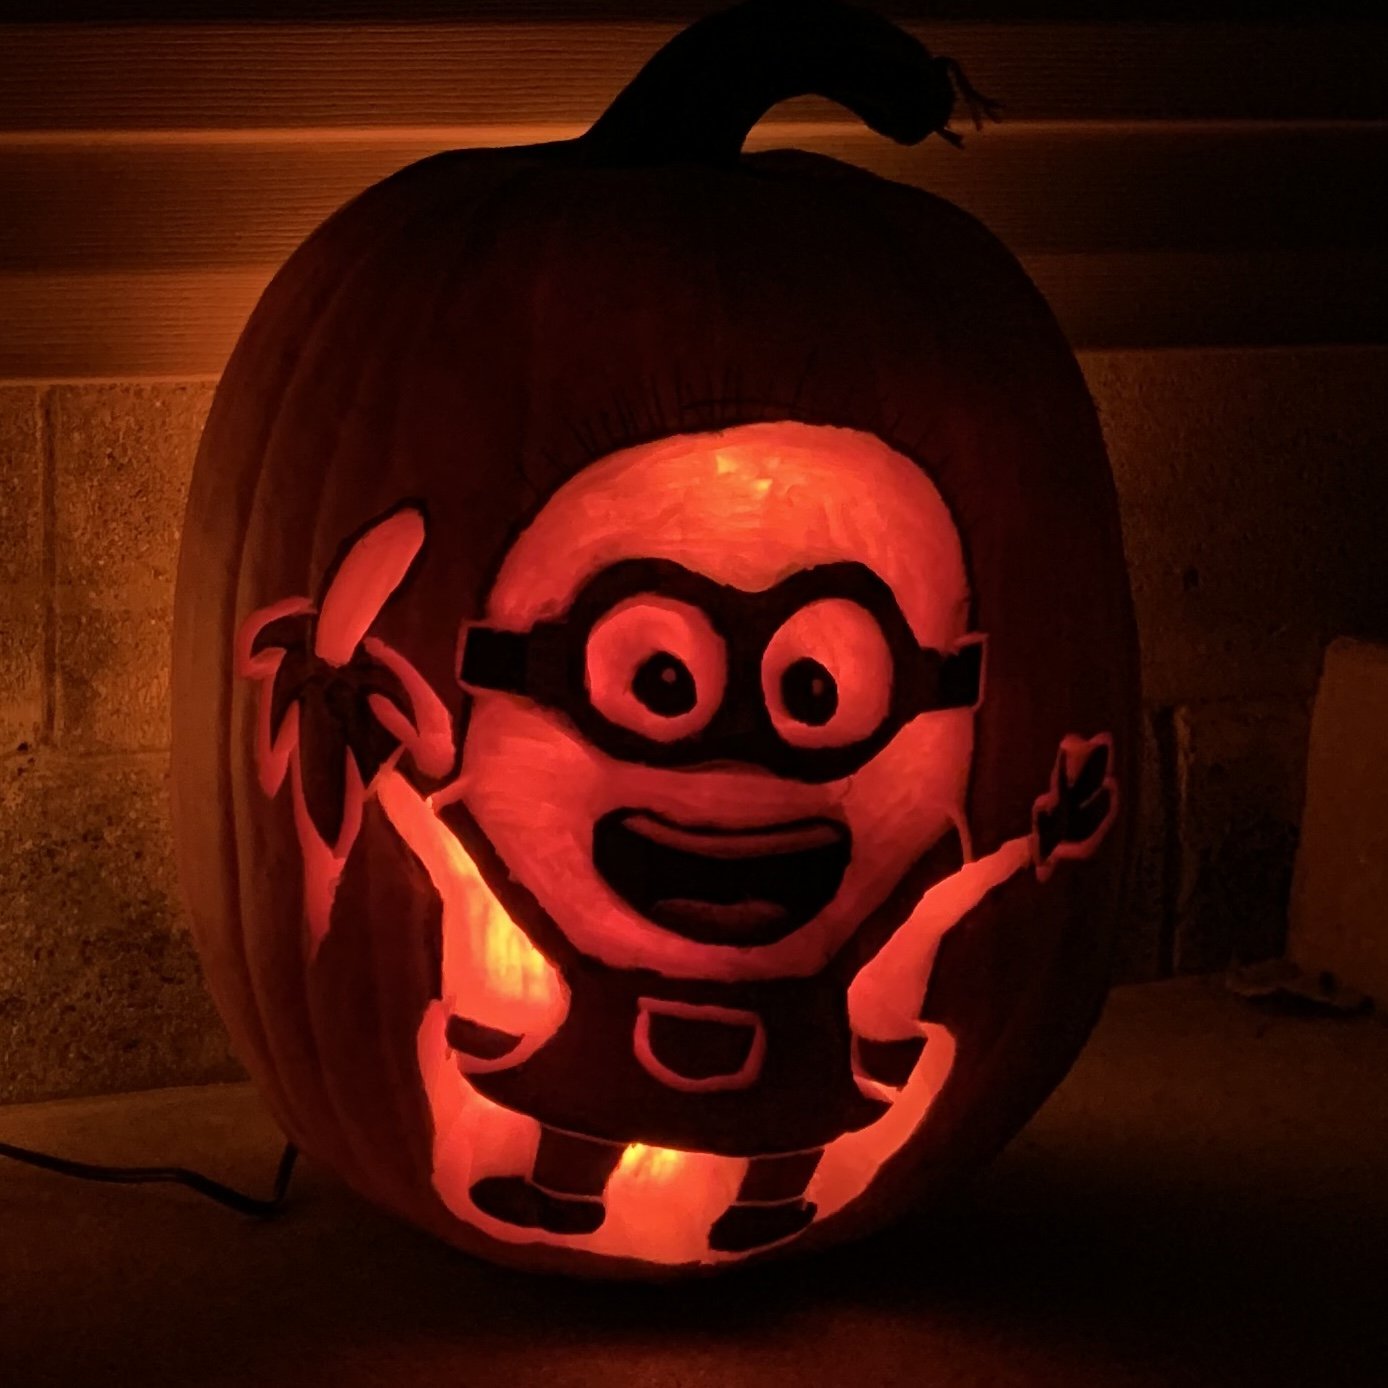
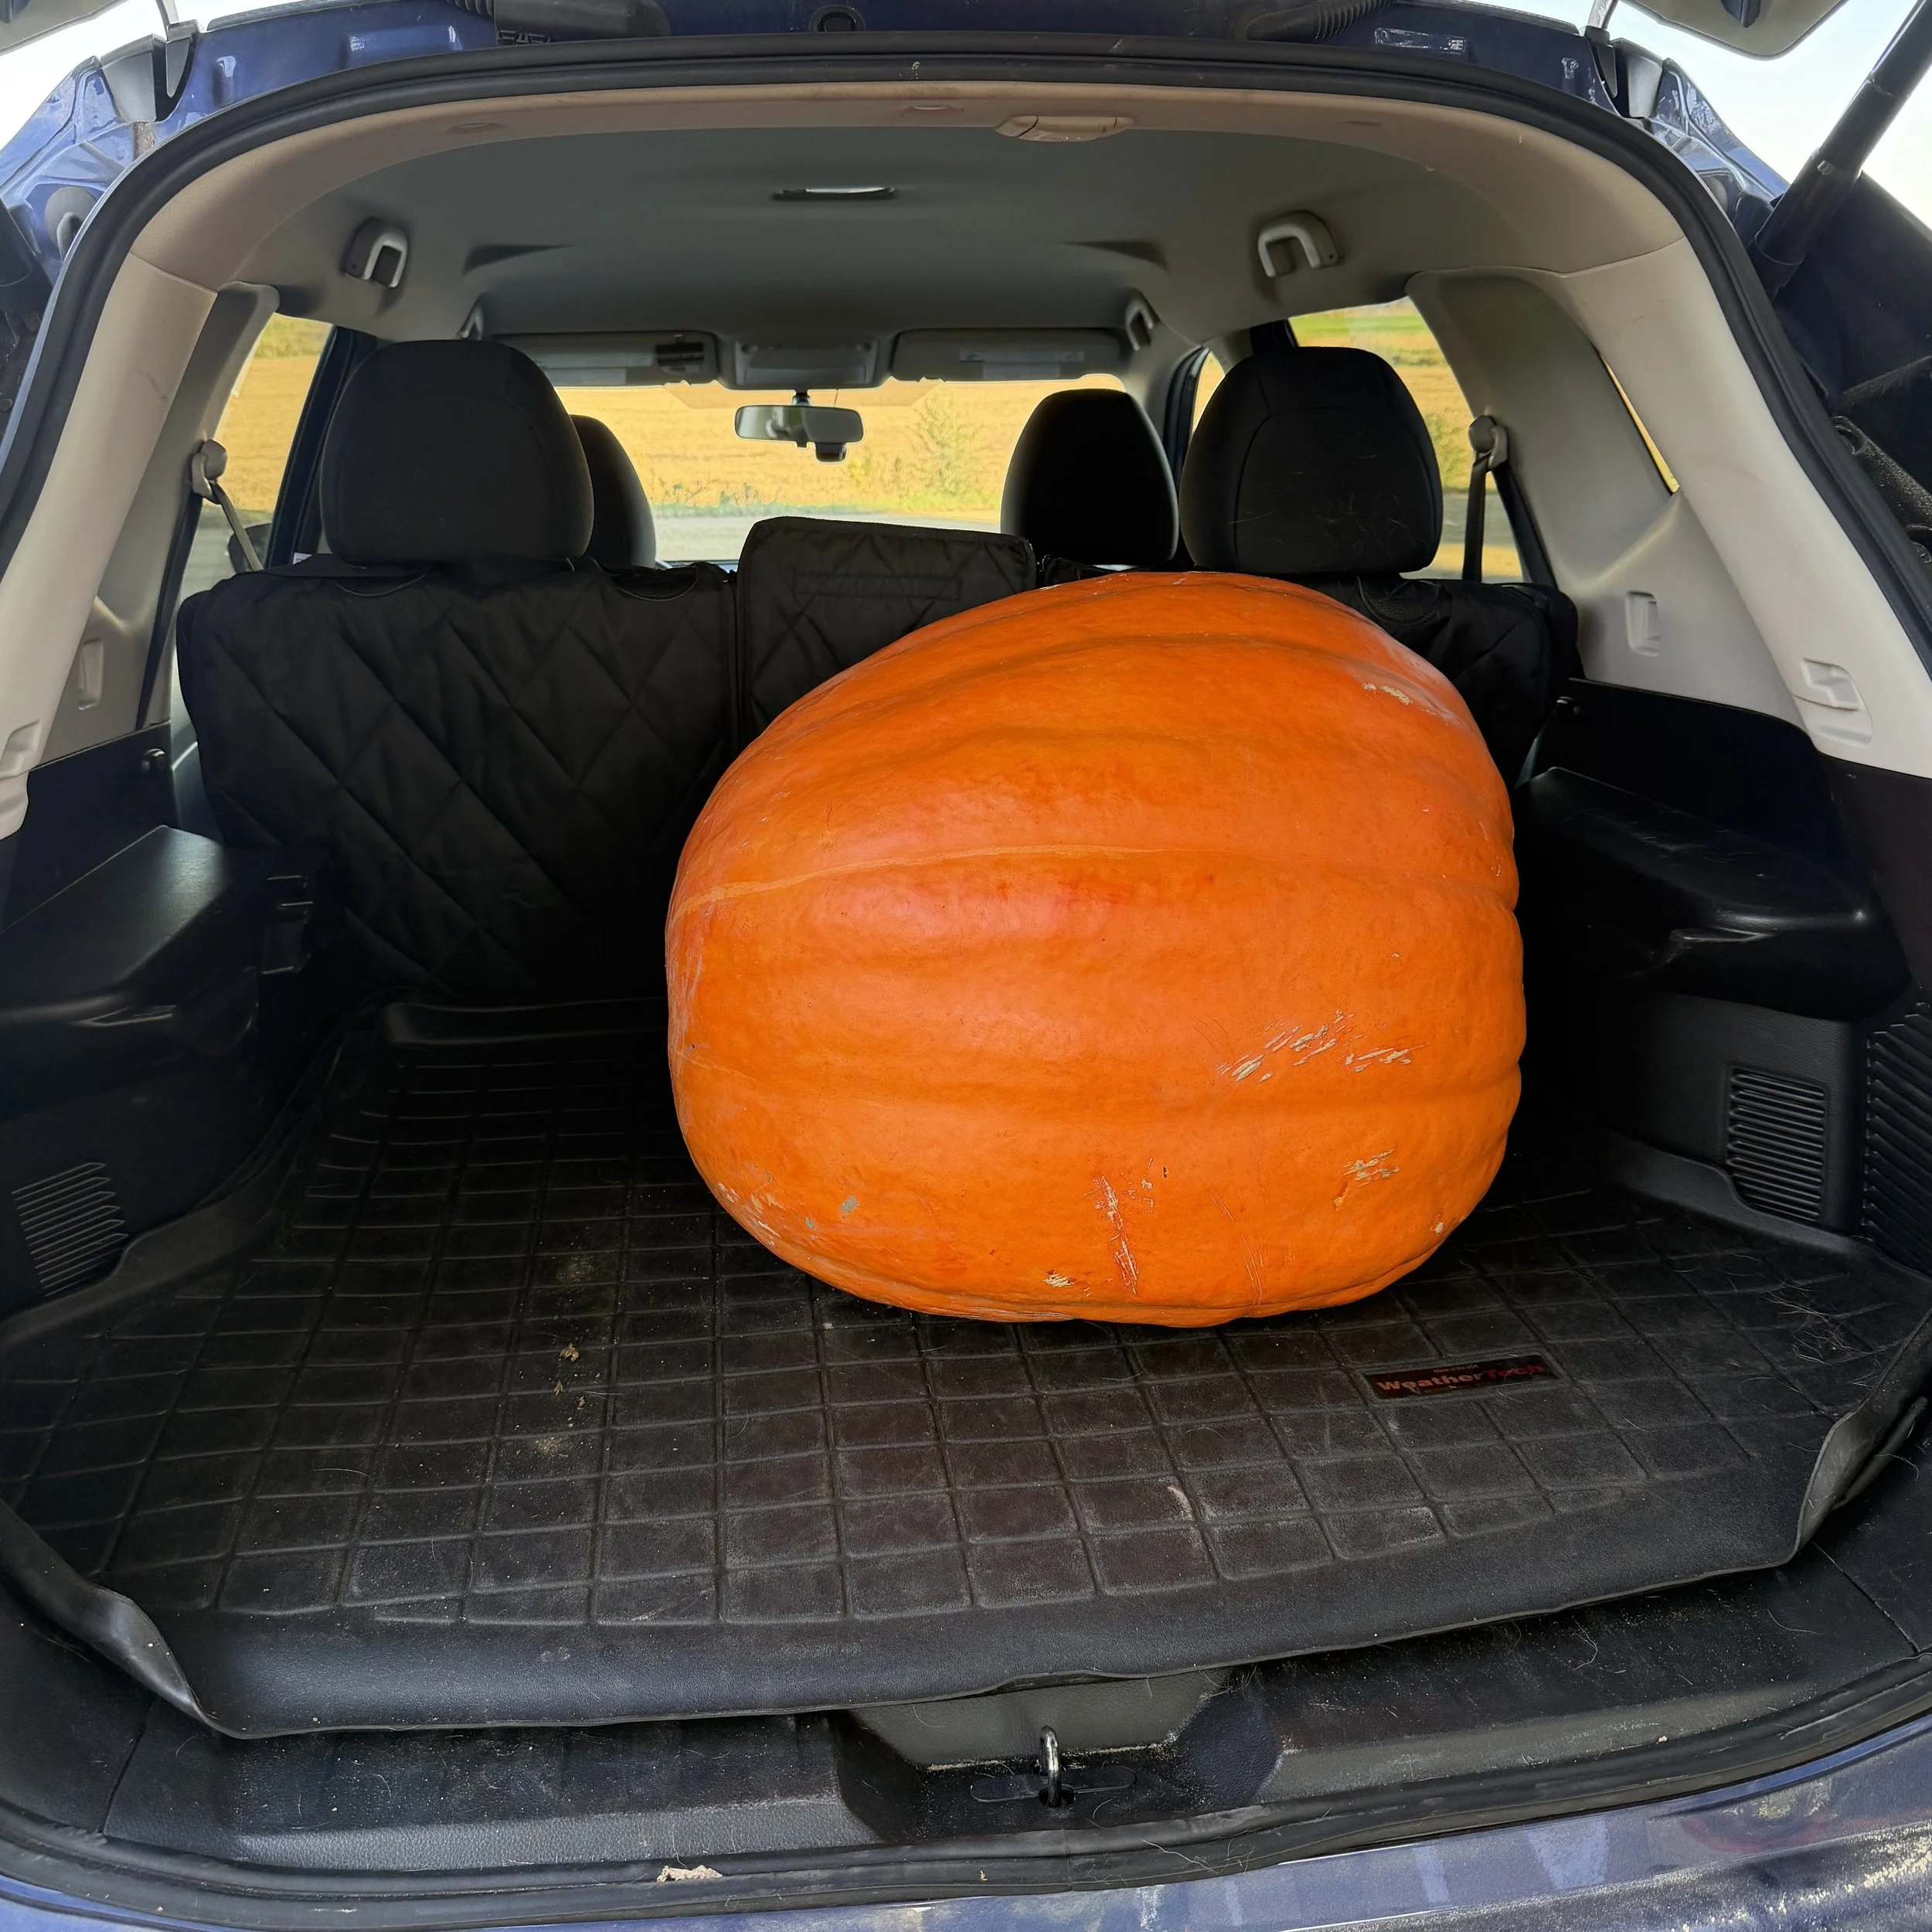
For the first time ever, I bought one of the same type of pumpkin used at the show for our home jack-o-lantern (if you’re local in Minnesota, check out Crazy Legs Farm & Pumpkins). I called ahead and let them know I was an artist at the pumpkin show at the zoo, and asked if they could pick out a good pumpkin for me to purchase and carve at home. When I showed up, the farmer had the pumpkin on a pallet and used a forklift to get it level with the bed of my vehicle and then rolled it in. I was a bit nervous about getting the pumpkin back out of the car once I got home, but thankfully my husband was able to wrangle it onto the workbench without breaking his back.
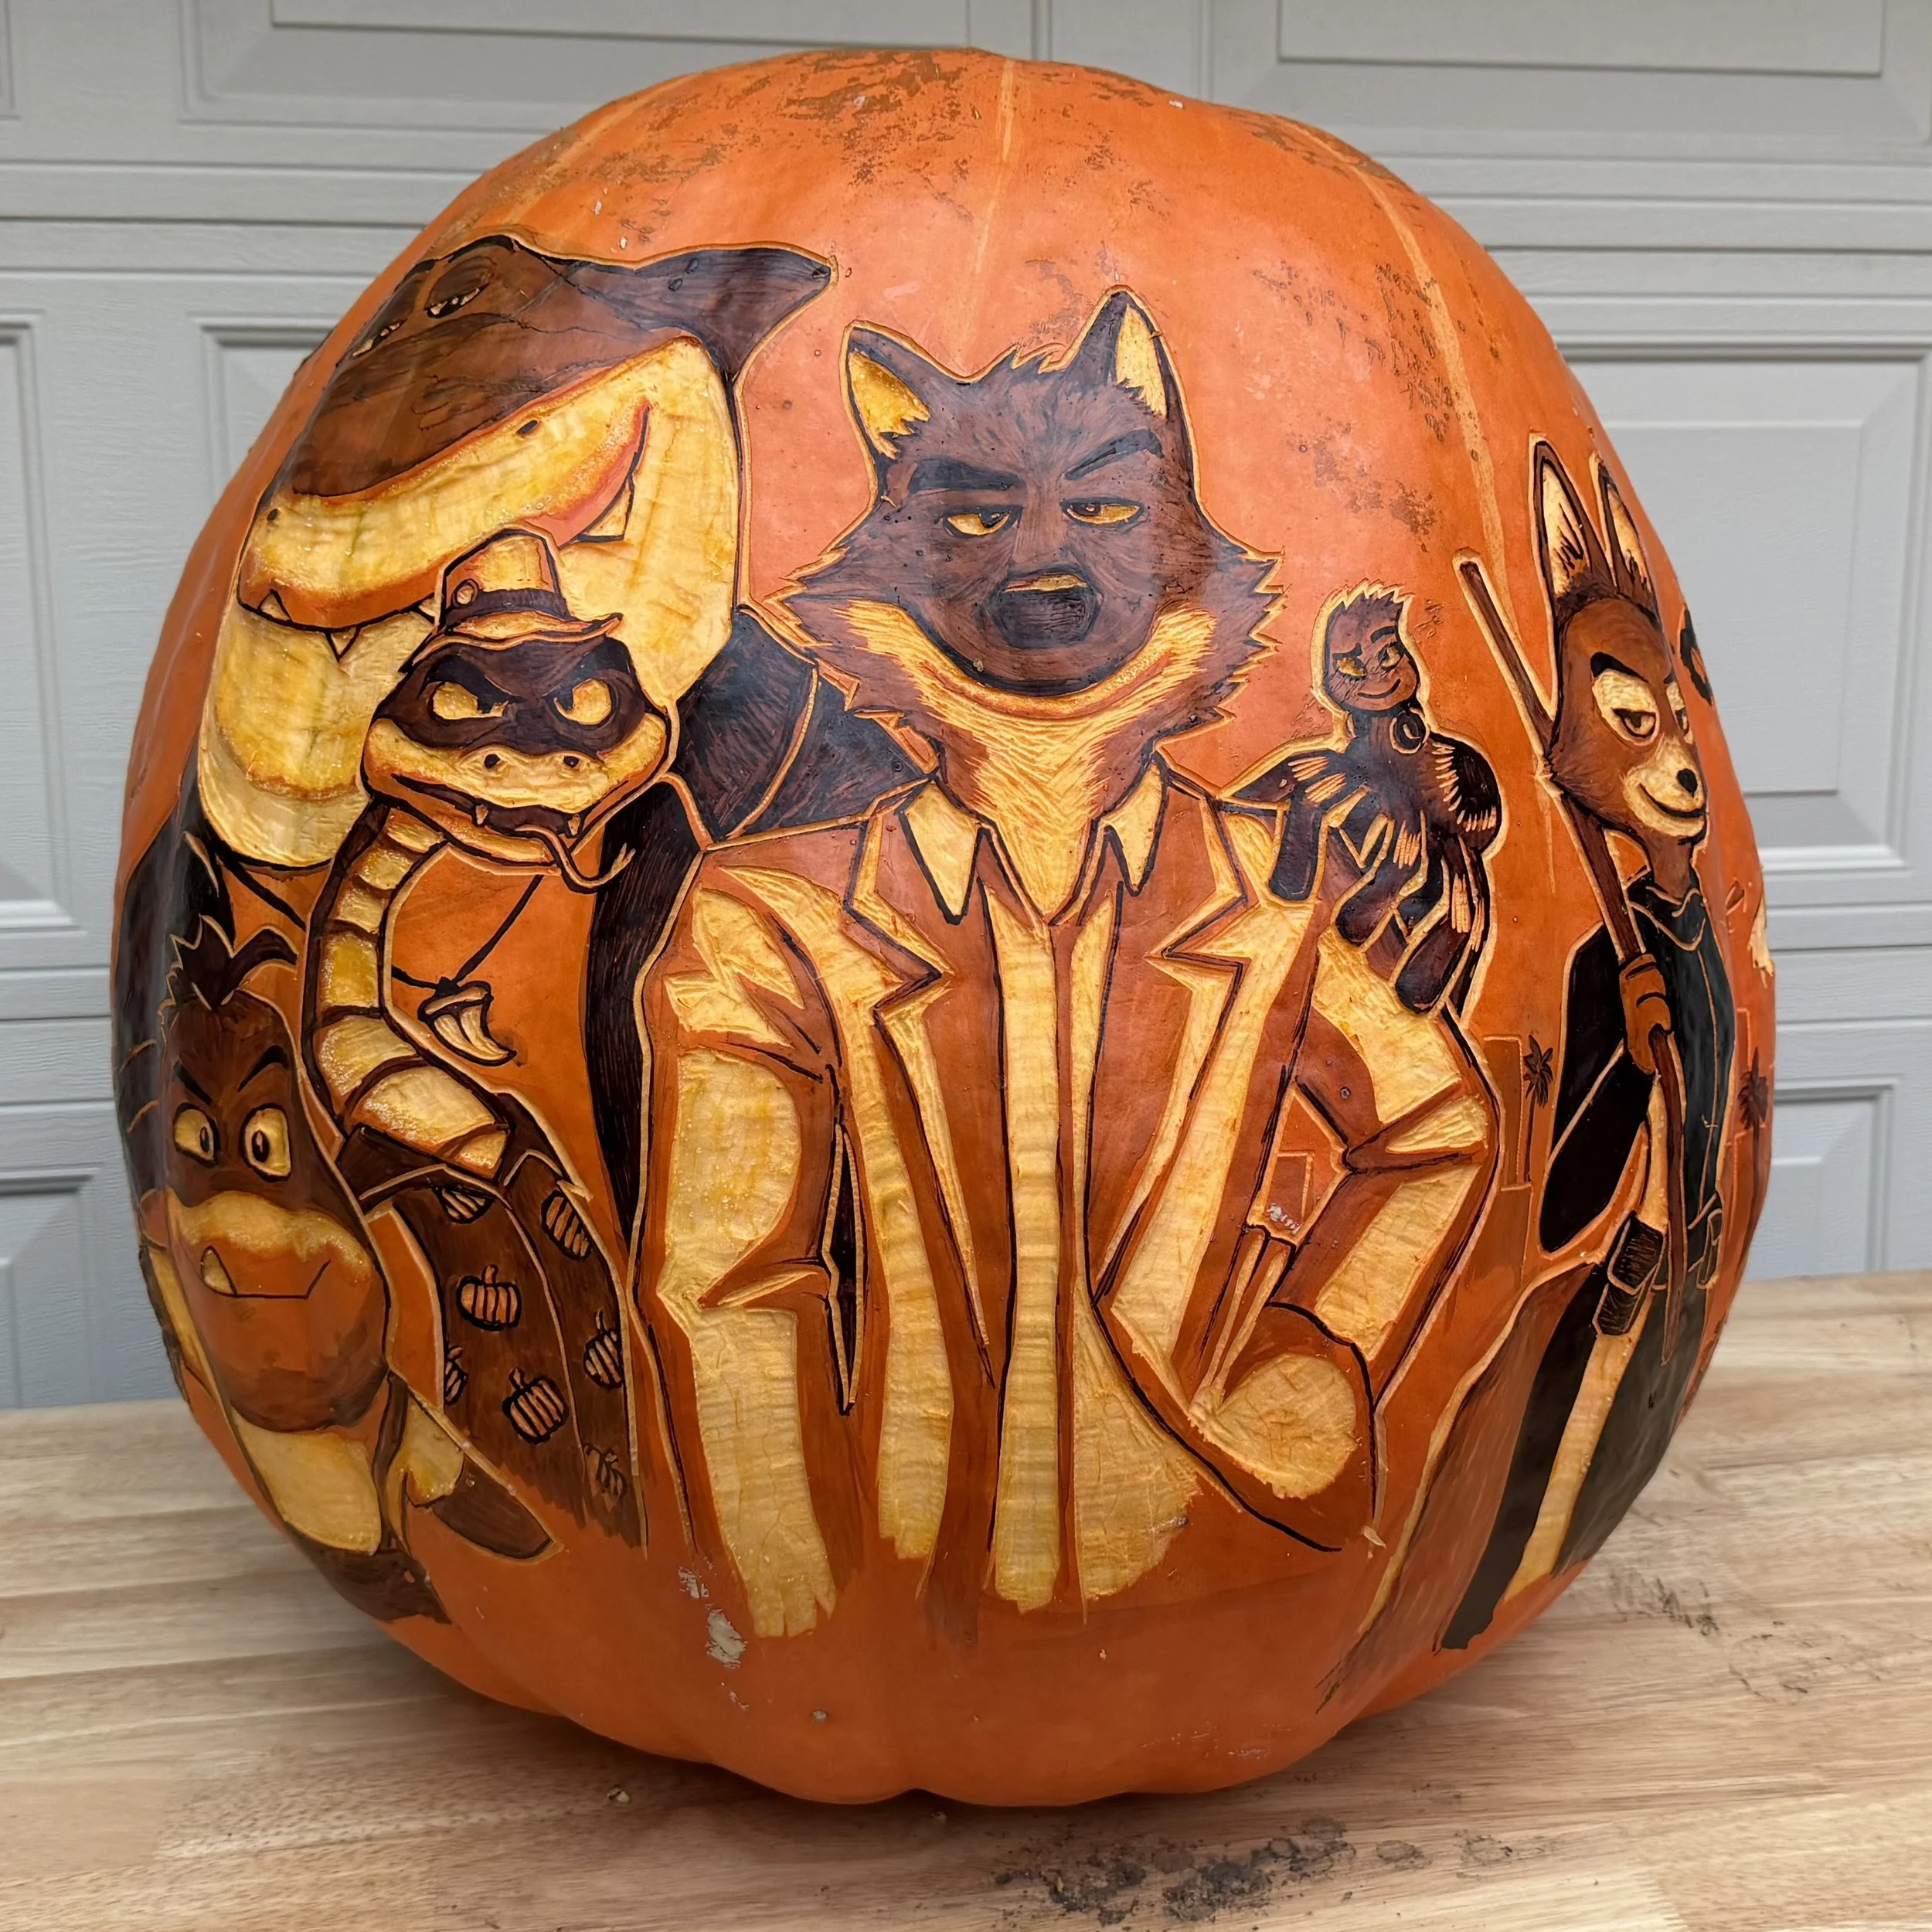
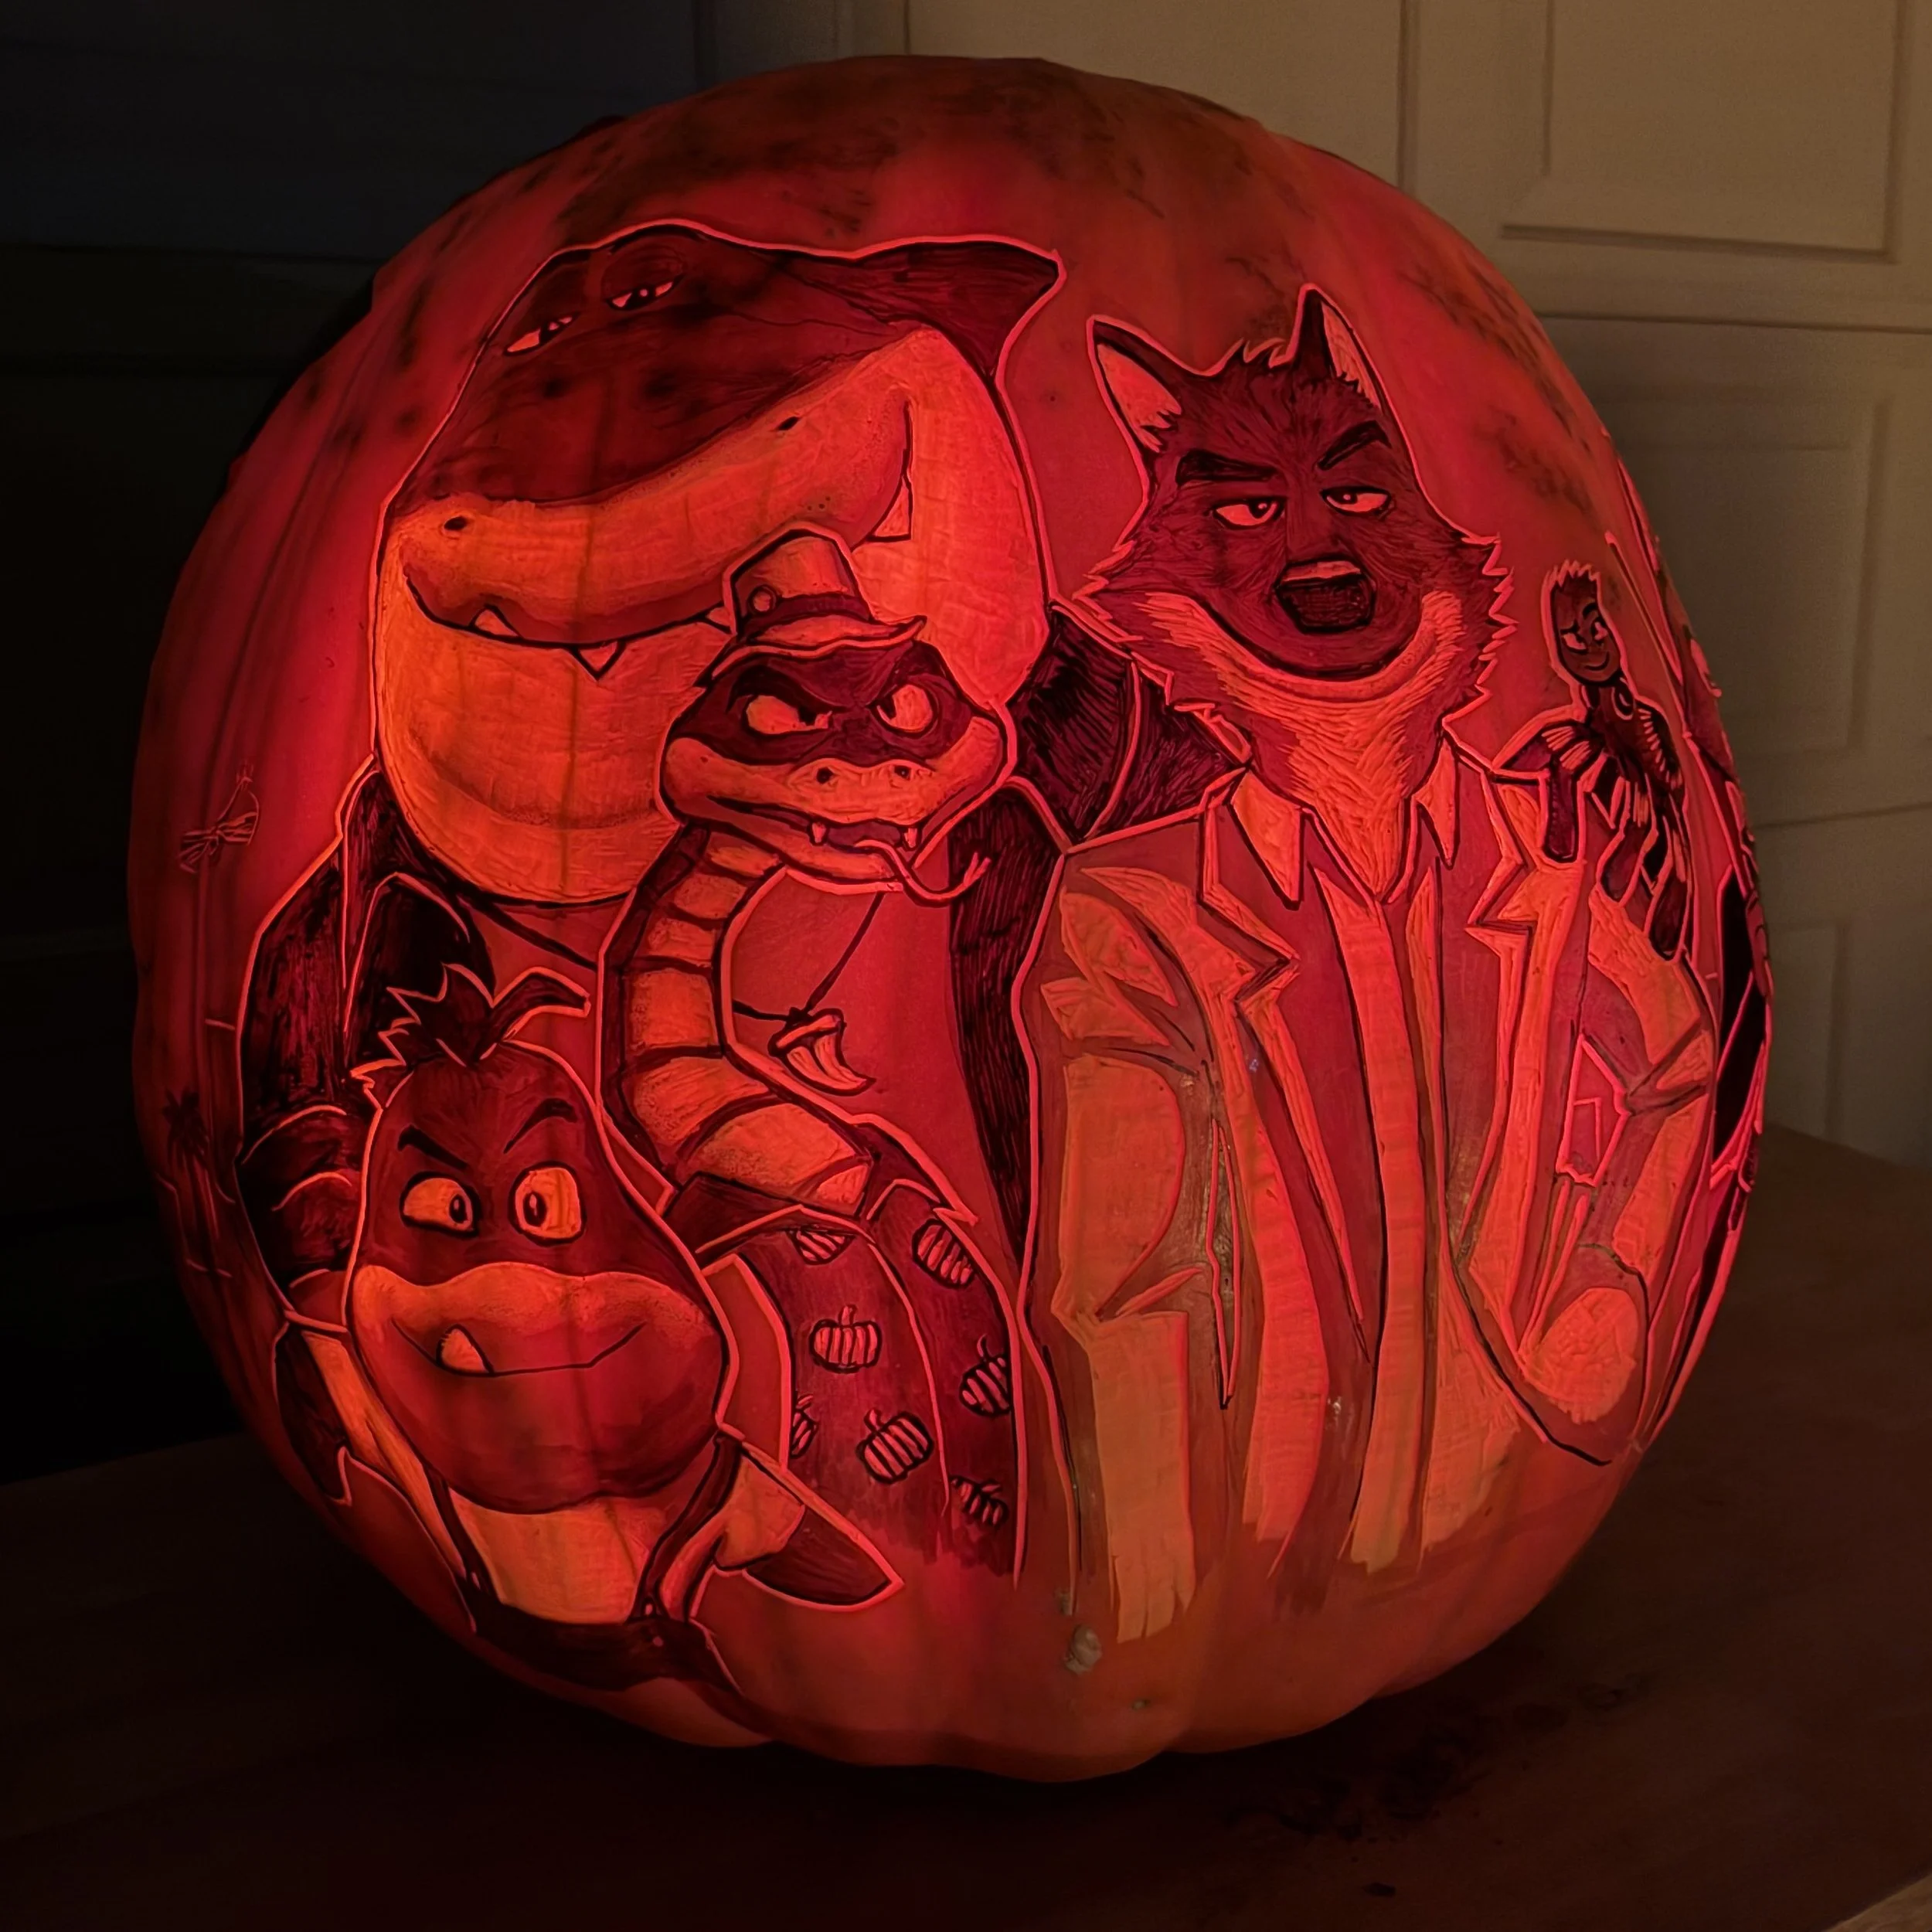
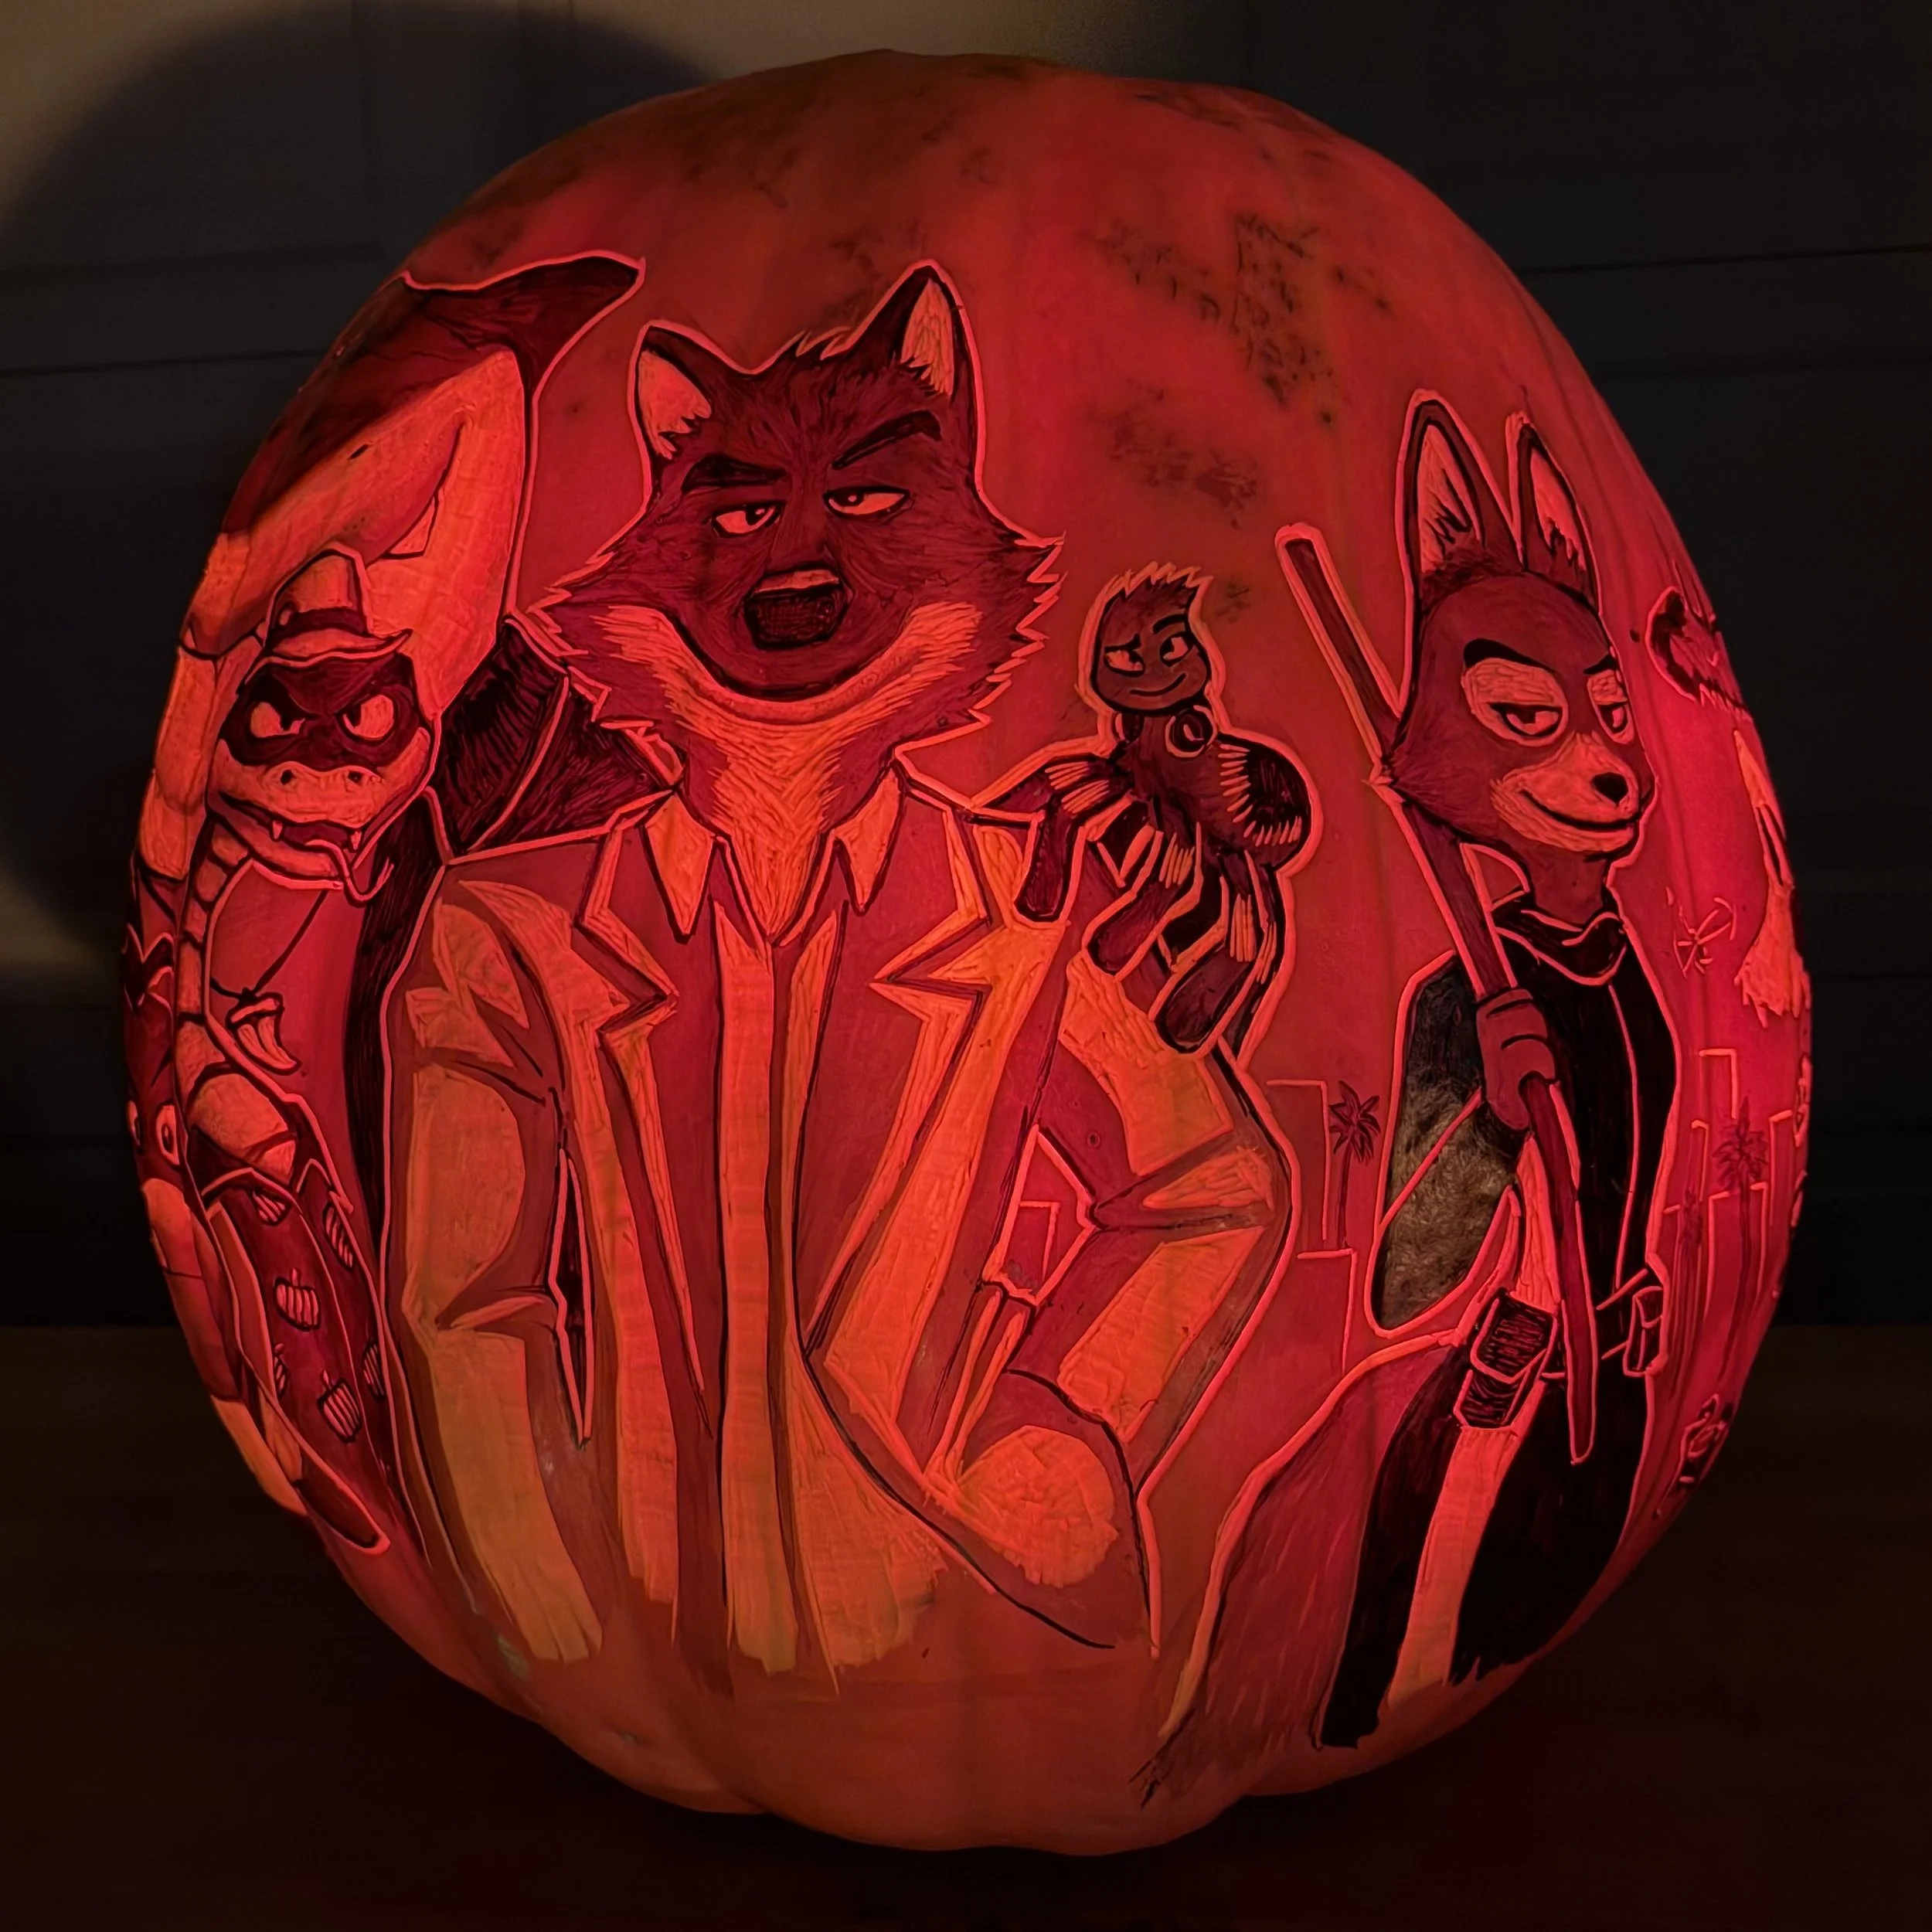
My son was really excited to be part of the process, and wanted to have a Bad Guys pumpkin, so that’s what we did. He also made some additions on the edge of the design which I carved out. I think he liked the idea of hiding spooky things on the pumpkin and wanted to join in on that. The gutting process on these pumpkins is no joke! They are SUPER thick, I’m honestly surprised that the light is able to shine through the uncarved pumpkin skin. Our workbench is on wheels, so we ended up just rolling it outside the garage on the 31st to display for trick or treaters.
And on November 1st, we chucked it onto the lawn to break it apart into small enough pieces to be disposed of.
That’s pumpkin carving for ya, folks!
If you want to learn more about the show and the process of creating these Jack-O-Lanterns, see my post All About Pumpkin Carving!